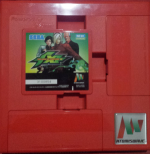
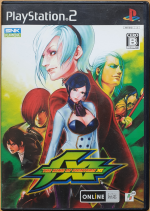
The King of Fighters XI
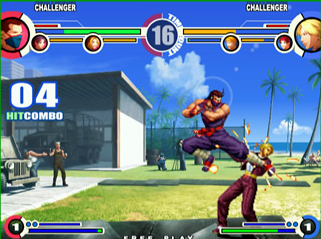
| The King of Fighters XI (ザ・キング・オブ・ファイターズXI) | |
| |
| Hersteller: | SNK Playmore |
| Systeme: | Atomiswave, Playstation 2 |
| Releases: | |
Versions
Arcade
- Atomiswave: the original version of the game that can be found in arcades.
- Naomi: unofficial conversions of the original Atomiswave version exist, which are bootlegs. They have slowdown, possibly input lag and minor graphical glitches & hacks (all characters unlocked, including bosses).
Hidden Content in the Arcade Version
The King of Fighters XI: Hidden Content in the Arcade Version
Playstation 2
Version differences between Arcade- and PS2-versions
The PS2 version is almost identical to the arcade version (including all bugs), except for the following:
- On PS2, all characters have 113 life, (they live with 0 health), on arcade 112 (they go K.O. on 0 health).
- On arcade, the game has noticeable slowdown when dream cancelling Gato's supers into his LDM, this is not the case on PS2.
Note: according to this Site, backdashing while back-turned does not work on wakeup. This was confirmed to be wrong on the Console version (it works), but needs confirmation on the arcade version still - as of 2023, japanese players confirmed it behaves differently on the arcade version.
Version differences between PS2-Versions
- The Japanese version has progressive scan (hold X + Triangle on boot)
- The first Japanese version has netplay. This was removed for the later revision (the budget version).
- The Japanese version has 4 more win quotes than the US/EU version. They can be triggered by holding R1(E) + square(A),cross(B),triangle(C) or circle(D). The regular 4 win quotes (hold A,B,C or D) & character specific in quotes appear to be mostly intact (needs more research).
- The character order select works differently. The Japanese version mimics the arcade version, where A-B-C (From top to bottom) was turned into Square-X-Triangle. The US version uses Triangle-Square-X, from top to bottom (the portraits mimic the PS2-pad buttons). The EU version uses yet another layout (needs to be added).
- The EU version has the character names of Tizoc (Griffon) & Mai Shiranui mixed up.
- (Unconfirmed) The US & EU versions have some slowdown on the Magaki stage compared to the Japanese version.
Practice Mode Guide
The King of Fighters XI: Playstation2 Practice Mode
Character unlock guide
Arcade / Atomiswave Character Unlock Guide
The time unlock characters are unlocked after X hours have passed. The game needs to be running for this, but there is no need for actual gameplay (it is enough if the game is running in demo mode).
- Adelheid: 720 hours
- Gai: 960 hours
- Jazu: 1200 hours
- Silber: 1200 hours
- Hayate: 1440 hours
Arranged Balancing
The PS2-version features an optional "consumer version" balance mode that can be activated in the Options Menu. This mode is not played competitively due to the drastic changes to the game systems and the fact that it does not match arcade balance.
Incomplete Changelist:
additional arranged mode info, in japanese
Playstation 3
- This is an emulated PS2 version.
- Like all other emulated PS2-games on PS3, there is some input lag (~2-3 Frames).
- Can be bought in the Japanese PSN-Store.
Tournament Rules
- The meaty unblockable bug (eg. Oswald 3A, Kula 236P) is banned
- Related to the above, inescapable grabs on incoming are banned (eg. Clark 41236,41236K Mary LDM)
- Meaty unblockables on incoming (eg. Ryo 632146D, silber 23236K) are banned. Note: those are allowed on enemy wakeup (since wakeup allows reversals, unlike incoming).
- Vanessa 623C juggle limit = 5 times in succession
- All character freeze & camera glitch bugs are banned (eg. with Hayate). Note that shifting Whip's 236236P 2nd to last hit against an airborne opponent is allowed if the combo is continued immediately.
- Time Unlock characters are allowed (Adelheid, Gai, Hayate, Jazu, Silber)
- Shion & Magaki are banned (only matters for console)
- Console characters are generally banned because they are very buggy & badly balanced across the board. There are occasional exceptions where console characters are allowed (fun tournaments).
Characters
Regular Characters
Time Unlock Characters
|
|
| |||||||||
|
|
Boss Characters
|
|
Console Only Characters
|
|
| |||||||||
|
| ||||||||||
|
|
Layout & Notation
Button Layout
Image Source: Conqueror's Guide
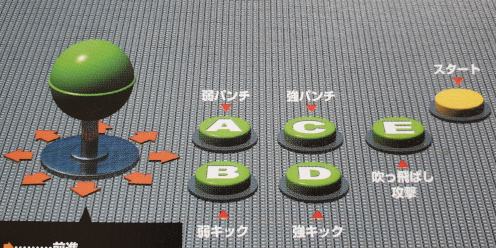
Block layout is used, with a new Extra Button for Blowback (this time not C+D but instead E)
A C E
B D
A = Light Punch
B = Light Kick
C = Hard Punch
D = Hard Kick
E = Blown Off
Numblock Notation
- This wiki uses numblock notation since it is used internationally and does not need a translation.
- As the name implies, look at your keyboard's numblock to figure out which number stands for which direction.
- 7 8 9
- 4 5 6
- 1 2 3
- For example, 236 is a quarter circle forward.
System (Input)
Attacks
- Input: direction + A,B,C,D,E
- Light attacks (A,B,2A,2B) generally have low damage and hit stun
- Hard attacks (C,D,2C,2D) generally have high damage and high hit stun
- Both standing light and hard attacks have 2 varieties each, close and far, that differ in animation and properties.
- Command normals (eg. 6A, 6B etc.) generally behave like hard attacks. They often have unique properties (eg. overhead).
- Often, command normals can be cancelled from other normal attacks (eg. C>6A). Command normals cancelled in this way often change their properties (eg. loses overhead, gains cancel).
- "Blown Off", the E-button (otherwise known as CD), causes a small launch on hit that can be comboed from on counter hit only. There is no crouching version of E, but a jumping version exists. All standing E attacks except Malin's can be cancelled into special moves.
Dash (ダッシュ)
- Input: 6,6
- Either holding 6 or 3 continues dashing. 3 is particularly interesting for characters with a [2],8 charge special move, since the 3 motion can be used to charge while dashing.
- Dashes have some startup and recovery, see The King of Fighters XI: Advanced System Mechanics for details.
Backdash (バックステップ)
- Input: 4,4
- Airborne on the 1st Frame and can therefore be used as a reversal - you will still get hit, but flip out of a potential combo.
- It is possible to input certain air special moves during a backdash (character specific).
Jumps
Image Source: Conqueror's Guide
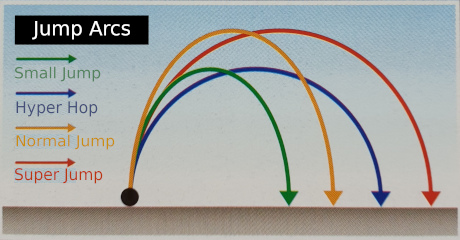
Normal Jump
- Input: 7/8/9
- The regular jump.
- All jump attacks can have different hitboxes depending on the jump type & direction (see character frame data).
for advanced information on jumps, see here
Super Jump
- Input: tap 1/2/3, then 7/8/9
- travels further than regular jump, but has the same duration.
Small Jump
- Input: tap 7/8/9
- For a small jump, tap the motion and let go within 4 Frames.
- Small jump attacks are automatically in counter hit state.
Hyper Hop
- Input:: 1/2/3, then tap 7/8/9
- For a hyper hop, input any down motion, then tap and let go of the up-motion within 4 Frames.
- Hyper Hops travel further than Small Jumps, but have the same duration.
- Hyper Hop attacks are automatically in counter hit state.
Throws
Front / Back Throw
- Input: 6/4 + C/D
- C = front, D = back throw.
Throw Breaks
- Input: C/D while being thrown
- Throw breaks require the same button than the throw that was used
- The window for Throw Breaks is 16F
- Simultaneous pressing of C+D does not work to break throws
- However, C~D or D~C works, so you can cover both throw types without having to commit to one.
- Note: if both players attempt to throw on the same frame, their C or D attacks will come out instead. This means that characters with a fast C/D have an advantage in these situations.
For information on advanced rules concerning throw breaks during rolls, see here
Rolls & Guard Cancels
Emergency Evasion Roll (緊急回避)
- Input: AB /4AB
- Fully Invulnerable to strikes except for 5F at the end (there are exceptions, see character pages)
- Can be thrown at any point
- Important: using 2B to punish front rolls does NOT work - this is a special rule also present in other old KOFs. Exception to the exception: Kyo's 2Bs hits (this is also the case in other older KOFs). 2Bs hit without problems against back rolls.
- Additional exceptions: Mary, Clark & Hotaru's 2A do not work to punish front rolls (likely also bugs).
For Roll Frame Data, see here
Recovery Roll (Ukemi)
- Input: AB / 6AB just before hitting the ground
- Used to recover quickly after being launched to avoid getting knocked down.
- AB is a back Ukemi roll that is the same as in other KOFs.
- Back Ukemi has complete invulnerability and 1F recovery that only allows guarding.
- 6AB is a front Ukemi roll that exists in no other KOF - it is unique to KOFXI.
- Front Ukemi has NO invulnerability. This roll has a hurtbox on the height of the legs. Using eg. a 2A when expecting a front ukemi attempt is an important strategy in KOFXI.
For detailed frame data & information about ukemi, see here
Guard Cancel Roll
- Input: AB / 4AB during guard
- Costs 1 Super Stock.
- Completely invulnerable, including throws (except for Vanessa & Duck, who can be thrown, bug).
- Has some recovery that can however be cancelled into guard (not into anything else!)
Roll Cancel
- Input: AB while a normal attack hits
- Costs 1 Shift Stock.
- Cancels the attack into a roll. Can be used to bait guard cancels or in some rare cases for combos.
Guard Cancel Attack
- Input: E while guarding: Guard Cancel Attack
- costs 1 Super Stock
- The guard cancel is invulnerable during startup & active time, but has recovery that can be punished on block.
- The time window to perform a guard cancel or guard cancel roll is very strict compared to other KOFs (only during hit stop!)
- After a Guard Cancel Attack, it is also possible to connect a "juggle anywhere" attack. This is most commonly performed with Kim: (opponent in corner) Guard Cancel > LDM.
Shift
The Skill Gauge (スキルゲージ)
- The Skill Gauge consists of 224 units (2x112)
- The bar fills solely based on time passed
- The gauge does not fill during supers (eg. while holding down Oswald's 2363214P)
- 0-1 fills over 8 seconds
- 1-2 fills over 16 seconds (half as fast than from 0-1)
- When a player's character is KOed, that player's Skill Gauge stops filling for a short moment
Regular Shift (シフト)
- Input: PP/KK
- PP shifts to the 2nd character (the one that is closest to the portrait of the currently active character)
- KK shifts to the 3rd character (the one that is farthest from the portrait of the currently active character)
- Regular shifts have a long startup phase before the character becomes invulnerable and jumps out(34-40F, character-specific, see "Advanced System Mechanics" for a list)
- The character that is shifting in has invulnerability while jumping in, but has 4F landing recovery, which can be punished. Note: Silber & Elisabeth have no invulnerability while jumping in.
Quick Shift (クイックシフト)
- Input: PP/KK while an attack hits
- Costs 1 Skill Gauge
- The active character immediately jumps out and the 2nd or 3rd character jumps in
- An air attack can be performed as the 2nd or 3rd character jumps in and falls
- 4F Landing recovery, 10F for Duck King, K' & Shion
- Landing recovery can be cut in several ways, see "Advanced System Mechanics"
- If not doing an air attack that connects, it is possible to land behind opponents depending on which character you shift in (character specific, see "Advanced System Mechanics" for a list).
- It is possible to crossup opponents in the corner when using Quick Shift (see "Advanced System Mechanics").
Saving Shift (セービングシフト)
- Input: PP/KK while grounded & getting hit or guarding
- Costs 2 Skill Gauges
- Immediately tags out the character getting hit (or guarding) and brings in the 2nd or 3rd character
- The character coming in does an automatic attack with a large, unblockable hitbox
- The attack deals a small amount of damage but cannot kill
- Despite the good hitbox, saving shifts have a hurtbox and can lose to counters & specific invulnerable moves
- If the attack hits on counter hit, a followup combo is possible, eg. K' 236236P or Gato jump D > runup > 236236B
- Saving Shifts only work if the character was getting hit standing, not while getting juggled. It is therefore important to immmediately launch a dizzied opponent if the opponent has access to saving shift.
- Additionally, Saving Shifts do not work against certain attacks, eg. after having been hit by a Super.
Supers
The Super Stock Gauge
- One bar of Super Gauge consists of 112 units / 144px
- If all of the player's characters are alive, the maximum stock number is 3
- Every KOed character in the player's team adds 1 more max super stock, up to a total of 5.
- Additionaly, whenever one of the player's characters is KOed, one super stock is instantly filled up.
- The bar fills when damage is done or received, or when a special move is used (regardless of whether it hits).
- Attacks blocked by the opponent only give 25% of their meter build value
- Attacks that hit the player or that the player blocks give exactly 1 unit of Meter per hit. This means that getting hit by multi-hit attacks generally gives way more meter than getting hit by single attacks, which should be kept in mind when constructing combos.
Super & Dream Cancel
- Costs 1 Shift Stock
- Certain Special Moves can be super cancelled. The same rule applies to certain Supers: some can be dream cancelled into the leader's LDM.
Taunts
- Taunts can be performed by pushing START (on arcade) or using the taunt button (console).
- Taunts give exactly 1/7th of a stock to your opponent (16/112 units).
System (Gauges & Match Flow)
Life Bar
- The Life Bar consists of 112 units.
- On Arcade, a character goes K.O. when on 0/112 life.
- On PS2, a character can have 0/112 life and will therefore need to have received a total of 113 damage to go K.O.
There are 3 HP-thresholds that trigger damage multipliers (= damage reduction) to come into effect:
- Between 100% (112HP) & 40% (44HP): 1.0x damage (normal damage)
- Between 39% (43HP) and 15% (16HP) : 0.75x damage
- Between 14% (15HP) and 0% (0HP): 0.5x Damage
Source: Conqueror's Guide
Leader
- The Leader has a green life bar
- Only a character designated as Leader has access to their Leader Super (LDM), which cost 2 Super Stocks
- The Leader generates 50% more Judgement Indicator with each hit they land.
Stun Gauge
Increase / Decrease
- The stun gauge consists of 112 units.
- The Stun Gauge decreases when the player is hit
- After having been stunned, the stun gauge cannot decrease again for ~6 seconds
- The Stun Gauge slowly increases over time if not getting hit
- The Stun Gauge can increase again even during combos, if there is enough time inbetween hits or if a hit deals 0 stun damage.
- Note: Using shift combos with 2 shifts against standing opponents almost always guarantees a stun combo. Deciding when to use shift stock to attack and when to better save if for a saving shift is therefore a vital aspect of KOFXI's gameplay.
Getting Stunned
- Once the Stun Gauge is empty, the character is stunned.
- A character that is stunned is immediately knocked down. Juggling the character further in this state is not possible.
- Once the character stands up, the stun starts, lasting 5 seconds (see here for detailed info)
- If a character was crouching before they were stunned, the next hit they receive will also make them crouch again. this is important to remember for some combos.
Escaping Stun
- Mashing buttons & moving the stick in any direction reduces the stun time by 4F for each input
- This only works once the character is standing (not lying on the ground or airborne)
Stun Values
- Characters have stun modifiers that increase or decrease the stun damage they receive (see here).
- Randomness is applied to stun damage, between +0 and -2 points compared to the value listed for each attack on the character pages.
- The randomness works the same way for longer combos (the -2 does not add up, the final result will vary between 3 values: +0, -1, -2).
- Generally, the randomness is not a big factor and stun combos are usually reliable.
Guard Gauge
- The Guard Gauge is a hidden gauge.
- The Guard Gauge consists of 112 units.
- The Guard Gauge decreases when attacks are blocked.
- The Guard Gauge slowly recovers while not blocking attacks.
- If a character is close to a guard crush, their HP-bar is flashing (it flashes quicker if very close to being guard crushed).
- Once the Guard Gauge reaches 0, a guard crush is caused.
- A guard crush leaves the opponent open for attacks for 35F (after hit stop).
- After a guard crush, the Guard Gauge is set to 112 again.
- Randomness is applied to guard damage, between +0 and -2 points compared to the value listed for each attack on the character pages.
Judgement Indicator (ジャッジメントインジケーター)

|

|

|
| 1P leads | Draw | 2P leads |
- The Judgement Indicator decides who wins if it comes to a time out.
- Contrary to other games, in KOFXI, the player with more health does NOT automatically win in the case of a time out.
- Hits that connect & KOs tilt the JI towards the player who performed them.
- The Leader generates 50% more Judgement with their hits. Note: contrary to old information, getting hit or losing your Leader does not decrease JI more than normal).
- If a draw occurs, the player who still has their leader wins. If both players do or do not have a leader, a draw occurs and both lose.
- Note: since KOs tilt the JI a lot, it is important to save characters on low health as much as possible. This also has the added benefit of still having characters left for shift combos and saving shifts.
- For in-depth information about the Judgement Indicator, please see here.
KO (DOWN!)
Next Character
- If a KO occurs, the next character in order jumps in (the character closest to the portrait of the character which was KOed)
- The direction the character is coming in from is always from behind the "corpse" on screen. Example: player corpse left, opponent stands right: next character comes in from the left.
Down! Okizeme
- The "corpse" can be rolled through or walked over, which changes the direction the next character will come in from and can be used to make blocking correctly much harder.
- While a character comes in, they have no collision until they land, so it is possible to walk or jump through them while they fall to cross them up.
- In the corner, there is a small gap behind the character that comes in, which allows corner crossups against them.
Down! Landing Recovery
- Characters that come in after a KO have 1F landing recovery. They cannot do anything other than to block on the first frame of landing (see also here).
- Interestingly, the 1F where only blocking is allowed is completely invulnerable. This means that attacks only connect on the next frame, and therefore reversals CAN be used, provided that you blocked for 1F. A practical application of this is to simply hold back and input a reversal throw as you land, which will be a true 1F throw that can even beat meaty attacks. Another application is to input a reversal ending with a block motion as you land, eg with K' 236236,4+B to get a reversal heaven's drive.
- Certain characters do not suffer from the 1F landing recovery and can act immediately (which is likely unintended): Kula, Ryo, Jenet and Hayate.
- Certain attacks become unblockable when done meaty in KOFXI, which can be abused on incoming - this is banned in all tournaments and frowned upon in casuals. Incomplete list taken from this source: Oswald 3A, Ash 5D(f), Griffon 5D(c), Kula 236P, Vanessa Puncher Upper (2nd Hit), Shen & Momoko 2D, Mary LDM, Clark 41236,41236K, Geese 5D(f), Tung 5D(f), Mr. Big 5C(f) 2nd hit, Robert 5E & j.E.
Advanced System Mechanics
The King of Fighters XI: Advanced System Mechanics
The King of Fighters XI: Collision & Hurtboxes
Tier Lists
The King of Fighters XI: Tier Lists
Links & Sources
Tourneys & Results
KOFXI Sawakoro Festival 2024
KOFXI Sawakoro Festival 2023
KOFXI Sawakoro Festival 2022
KOFXI Tougeki 2006
Places to play KOFXI at
A list by kofxi_bot, slightly outdated
World List of KOFXI Players
Worldwide List of KOFXI Players
Matchvideos
The King of Fighters XI: Matchvideos
Sources
KOFXI_bot @ Twitter
Hartheon, japanese KOFXI infopage
japanese infopage for system frame data
Credits
- KOFXI Producer / debugging: Woo / ウー
- Coordinator / debugging: C6B, currently lives in Nagoya according to Rock.
Trivia / Secrets
- Random select: up/down+start
- Random Team select: right/left+start
- Holding E (Arcade) / R1 (ps2) while selecting a character during order select will reveal that character's position to your opponent.
- According to Rock, the game is based on Samurai Shodown 6. What this actually means is unclear (common code base etc.).
