The King of Fighters XI: Advanced System Mechanics
System (advanced)
Note by ATG: part of this article is based on the japanese Hartheon-website and this Wiki, the rest is individual research by Rock, arit & me.
Damage
Random Damage
Note: random damage needs more research!
- There is randomized damage in KOFXI. More info soon.
Regular vs. Cancel Damage
- Supers can have different damage when done raw vs. as a Super- or Dream Cancel (ex. Ralf: 236236E deals 65 raw, 45 as a DC)
Counter Damage
- Counter Hits deal extra damage, usually 30%, but there are exceptions (ex. Ralf: 236236E instant K.O.s on counter hit!)
Combo Damage
- Combo damage is reduced starting with the 3rd hit
Formula to calculate combo damage reduction:
{100-(25+(hit number/2)x5} = hit damage %
- This means that if you eg. do a 3-hit combo, the 3rd hit will only do 67.5% damage.
Unscaled Damage
Certain attacks ignore damage scaling rules, meaning either the combo hit or low-hp damage reduction. Examples: Griffon air throw.
Input Engine & Buffer
Inputs in KOFXI
KOFXI is the first KOF with a "modern" input engine.
This means that the input buffer is much larger and inputs are generally easier and more lenient than in older KOFs. Additionally, the "KOF 4 Frames" of the older games have finally been removed (eg. in KOF98, 4 Frames after a Button press, it was still possible to give a directional input to change eg. a standing to a crouching normal or a throw, which is very annoying - good riddance).
Examples of Shortcuts
- 2363214X-Super can also be done with 236236,4X or 23634X or 236,214X. The same works for 2141236X-Supers.
- With Oswald 63214, 6[6](run),3214P executes a running Super. Works with all characters that have a "63214,63214X" Super.
- (note: needs doublecheck) With K' 661236P executes an ain trigger right after starting to run instead of getting an accidental 623P - the "1"-input prevents the SRK from coming out. Alternatively, "41236" after a run also works.
- With K' 236321[4],E triggers the LDM after a short backwalk.
- With K', dash, 41236P will trigger a dashing Ain Trigger (Hadoken) instead of a Crow Bites (Shoryuken).
- With Ash or Duolon hold A+B+C, 6~D: triggers the activation LDM without the need for the fancy raging demon input. Also works for shen by holding A+B+C, let go of C, then press it again.
- Simultaneous button presses prevent special moves from coming out, which is useful for pre-buffering motions. Example with Iori: 236C+D,3214C triggers 5C(c) into super. Source: ゲームの日記
Data for specific Buffer Lengths
- Simultaneous button presses can be off 1F. Example: A successful Shift triggers even when C is pressed 1F after A.
- Exception to the above rule: attempting to buffer a simultaneous button press after anything, eg. A+B roll linked after a 5C, needs frame perfect timing and cannot be 1F off. This frequently affects rolling right after dash startup or after guarding.
- Quick Shifts can be entered up to 6F before the actual hit connects (see below, 6F button buffer).
- Total time to enter a Quick Shift for weak attacks: 9F (tested with Kasumi 5B(f)).
- Total time to enter a Quick Shift for strong attacks: 16F (tested with Oswald 214C(2)+5E and Kasumi 5D(c)).
- There are likely exceptions for specific attacks.
- The buffer for all kinds of regular attacks is 6F. Example: with Gato, there is a 6F window to input 2D after 6A (which is a 1F-Link).
Air Hit Stun & Juggles
- Attacks that either put the opponent into the air (= launchers) or attacks that hit them in the air can have added air hit stun.
- This hit stun can have 4 states:
Full Juggle
This property frequently happens at the beginning of a launch and is the best kind of juggle property - every hit that can hit airborne opponents (not grabs etc.) should theoretically connect.
Many attacks have this property in their early hit stun frames, but only briefly, after which they are replaced by limited juggle frames.
Limited Juggle
The majority of special moves have this state. During limited juggle state, a wide range of attacks can connect, eg. normal attacks and many special moves, but generally no "launcher" type attacks (eg. Kula 214B-6D, Vanessa [4],6P etc.)
This state is likely used to prevent infinites but still allow combos.
No Juggle / Juggle Anywhere
Many launching attacks do not allow follow ups at all, or lose their full / limited juggle after a certain amount of frames.
In this case, only attacks marked as "juggle anywhere" can connect against opponents in this state (eg. K' 2363214E, Oswald [4],646E, Vanessa 214K-6C)
Absolutely no Juggle
This is a rare state where not even juggle anywhere attacks connect. The most prominent examples are 5E & j.E on non-counter hit, which don't even allow juggle anywhere attacks as a followup.
Counter Hits
Counter Hits have various unique properties that make them behave differently from normal hits.
Counter Hit Extra Damage
Counter Hits deal extra damage, usually 30%, but there are exceptions (ex. Ralf: 236236E instant K.O.s on counter hit!)
Counter Hit Special Properties
Counter hits sometimes have special properties (eg. K' 6A wall bounces) or added hit stun (see further below)
Counter Hit State
Counter Hits occur during the Startup & Active time of...
- Command Normals
- Special Moves
- Supers
- Attacks from Small Jumps & Hyper Hops
Counter Hit Air Hit Stun
Counter hits against airborne opponents have added hitstun. This enables combos from anti-air normal attacks, but also from 5E, j.E and many special moves.
- Normal attacks (both standing and jumping) have 14F full juggle.
- 5E/j.E has 8F full juggle + 20F limited juggle (note: the "counter hit" option is buggy in practice mode, it only adds 8F + 12F).
- Special Moves: TODO
Crouch / Stand Rules
Crouch Hits
Source: Hartheon & testing by ATG
- If a character is hit during the startup of a crouching attack, they immediately stand up.
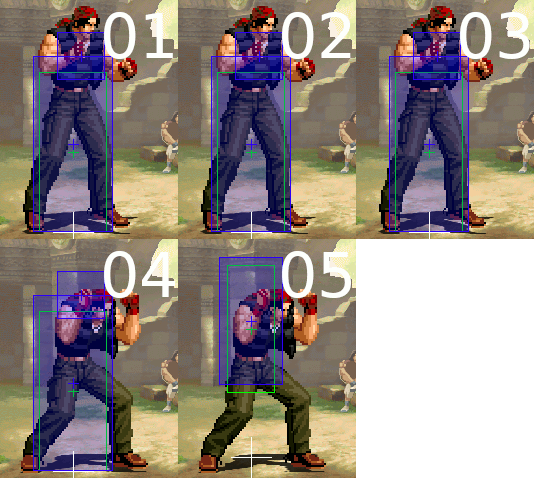
- If a character is hit while crouching, it takes an additional frame for them to stand up. They can walk & jump 1F later than normal. However, this does NOT affect attacks or blocking - all attacks, both crouching and standing, come out normally.
- If a character is hit while crouching, attempting to use a reversal roll after will make 5A come out. This has to do with the phenomenon described above.
Crouch / Stand during stun
If a character was crouching when they got stunned, they will still be crouching after stun, even though the "stun" animation looks like they are standing. This even happens if the character was juggled during the combo that stunned them. It is important to keep this in mind with eg. Ryo (who has an LDM that stuns), because his 646P tends to whiff on crouchers.
Crouch / Stand during block hit stop:
Block switching is not possible while the block hit stop is occurring. This is usually never a problem, except with Quick Shifts. Certain attacks have so much block hit stop that you can land an unblockable jump attack, or in the case of Jenet, an unblockable low with her 2B (4F startup, the fastest low in the game).
List of attacks that enable QS unblockables on block, source kofxi_bot:
- Kyo 236236P
- Shingo 236236P
- Shingo 2141236P (last hit)
- Ryo 632146B
- Ryo LDM
- Elisabeth 2363214P (cancel version)
- Gato 236C>66C
- Gato 236236P
- Griffon 236236K (3rd hit)
- Malin 236236K > dream cancel LDM (since LDM is overhead, need to switch block before the DC)
Corner Crossups
- While in the corner, if a character rises from a back-turned knockdown (eg. after Kyo's throw), they can be crossed up by jump attacks even though they are cornered. This can lead to 50/50 left right Okizeme - if the jump attack is delayed, it does not hit as a crossup, but instead hits from the front. The best way to defend against this is to either reversal and hope for an auto-correct (character specific), block, roll out of the corner or attempt to wakeup backdash (to take the hit airborne).
"Guard Only" Frames & Forced Actions (強制硬直)
Source: Hartheon
Normals, Command Normals, Specials, Supers, regular Rolls, Guard Cancel Rolls and the landing recovery during incoming allow blocking on their last recovery frame. This is important to know when calculating advantage & disadvantage frames. What this means is that if an attack is listed as having -4 on block, the character can actually block 1F earlier than they can act, so trying to punish the attack requires a 3F-attack.
Note: there are some other attacks that allow only specific actions on specific frames, like Vanessa's LDM (she can guard during the super freeze, as the move effectively has no duration), or when getting hit by Silber's 63214P (your character is frozen, but you can special cancel out of this).
Guard Only Frame During Incoming
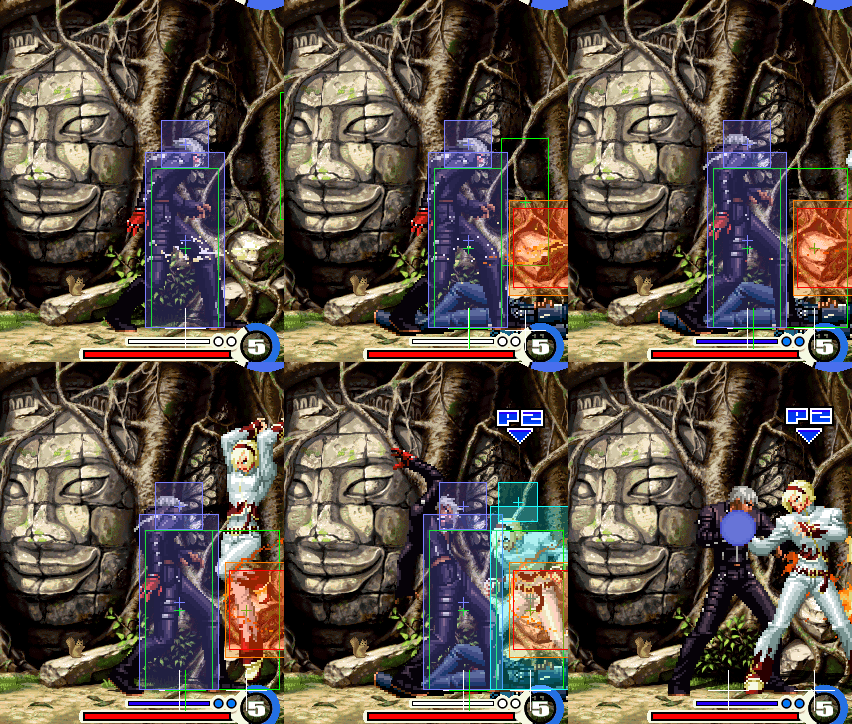
Attacks will not connect on the first frame of landing from a DOWN! if and only if the player that lands is guarding. In that case the 2nd frame after landing is when attacks can connect again. What this effectively means is that if you guard as you land from a down, you are invulnerable on that frame and can act fully on the next frame.
Example: You land from a DOWN! and guard. K' tries to use 2D against you as you land. You simply hold "4" and input D as you land. On the first landing frame, your guard animation will trigger, which is now invulnerable, and on the next frame, you will actually throw K' out of his attack.
Jumps (advanced)
Jump Duration
- Jump duration is the same for a jump type, regardless if the character jumps up, forwards or backwards.
- Jump duration between small jumps and hyper hops is the same.
- Jump duration between normal jumps and super jumps is the same.
Jump & Superjump Duration Tiers
Note: the air time was measured excluding jump startup and landing recovery.
- 35F: Kyo, Ash, Ryo, K', Gato, Clark, Robert, EX Kyo, Geese
- 36F: Shen, Duck, Mary, Kula, Whip, Eiji, Gai, Silber
- 37F: Iori, Kim, Elisabeth, Griffon, Ralf, Mr. Big
- 38F: Shingo, Terry, Vanessa, Yuri, King, Duolon, Kasumi, Momoko, Shion, Hotaru
- 39F: Oswald, Ramon, Benimaru, Malin, Magaki, Mai
- 40F: Maxima, Adelheid
- 42F: Jenet, Kensou, Tung
- 45F: Athena
- 46F: Hayate, Jazu
Smalljump & Hyperhop Duration Tiers
Note: the air time was measured excluding jump startup and landing recovery.
- 24F: Kyo, Ash, Mary, Ryo, K', Kula, Gato, Clark, Robert, EX Kyo, Geese
- 25F: Iori, Shen, Kim, Duck, Elisabeth, Griffon, Ralf, Whip, Eiji, Gai, Silber, Mr. Big
- 26F: Shingo, Oswald, Terry, Vanessa, Ramon, Yuri, King, Duolon, Kasumi, Momoko, Shion, Magaki, Hotaru, Mai
- 27F: Benimaru, Maxima, Malin, Adelheid
- 28F: Jenet, Kensou, Tung
- 31F: Athena
- 32F: Hayate, Jazu
Jump Startup
- 4F Startup (airborne F5)
- Jump startup is invulnerable to throws
- All 4F of Jump startup can be cancelled into (standing) special moves before the jump comes out
2F-Jump
- Executing an attack after a jump as early as possible reduces jump startup to 1F, which makes the character airborne on F2.
- This trick is essential to escape specific blockstrings that would otherwise not allow jumping out.
- Note: the button can also be pressed 1-3 frames later to reduce the jump startup not to 1F, but to 2F or 3F, which is particularly useful when doing very early smalljump attacks (because 1F smalljump is very hard to do).
Attacks during Small Jump / Normal Jump
- While standing, Doing an attack at the same time as an up motion will always trigger a normal jump attack, even if a small jump was put in. To prevent this from occurring, the attack has to be slightly delayed for the small jump to register. The alternative is to let go of the up motion after 1F, which is very hard to pull off with a stick.
Special Hyper Hop rules
- Hyperhop is blocked while walking backwards. [4],1,9 leads to a regular Small Jump. To execute a hyper hop after walking backwards, it is necessary to go into neutral position: [4],5,1,9.
Jump Landing Recovery
- Jump recovery is always 1 Frame, regardless of whether an attack was performed in air or not.
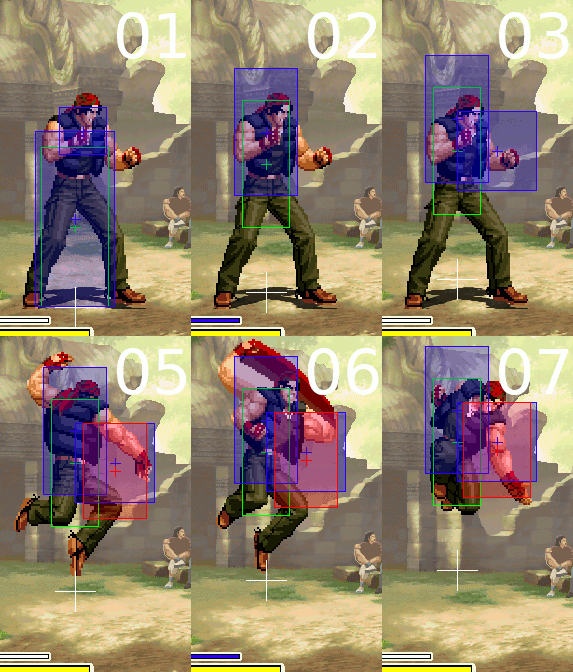
- It is possible to hit opponents in the 1F recovery. Punishing jumps this way is much easier with attacks that have a low hitbox & long active time, since if done early, the opponent will fall into the active hitbox and get hit standing, whereas standing attacks that usually have large vertical hitboxes need 1F-timing to avoid an early air hit.
Quick Shift Landing Recovery
- Quick Shifts have 4F Landing Recovery
- Recovery is cut to 1F if using a normal attack after
- Recovery is cut to 0F if using a Special Move / Command Normal after
- Recovery is cut to 1F if whiffing or hitting with an air normal (note: recovery cannot be cut further to 0F in this case with Special Moves or Command Normals! It will stay at 1F)
- Duck King, K', Shion have different landing recovery than all other characters.
- 10F Landing Recovery
- 9F if attacking after
- 9F if using a Special Move / Command Normal after
- 1F if whiffing or hitting with an air normal after (the same as regular characters)
Because of the added landing recovery for these 3 characters, it is advised to always use an air attack (either hit or whiff).
Saving Shift
- Saving shifts have 1F more landing recovery on whiff than on hit.
- Several characters have less landing recovery after a saving shift.
- 4F/5F: Ryo, Maxima, Gato, Clark, Silber, Magaki, EX Kyo
- 5F/6F: Elisabeth
- 9F/10F: all other characters
Shift Startup
Characters have individual startup for their regular shift (the animation before they jump out).
- 40F: Kyo, Ash (Geese)
- 39F: Shen, Momoko (Hotaru, Robert, Tung, EX Kyo, Mr. Big)
- 38F: Shingo, Maxima
- 37F: Terry, Kim, Yuri, Elisabeth, Kula, Gato
- 36F: Oswald, Duck, Vanessa, Mary, Ramon, Benimaru, Malin, Kasumi, Jazu (Magaki, Mai)
- 35F: Iori, Ryo, Clark, Whip, Kensou, Gai (Shion)
- 34F: King, Duolon, K', Jenet, Griffon, Ralf, Eiji, Athena, Adelheid, Hayate, Silber
Quick Shift Crossups
The following characters can land behind the opponent when performing a Quick Shift and not attacking:
- Oswald, Elisabeth, Kim, Ryo, King, Jenet, Gato, Griffon, Ralf, Clark, Whip*, Mary, Eiji, K', Maxima, Kula, Shingo, Hayate, Jazu, Silber, Adelheid. *=Whip only for corner crossups, see below (Source, "QSからの裏落ち")
Using a Quick Shift on a cornered opponent can cause some issues for these characters. Upon landing, the inputs can end up reversed and you will get unwanted special moves. This is because the character is briefly considered to be cornered when landing from the Quick Shift. The best way to avoid wrong inputs in these situations is to whiff an air normal before landing. It is also possible to either input your motions at the last moment (right after landing), or to intentionally use weird motions that cover this issue (an example is to quick shift to geese and input 63124,63214E while falling to get a deadly rave - the regular motion will not work!).
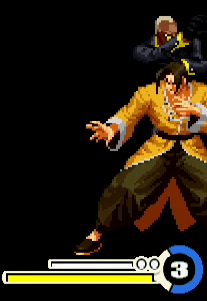
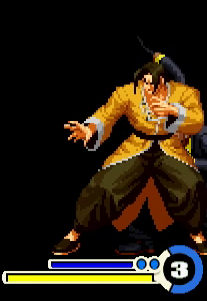
For the characters listed above, it is possible to land behind a cornered opponent, right in the corner, with a Quick Shift. The way to do this is to input an attack 2 frames before landing, on F25 of the Quick Shift (see the images below).
Sidenote: jumping attacks done close to the ground will first trigger the jumping attack, then the ground attack, both with just one button press!
|
|
|
| j.B 2F before landing | Landing behind the opponent | 2B behind the opponent |
Safe Jumps / Option Selects
Like in other fighting games (and particularly like in other KOFs) it is possible to buffer a special move, throw or attack during a jump-in, in case the jump-in does not connect due to a reversal. If the opponent does not perform a reversal, the jump attack will connect normally and the extra input for whatever special move or attack was supposed to come out in the case of a reversal will simply not be performed due to the hit stop of the air attack. This option select is particularly good if a throw is put in after a jump attack, to beat wakeup rolls from opponents. An example input with Oswald is: J.C, immediately 4D: in case the opponent rolled, the 4D will trigger a throw.
Super Freeze Input Buffer
Buffering Inputs during Freeze
It is possible to buffer inputs during super freezes. This is the preferred way to punish supers that are otherwise hard or impossible to punish on block. Example with Oswald vs Gato: 421D during Gato's 236236A super freeze to immediately counter after the super.
Super Freeze Input Buffer for Rolls
The input buffer for rolls during super freezes is a special case. Depending on the character's state (neutral, crouching, walking) during the freeze, the roll buffer changes.
- Neutral: it is possible to buffer a roll with AB, but NOT with 4AB or 6AB, even though 6AB is the same as AB. 4AB can be used only with reversal timing after the freeze.
- if "6" or "66" was held: buffering AB & 6AB is possible. Attempting to use 4AB during the freeze will trigger a 5A to come out (because back rolls need the 4-input to be held an additional frame before). 4AB only works with reversal timing after the freeze, 1F later..
- if crouching or "4" was held: attempting to buffer a roll during super freeze while crouched or while holding back will trigger a 5A to come out. All rolls in this case only work with reversal timing after the freeze.
Note: see further above on dash recovery behavior & rolls.
Other Data
Judgement Indicator (detailed)
- JI starts at 0
- JI can go up to 90 points into either direction (tracked internally from 90 for 1P to -90 for 2P).
- Whenever an attack hits, JI always moves at increments of 2 or 8 for non-Leaders; and 3 or 12, for Leaders. The only exception is a KO, which moves the indicator by 32 + the value of the attack that caused the KO.
- JI gain from heavy attacks (8/12) is affected by damage reduction and will be reduced to 2/3 respectively.
- Judgement gain from light attacks is unaffected by damage reduction.
- The following table shows how much JI points are added for an action:
| Action | Gain (NL) | Gain (L) | Note |
|---|---|---|---|
| KO | 32 | 32 | The same for Non-Leader & Leader. |
| Light Attacks (ground) | 2 | 3 | |
| Light Attacks (air) | 2 | 3 | |
| Heavy Attacks (ground) | 8 | 12 | There are exceptions where some heavy attacks only give 2, eg. Shingo & Oswald's 5Cs & 5Ds. |
| Heavy Attacks (air) | 8 | 12 | There are exceptions where some jump heavy attacks randomly give 2/3 or 8/12, eg. Kyo's jump attacks. This appears to be very common with smalljump attacks. |
| Command Normals | 2/8 | 3/12 | Whether the light or heavy attack data is used is character specific, but is often tied to Cancel/No Cancel version. |
| Throws | 8 | 12 | |
| Guard Cancel Attack | 2 | 3 | |
| Saving Shift | 0 | 0 | |
| Special Moves | 2/8*N | 3/12*N | Always multiples of the light / heavy attack values, character specific. |
| LDMs | - | 3/12*N | Always multiples of the light / heavy attack values, character specific. |
Knockdown Properties
Height of crouching Characters
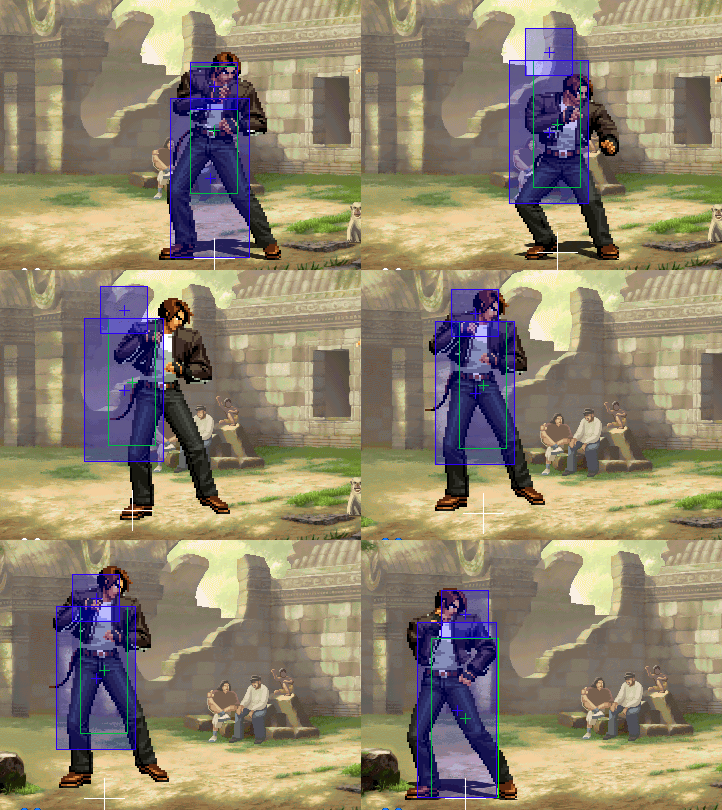
See: The King of Fighters XI: Crouched character hitbox sizes
Individual Character Health
Note from ATG: internally, every character has 112 Health. The "received damage multiplier" is applied to attacks to determine how much damage an opponent takes. Damage values in the wiki will always be against Kyo, since he has a 1.0 modifier.
Received Damage Multiplier
Source: Conqueror's Guide & some math
Use this multiplier on the damage values in the wiki to figure out how much damage each character receives from a hit. Round down or up, depending on whether the final number is below 1.5 or 1.5/higher.
0.95: Maxima
0.96: Griffon, Gai
0.97: Terry, Ryo, Ralf, Clark, Silber
1.0: Kyo, Iori, Shingo, Ash, Oswald, Shen, Kim, K', Gato
1.02: Vanessa, Elisabeth, Jenet, Eiji, Kensou
1.03: Mary, Benimaru
1.04: Duck King, Ramon, Duo Lon
1.05: Yuri, King, Kula, Whip, Malin, Kasumi, Athena, Momoko
1.08: Jazu
1.10: Hayate
1.11: Adelheid
Stun
Stun Multiplier
Source: Conqueror's Guide & some math
Use this multiplier on the stun values in the wiki to figure out how much stun each character receives from a hit. Always round down.
0.95: Gai
0.96: Silber
0.97: Maxima, Kasumi, Kensou, Momoko
0.98: Elisabeth, Jenet, Ralf, Eiji
0.99: Ramon
1.0: Kyo, Iori, Shingo, Ash, Kula, Shen, Terry, Kim, K', Gato, Griffon
1.02: Oswald, Vanessa, Mary, King, Duo Lon, Whip
1.03: Clark, Duck, Ryo, Yuri, Malin, Athena
1.05: Benimaru
1.25: Adelheid
1.30: Hayate, Jazu
Universal Frame Data
Note: The following values have been determined by Rock & ATG. Additional Source: ゲームの日記
Hit Stun
Source: ゲームの日記. Might be off 1F on air block stun, needs to be rechecked.
- Hit Stun from light attacks: 12F hit, 11F Guard
- Hit Stun from hard attacks: 20F hit, 19F Guard
- Special Moves combo from light attacks as long as they have 12F or less startup
- Supers combo from light attacks as long as they have 11F or less startup
- Light air attack Hit Stun: 14F hit, 11F Guard
- Hard air attack Hit Stun: 14F hit, 19F Guard
Calculating Frame Advantage
- Light attacks: 12F - (all remaining Active Frames of the attack after the first active frame) - recovery frames.
- Hard attacks: 20F - (all remaining Active Frames of the attack after the first active frame) - recovery frames.
- Example with K': 5A(c): 12F-2F (5A has 3F Active time) -4F (5A has 4F recovery) = +6F.
- Note: if a character comes out of hit stun, they can block 1F earlier than they can attack again. See " "Guard Only" Frames & Forced Actions (強制硬直)".
Pushback
Attacks that connect cause pushback on the opponent that gets hit or guards.
- Light attacks cause 57-58px pushback on hit, 59px on guard
- Hard attacks cause 97-98px pushback on hit, 126-127px on guard
- 5E counts as a hard attack. Special moves vary but frequently count as hard attacks.
- In the corner, pushback is applied until the opponent is pushed exactly into the corner, the rest is applied to the player. Example: P2 is standing 10px away from the corner, P1 hits them with a hard attack (98px pushback). P2 is pushed 10px, P1 is pushed 88px.
- Exception to the above: projectiles do not cause pushback to the player when the opponent is cornered.
- Back-turned hits have the same pushback as normal hits, but since all characters' hurtboxes are larger at the back, they allow for longer combos.
Invulnerability in the last active frame
Thanks to Hartheon (see:"1F無敵") & the research of several players we know that the last frame of hit stun in KOFXI is invulnerable, except against throws.
This means that an attack that gives 6F advantage does not combo into an attack that hits on F6, because the frame where it would connect falls onto the invulnerability frame. It is advised to keep this in mind when using the frame data of this wiki.
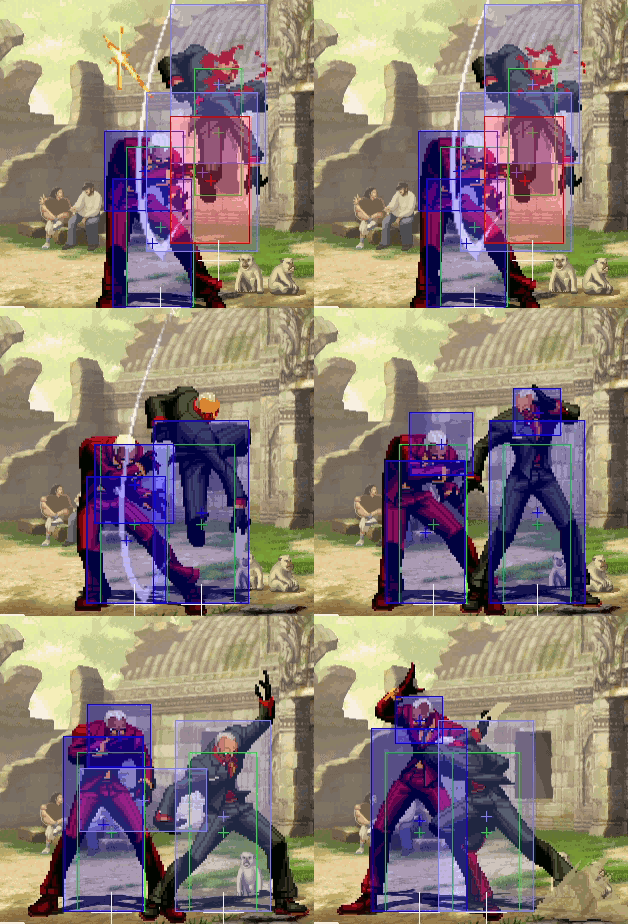
Super Freeze
- Super Freeze duration: 28F
- F1: First super startup frame. Player character becomes invulnerable. Opponent can still act fully (no freeze yet).
- F2: Player & opponent freeze
- F28: Last frame of Super Freeze
- F29: Freeze has ended. Player character's move usually continues on this frame (there are exceptions where this occurs earlier). Opponent can act again. If the opponent issued an attack on F1, then the attack continues on this frame. If an opponent buffered anything during Super Freeze, it will start to come out on this frame.
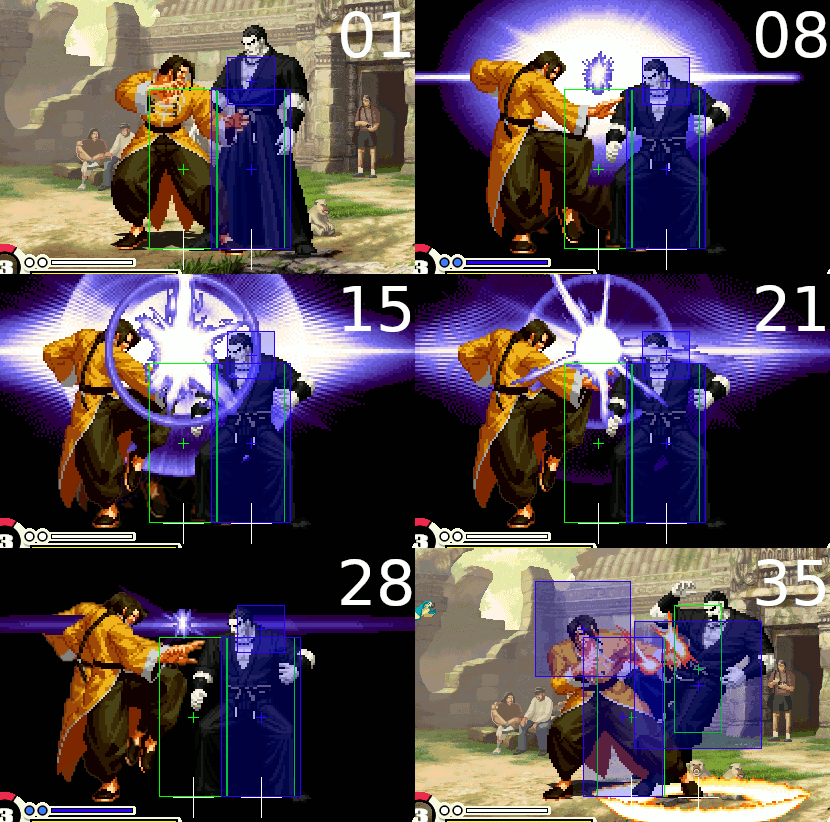
- Note: animations keep playing from F1-3 of the freeze, but hitboxes do not change. This is a visual bug and means the sprite becomes disjointed from the actual hitbox for a few frames. This can be observed on the .gif on F4, where Geese's posture changes (it shouldn't, since we are still on F1 internally, and this animation normally occurs on actual F4).
Wakeup Data
All characters take the same time to wake up (face up / down). Exceptions:
- Elisabeth, Gato, Clark, Silber, Ryo, Kim: 4F faster, face up
- Ryo: 1F slower, face down
- Kim: 8F slower, face down
- Duolon: 2F slower, face down
- Maxima: 5F slower, face down
Roll Frame Data
Roll (front)
- Duration: 29F
- Invulnerable on: F1-23 (23F)
- Vulnerable Recovery: F24-28 (5F)
- Guard-only Frame: F29
Roll (back)
- Duration: 33F
- Invulnerable on: F1-26
- Vulnerable Recovery: F27-32 (6F)
- Guard-only Frame: F33
Exceptions
Note: all recovery includes the guard only frame.
- Kim: back roll 1-24 invul, 5F recovery (29F duration).
- Yuri: front roll 1-26 invul, 6F recovery (32F duration).
- Gato: back roll F1-6 vulnerable. F7-26 invul. 7F recovery (33F duration).
- Gato: forward ukemi (front recovery roll): throw invulnerable (thanks @kofxi_bot!)
- Silber: back roll F1-32 invul, 1F guard-only recovery (33F duration).
- All Console Characters: front roll invul F1-26, 6F recovery (32F duration).
- Hotaru: back roll invul F1-25, 6F recovery (31F duration).
- Geese: back roll invul F1-22, 7F recovery (29F duration).
Guard Cancel Roll
- The GC-Roll is fully invulnerable, but has recovery
- The recovery can only be cancelled into block
- Eiji has no invulnerability at the end of his GC-Roll
- Elisabeth has no invulnerability at the end of her front GC-Roll
- Vanessa & Duck King have no throw invulnerability during their GC-Roll
Back Ukemi
- Back Ukemi is invulnerable for 22F and has 1F guard-only recovery for most characters.
Exceptions:
- 24+1: Clark
- 21+1: Silber, Shion
- 18+1: maxima
- Several characters have no collision during their back ukemi. This means you can run through them for okizeme.
- Characters without collision: Shingo, Oswald, Mary, Ryo, King, Benimaru, K', Kula, Maxima, Jenet, Griffon, Ralf, Clark, Whip. Athena, Hayate, Silber, Jazu, Magaki.
Front Ukemi
- Front Ukemi has a small hurtbox (starting at around the waist of the character, vertically), and can be punished by attacks at any time.
- The total duration is 22F +1F guard-only recovery (untested!) for most characters.
- The hurtbox size is 72x128 pixel.
Exceptions:
- 24+1F: Mai
- 26+1F: Oswald, Kim, Ryo, King, Elisabeth, Benimaru, Maxima, Gato, Silber, Magaki
Console Characters:
- EX Kyo: F1-22 invul. F23 recovery.
- Mai: front ukemi has hurtbox on hands. Body hurtbox 80x144 pixel.
- Robert: F1-4 regular front ukemi hurtbox, F5-13 tall hurtbox (80x160 pixel), F14-22 invulnerable, F23 recovery
Roll Distances
Note: dashing Rolls have added distance, eg. 160->216. Needs further research.
All numbers are in pixels that are also used 1:1 as distance units internally by the engine.
| Character | Front | Back | Character | Front | Back | Character | Front | Back |
|---|---|---|---|---|---|---|---|---|
| Ash | 160 | -160 | Oswald | 160 | -178 | Shen | 160 | -160 |
| K' | 160 | -160 | Maxima | 160 | -160 | Kula | 160 | -160 |
| Terry | 160 | -160 | Kim | 160 | -206 | Duck | 160 | -160 |
| Jenet | 160 | -160 | Gato | 160 | -160 | Tizok | 160 | -160 |
| Kyo | 160 | -160 | Iori | 160 | -160 | Shingo | 160 | -160 |
| Vanessa | 160 | -160 | Mary | 160 | -160 | Ramon | 160 | -160 |
| Ralf | 160 | -160 | Clark | 160 | -160 | Whip | 160 | -160 |
| Ryo | 160 | -160 | Yuri | 187 | -160 | King | 160 | -160 |
| Malin | 160 | -160 | Kasumi | 160 | -176 | Eiji | 160 | -160 |
| Elisabeth | 160 | -160 | Duolon | 192 | -160 | Benimaru | 160 | -160 |
| Athena | 160 | -160 | Kensou | 160 | -160 | Momoko | 160 | -160 |
| Adelheid | 163 | -166 | Gai | 160 | -160 | Hayate | 160 | -160 |
| Silber | 160 | -160 | Jazu | 160 | -160 | Geese | 189 | -152 |
| Hotaru | 219 | -160 | Mai | 189 | -160 | Robert | 189 | -160 |
| Tung | 189 | -208 | EX Kyo | 204 | -160 | Big | 189 | -160 |
| Shion | 160 | -160 | Magaki | 160 | -160 |
Dash Data (advanced)
Dash Startup
- Characters start moving on F4.
- Normal Attacks, Special Moves and rolls have priority over starting a dash (6,5,6+C will trigger a standing C).
- From F2-F4 of a dash, normal attacks cannot be performed, but rolls, special moves & command normals work.
- When attempting to perform a roll during F2-F4 of a dash, the exception to the 1F-leniency rule for simultaneous button presses mentioned in the "input buffer" section applies: the AB-input has to be on the same frame, or the roll will not come out and a normal attack will trigger on F5 (due to the input buffer).
- Starting from F2, attempting to perform a roll will turn it into a dash doll (which covers more distance).
Actions while dashing
- Characters can perform normal attacks, special moves & command normals while dashing
- Characters can roll forward while dashing, but not back (to perform a back roll from a dash, 1F in neutral position must pass, see below)
- Characters can small jump & normal jump forward while dashing, but only forward
- Jumps during dashes automatically turn into hyper hops & super jumps
- Characters cannot perform throws while dashing (to perform a throw from a dash, 1F in neutral position must pass, see below)
- Characters cannot crouch while dashing
Dash Recovery
- Dashes have 4F recovery (last frame is guard only?)
- Dash recovery can be cancelled into all attacks and front rolls at any point
- Dash recovery can be cancelled into back rolls from F2 (so, the player has to go neutral during a dash for at least 1F before they can perform a back roll)
- Dash recovery can be cancelled into throws
- Dash recovery cannot be cancelled into crouching, but it can be cancelled into crouching attacks.
- Dash recovery cannot be cancelled into up or back jumps.
Backdash Data (advanced)
- Standing startup from F1 that is considered airborne
- A "jumping" animation & hurtbox starting on F5 (for most characters) that has no hurtbox on the legs and that has character-specific duration
- 4F standing recovery (for most characters)
Backdash jump start
- For most characters, backdashes enter a "jumping" animation & hurtbox on F5.
Exceptions:
- Jumping on F4:Benimaru & all console-exclusive characters
Backdash jump duration
The "jumping" animation & airborne state has a different duration for each character:
coming soon
Backdash recovery
- For most characters, backdashes end in 4F standing recovery.
Exceptions:
- 3F backdash recovery: Terry, Kasumi, Shion, Geese
- 5F backdash recovery: Hayate
- 6F backdash recovery: Maxima
Backdash distance
All numbers are distance units that are used internally by the engine.
NOTE: needs to be double checked since there is rounding going on!! eg. 192 & 193 could be the same.
- 201: Magaki
- 193: Malin
- 192: Hayate
- 190: Elisabeth, Kula, Gato
- 189: Athena
- 187: Clark
- 186: Duolon
- 185: Oswald, Griffon, Jazu
- 184: Kim, Vanessa, Yuri
- 183: Kasumi
- 178: Kyo, Terry, Ramon, Benimaru, Hotaru, Mai, Robert, Tung, EX Kyo, Mr. Big, Geese
- 176: Iori, Shingo, Shen, K', Jenet, Ralf, Whip, Adelheid, Silber
- 172: Mary, Eiji, Momoko
- 170: Ash, Ryo, Shion
- 168: Gai
- 162: King
- 160: Duck
Advanced Throw Rules
Throw Hitboxes
- All normal throws have 40px range (counted from the center of a character)
Reversal Throws
- When getting up from a knockdown or when landing from getting hit in air by an attack that makes the character land on their feet, Throws are blocked for 3F (F4 is the earliest possible frame for a throw to come out).
- Throws can be used from F2 after landing from a DOWN! (right after the "guard only" frame) and are therefore frequently used defensively in this situation. Note: There is a special interaction when landing from a DOWN! That actually allows 1F throws - see further below. Also, characters that do not have the "guard only" frame (eg. Kula, Ryo) can throw on F1 anyway.
- After back & front Ukemi, Throws are blocked for 2F (F3 is the earliest possible frame for a throw to come out).
Throw Invulnerability
- 8F on Wakeup or when landing on your feet after getting hit in air
- 4F after getting hit (standing or crouching)
- 1F after block stun. Note: own block stun can be artificially extended by holding 4 or 1, making the timing for a "meaty" throw very hard for your opponent. Blockstun extended this way can be cancelled at any time by performing any other action. Note: for those familiar with KOF98, alternating quickly between high- and low guard does NOT increase the blockstun even further (which is the case in that game).
- Performing any action while having throw invulnerability will NOT prematurely end the invulnerability (this is the case in many other games).
Throw Breaks during Rolls
Source: kofxi_bot
Group A (can break throws while rolling of all groups. Can throw group B & C during their rolls without them being able to throw break)
Kyo, Iori, Ash, Shen, Terry, Duck, Vanessa, Ramon, Yuri, Duolon, Malin, Kasumi, Kensou, Momoko, Gai
Group B (can break throws while rolling only from group C. Can throw Group B & C during their rolls without them being able to thow break)
Shingo, Oswald, Mary, King, Benimaru, K', Kula, Maxima, Jenet, Griffon, Ralf, Whip, Eiji, Athena, Adelheid, Hayate, Jazu
Group C (can break throws while rolling only from group C. Every group can break their throws while rolling.)
Kim, Ryo, Elisabeth, Gato, Clark, Silber
Throw Break time window while rolling
Source: kofxi_bot
If being thrown by any of the following characters while rolling, the following time frames to break the throw apply:
11/12F: against group A
14F: against Duck
16F: against all others
Command Throws
- Command Throws can generally be comboed, eg. Clark 5C(1)>41236K
- Command Throws can be linked into, eg. Ralf 2B > link 41236K
- Command Throws do NOT combo if done right after a jumping attack. This is likely to avoid insane instant overhead setups (since throws frequently have only 1F startup, the air attack could be done really early and still combo).
- However, what does work is eg. a standing combo > quick shift > next character lands > Command Throw, since no jumping attack was used.
- Sacred Treasures Team: Kyo | Iori | Shingo
- Hero Team: Ash | Oswald | Shen
- Fatal Fury Team: Terry | Kim | Duck King
- Agent Team: Vanessa | Mary | Ramon
- Art of Fighting Team: Ryo Sakazaki | Yuri Sakazaki | King
- Rival Team: Elisabeth | Duo Lon | Benimaru
- Team K': K' |Kula | Maxima
- Garou Team: Jenet | Gato | Griffon
- Ikari Warriors Team: Ralf | Clark | Whip
- Anti Kyokugenryu Team: Malin | Kasumi | Eiji
- Psycho Soldier Team: Athena Asamiya | Sie Kensou | Momoko
- Time Unlock: Adelheid | Gai | Hayate | Jazu | Silber
