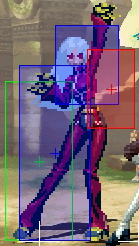
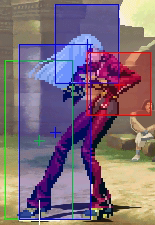
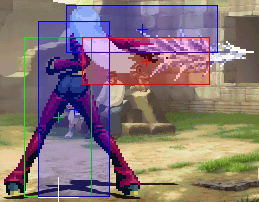
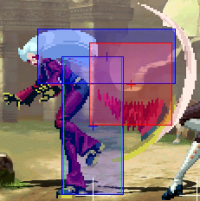
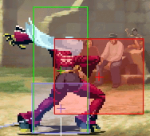
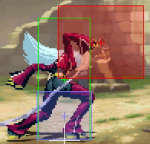
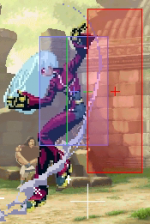
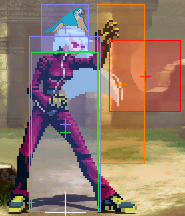
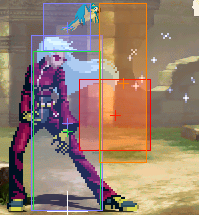
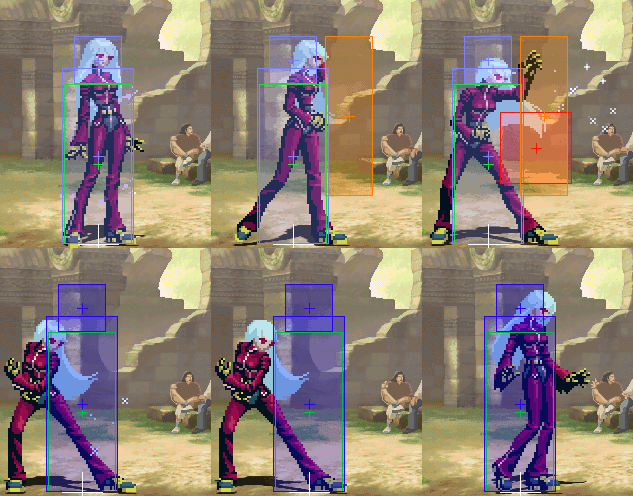
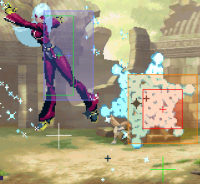
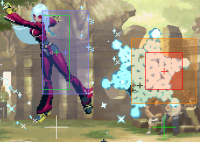
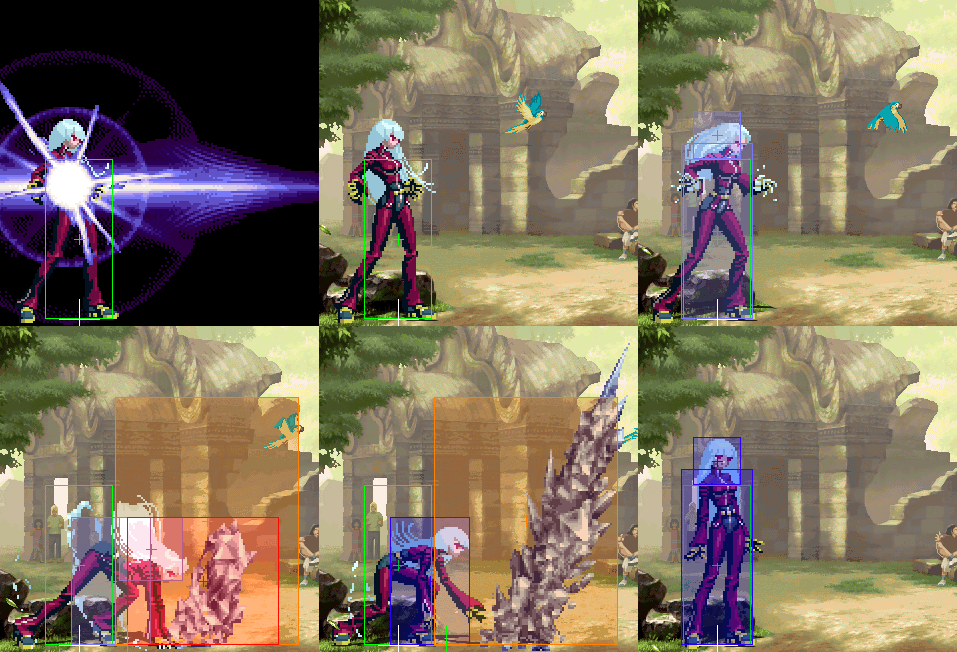
Kula Diamond(KOFXI)
| Kula Diamond クーラ・ダイアモンド | |

| |
| Tiers & Ranking | |
| Tier: | S+ |
| Ratio Cost: | 7 Points |
| Properties | |
| Damage Modifier: | 1.05 |
| Stun Modifier: | 1.0 |
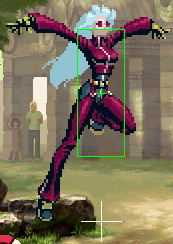
| Crouch height (Tier): | F |
Quick Guide
- Kula is a top tier character with brutal pressure, good defense, high combo damage and flexibility and great shift synergy.
- She can be played in any position, but is most often played as a point or second character because she is great at setting up combos and she is the only character to have an EX super for 2 stocks that can serve as a substitute LDM.
Neutral
- Kula uses her very fast walk speed & backdashes to move around in neutral, threatening opponents that want to attack with her very fast 623C (3F startup), which also knocks down.
- 3C can be used as a good long-range poke.
- Kula usually approaches by walking into smalljump range, where she can then close in on the opponent with 214B (which has invulnerability during some of its startup) or her extremely fast j.E (7F startup).
- If you feel you must use a regular (or super-)jump, try using j.D.
Offense
- Kula's smalljump C is a notoriously strong and early-hitting attack that is her overhead option during blockstrings.
- The reason smalljump C can hit so early is because of 5C(c): it is extremely fast (4 frames). It also has 2 hits, which makes it a great option for combos & punishes. It can also be hit confirmed easily.
- Pairing J.C pressure with her 2B>2B>5B>623C combo starts a very strong and hard to block mixup game.
- 236P gives massive frame advantage and should be used against cornered opponents in block strings, eg. after 2B>2B.
- Basic combo from j.C midscreen: 5C(2)>214B>6D, delay 623C.
- Basic combo from j.C corner: 5C(2)>236A, link 214B,delay 6B, 623C.
- 214B>6D launches very high and is one of the best shift combo starter setups for juggles - use it.
Defense
- 623C is her best reversal option: 3F startup, causes hard knockdown but only has invulnerability above the feet (does not work against lows).
- 214B can be used on wakeup due to its invulnerability during startup. If the 214B hits, it can combo into 6D, then any juggle or shift out, which makes it a strong reversal option.
- Kula' EX super (costs 2 stocks) is highly damaging, particularly when used as an anti-air or from a back-hit during combos. It can also be used as a costly reversal.
Colors

|

|

|

|
| A | B | C | D |

|

|

|

|
| R1 + |
R1 + |
R1 + |
R1 + |
| E+A | E+B | E+C | E+D |

|

|

|

|
| L1 + |
L1 + |
L1 + |
L1 + |
| Start+A | Start+B | Start+C | Start+D |
Frame Data
| Move | S | A | Hit | Blk | Dmg | Stn | G-Dmg | Gauge | J-Type | Air | C-Air | Note |
|---|---|---|---|---|---|---|---|---|---|---|---|---|
| 5A(c) | 7 | 4 | +2 | +1 | 4 | 6 | 6 | 8 | F+L | JA | F1-14 F | |
| 5A(f) | 8 | 3 | -2 | -3 | 5 | 8 | 8 | 8 | F+L | JA | F1-14 F | |
| 5B(c) | 8 | 3 | -1 | -2 | 5 | 8 | 6 | 8 | F+L | JA | F1-14 F | |
| 5B(f) | 5 | 6 | -1 | -2 | 6 | 8 | 8 | 8 | F+L | JA | F1-14 F | Special Cancel. |
| 5C(c) | 4 | 3+6 | -5 | -6 | 16 | 12 | 12 | 14 | F+L | JA | F1-14 F* | *=both hits. |
| 5C(f) | 15 | 7 | -17 | -18 | 11 | 15 | 12 | 14 | F+L | JA | F1-14 F | Special Cancel |
| 5D(c) | 8 | 1+4 | -2 | -3 | 16 | 12 | 12 | 14 | F+L | JA | F1-14 F* | *=both hits. |
| 5D(f) | 10 | 4+2 | +4 | +3 | 18 | 32 | 24 | 28 | F+L | JA | F1-14 F* | *=both hits. |
| 5E | 9 | 5 | KD | -16 | 16 | 12 | 14 | 16 | F+L | N | F1-8 F, F9-28 L |
|
| 6A | 19 | 21 | KD | -22 | 15 | 14 | 12 | 14 | F+L | N | F1-wall N, F1-16 F*, F17-end L* |
Hard Knockdown. Wall Bounce on CH. Super Cancel. *=Start of wall bounce. |
| 6A(can) | 14 | 15 | -15 | -16 | 7 | 7 | 5 | 14 | F+L | N | N | Hard knockdown on air hit. |
| GCE | 5 | 8 | KD | -18 | 5 | 0 | 0 | 0 | ? | N | F1-8 F, F9-28 L |
|
| Saving Shift | ? | n* | / | / | ? | N | F1-8 F, F9-28 L |
Active until landing. 9F/10F recovery (hit/whiff). | ||||
| 2A | 8 | 4 | -1 | -2 | 4 | 6 | 6 | 8 | F+L | JA | F1-14 F | |
| 2B | 6 | 3 | +2 | +1 | 4 | 6 | 6 | 8 | F+L | JA | F1-14 F | |
| 2C | 6 | 11 | -13 | -14 | 11 | 15 | 12 | 14 | F+L | JA | F1-14 F | |
| 2D | 10 | 5 | KD | -8 | 13 | 14 | 12 | 14 | F+L | JA | JA | SC. |
| 3B | 10 | 13 | KD | -11* | 12 | 7 | 5 | 14 | / | JA | F1-8 F, F9-22 L |
F10-33 low profile (112px tall). F34-41 crouching recovery. F22 standing recovery. *= from point blank. |
| 3C | 19 | 18 | KD | -4 | 18 | 12 | 12 | 12 | F+L | JA | F1-8 F, F9-28 L |
All 3 hits Knockdown on air hit & QS. 3rd hit hard knockdown on ground hit. Wall Bounce on ground CH. |
| small A | 6 | 7 | / | / | 4 | 7 | 7 | 8 | F+L | JA | F1-14 F | |
| j.A | 9 | 7 | / | / | 5 | 8 | 8 | 8 | F+L | JA | F1-14 F | |
| small B | 6 | 4 | / | / | 5 | 7 | 7 | 8 | F+L | JA | F1-14 F | |
| j.B | 8 | 7 | / | / | 6 | 8 | 8 | 8 | F+L | JA | F1-14 F | |
| small C | 12 | 6 | / | / | 10 | 14 | 11 | 14 | F+L | JA | F1-14 F | |
| j.C | 14 | 7 | / | / | 11 | 15 | 12 | 14 | F+L | JA | F1-14 F | |
| small D | 9 | 4 | / | / | 10 | 14 | 11 | 14 | F+L | JA | F1-14 F | |
| j.D | 7 | 5 | / | / | 11 | 16 | 12 | 14 | F+L | JA | F1-14 F | |
| small E | 7 | 4 | / | / | 13 | 9 | 9 | 16 | F+L | N | F1-8F, F9-28 L |
|
| j.E | 12 | 5 | / | / | 14 | 10 | 10 | 16 | F+L | N | F1-8F, F9-28 L |
|
| 214B | 15 | 5 | -3 | -4 | 12 | 10 | 10 | 10/8 | F+L | F1-8 F, F9-end L |
F1-8 F, F9-end L |
F1-6 invul. F7-19 in counterhit-state. 20F landing recovery, of which F2-19 can be cancelled into followups. |
| 214D | 22 | 3+3 | KD | +10 | 14 | 24 | 24 | 10/16 | F+L | F1-8 F, F9-end L/F9-28 L* |
F1-8 F,F9-end L* | F1-8 crouched hurtbox. F9 airborne. F1-40 in counterhit-state (until landing). 16F landing recovery, of which F2-15 can be cancelled into followups. *=first/second hit, *2=both hits. |
| 214K>6B(1) | 9 | 2 | KD | ? | 8 | 2 | 2 | 0/12 | / | F1-8 F, F9-end L |
F1-8 F, F9-end L |
Physical hit of 6B. Usually only connects on back-turned enemies. Cannot juggle at all. |
| 214B>6B(2) | 18 | n | KD | +0*/-6* | 8 | 2 | 2 | 0/12 | F+L | F1-8 F, F9-end L |
F1-8 F, F9-end L |
Projectile hit of 6B. *=against thin+normal characters + point blank: both hits / one hit on guard. Against fat characters + when both hits connect: -1. |
| 214D>6B(2) | 18 | 2+n | KD | -3/-5* | 8 | 2 | 2 | 0/12 | F+L | F1-8 F, F9-end L |
F1-8 F, F9-end L |
Identical to 214B>6B(2), but different advantage. *=point blank (only second hit connects), thin+normal / fat characters. Against Vanessa: -2. |
| 214K>6D | 8 | 12 | KD | -15* | 10 | 6 | 6 | 10/8 | F | F1-10 F, F11-end L |
F1-10 F, F11-end L |
Low Hit. Launches + allows juggles. Can be QSed. *=point blank |
| 236A | 15 | 7 | KD | +2 | 12 | 10 | 10 | 0/8 | F | F1-8 F, F9-end L |
F1-8 F, F9-end L |
Launches. Knockdown on air hit. Unblockable as a meaty, tourney-banned on incoming & okizeme. |
| 236C | 37 | 10 | +31 | +17 | 14 | 12 | 12 | 0/12 | F | JA | JA | Knockdown on air hit. Unblockable as a meaty, tourney-banned on incoming & okizeme. Conqueror's Guide erroneously lists gauge gain as 6/12. |
| 623A | 5 | 12 | KD | -32 | 14 | 12 | 10 | 10/8 | F+L | JA | F1-10/1-8 F*, F11-19/10-28 L* |
Crouching hurtbox F1-10. Airborne F11. All 14F of Landing Recovery in counter hit state. *= hitbox 1/2+3 |
| 623C | 3 | 4+2+14 | KD | -42 | 8+8+5 | 4+4+4 | 4+4+4 | 10/8+8+8 | F+L | F1-8 F, F9-20 L* |
F1-8 F, F9-end L* |
Upper feet invul F1-8. Airborne F9. All 14F of Landing Recovery in counter hit state. *=first hit (2nd&3rd have JA only) |
| 214A | 9 | 4+4 | KD(+46) | -8 | 14 | 13 | 12 | 10/8 | F+L | JA | F1-wall N, F1-16 F*, F17-end L |
F1-19 counterhit-state. Reflects projectiles F6-19. 37F total duration. Hard Knockdown. Wall Bounce on counter hit. *=Start of wall bounce. |
| 214C | 9 | 4+4 | KD(+46) | -8 | 16 | 13 | 13 | 10/8 | F+L | JA | F1-wall N, F1-16 F*, F17-end L |
Strictly better than 214A. F1-19 counterhit-state. Reflects projectiles F6-19. 37F total duration. Hard Knockdown. Wall Bounce on counter hit. *=Start of wall bounce. |
| 214P(proj.) | 11 | n | KD | -8* | 12 | 0 | 0 | 0/10+8+10* | x | F1-8 F, F9-end L |
F1-8 F, F9-end L |
Projectile that only spawns when an enemy projectile is reflected with 214P. 38F total duration. *=point blank (eg. against Oswald's 623A). *2= gains meter as the projectile flies, then twice as it connects - the Conqueror's Guide lists meter erroneously as 0/8. |
| j.236B | 29 | n | KD | -4* | 12 | 6 | 10 | 0/10 | F+L | F1-8 F, F9-28 L |
F1-8 F, F9-end L |
"Diamond Shoot". 45° Angle down. 10F landing recovery in CH-state. *=point blank & from lowest possible height |
| j.236D | 29 | n | KD | -4* | 12 | 6 | 10 | 0/10 | F+L | F1-8 F, F9-28 L |
F1-8 F, F9-end L |
Diamond Shoot". Angled forwards. 10F landing recovery in CH-state. Allows juggles after. *=point blank & from lowest possible height |
| 236236A | 8 | 6+8 | KD | -12 | 35 | 0 | 0 | 0 | F+L | JA | F1-8 F, F9-28 L |
F2-26 counterhit-state. F27-50 recovery. Negates projectiles F8-26 (19F). |
| 236236C | 22 | 14 | KD | -12 | 35 | 0 | 0 | 0 | F+L | JA | F1-8 F, F9-28 L |
F1-11 invul. F12-35 counterhit-state. F36-48 recovery. Negates projectiles F22-40 (19F). |
| 236236E | 7 | 38 | KD | -29* | 48 | 0 | 0 | 0 | F+L | F1-8 F/JA*, F9-end L/JA* |
F1-8 F/JA*, F9-end L/JA* |
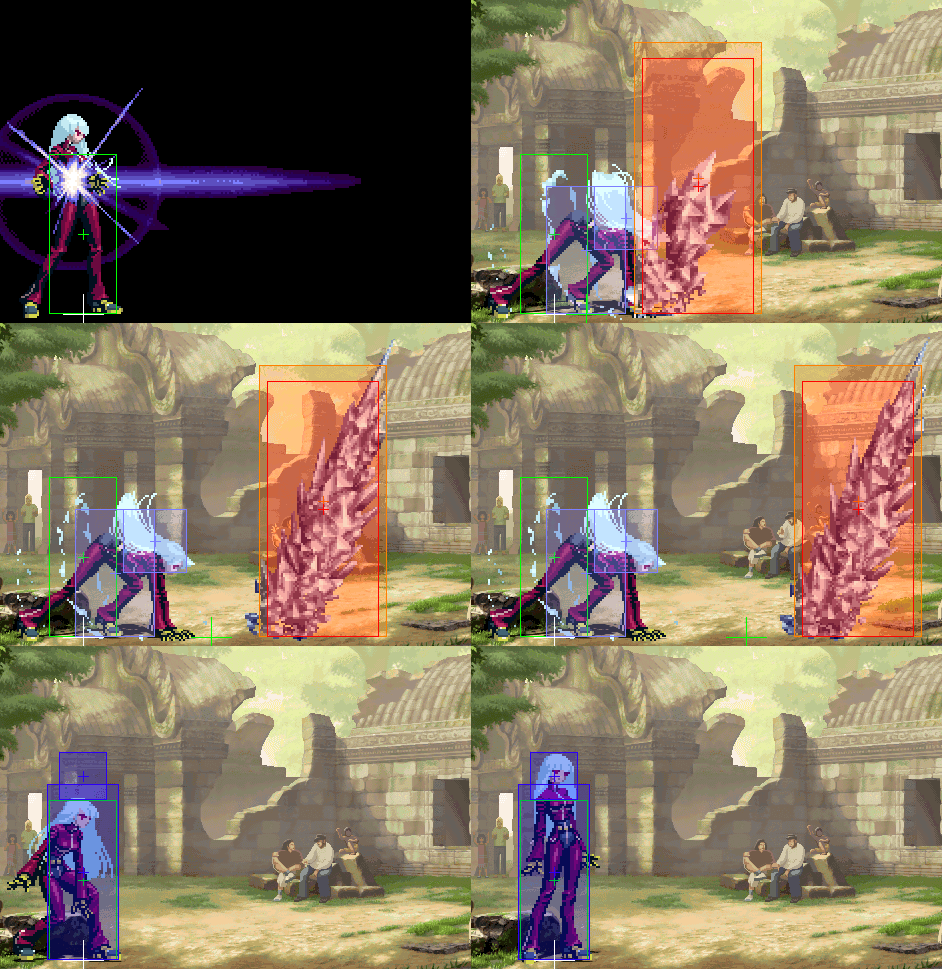
F1-7 invul. F8-48 low hurtbox & counterhit-state. F49-52 head only counterhit-state. F53-66 standing recovery. Costs 2 Super Stocks. *1= 1st+2nd/3rd pillars. *2=Point Blank in the corner, usually is advantageous. |
| 214214E | 13 | n | KD | -36 | 60 | 0 | 0 | 0 | JA | JA | JA | Juggle anywhere. F1-31 invul. F32-37 CH-state. F38-78 invul. F79 guard-only recovery. |
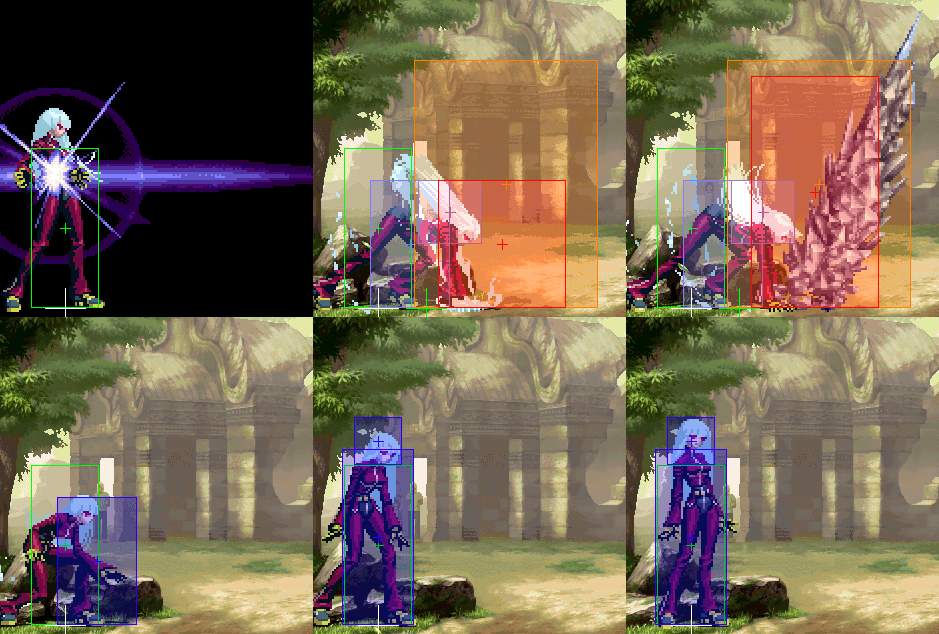
| Move | Hitbox | Startup | Active | Hit | Guard | Note |
|---|---|---|---|---|---|---|
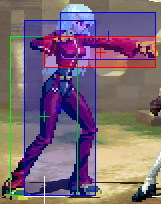
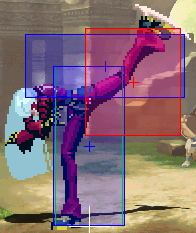
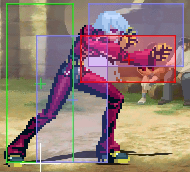
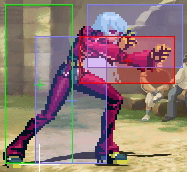
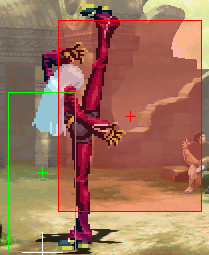
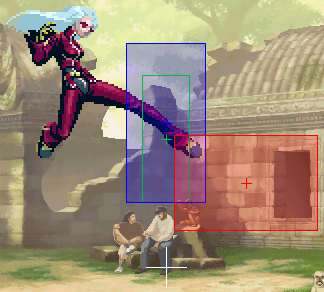
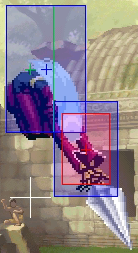
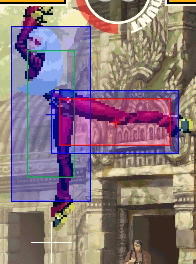
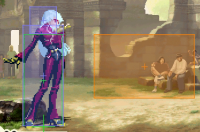
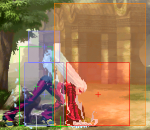
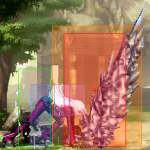
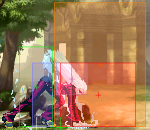
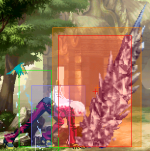
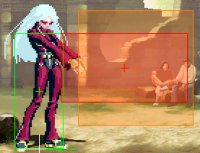
| 2A | 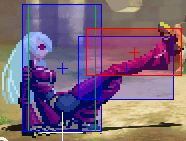 |
8 | 4 | -1 | -2 | |
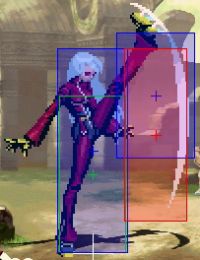
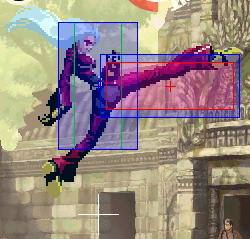
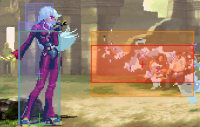
| 2B | 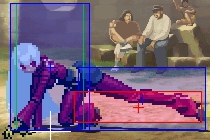 |
6 | 3 | +2 | +1 | |
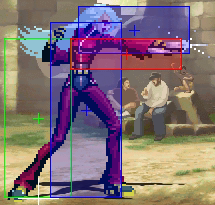
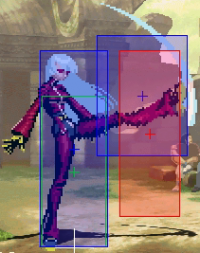
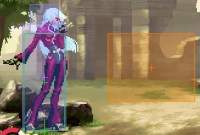
| 2C | 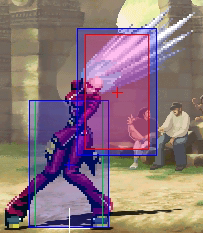 |
6 | 11 | -13 | -14 | |
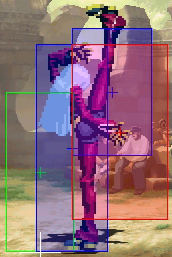
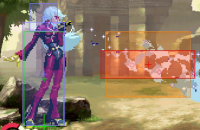
| 2D | 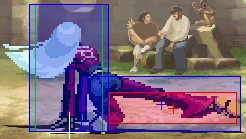 |
10 | 5 | KD | -8 | |
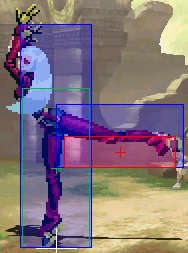
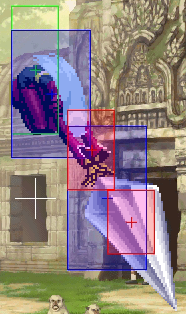
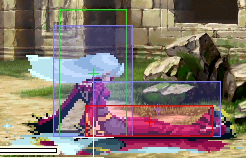
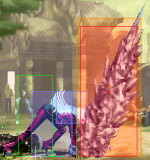
| 3B | 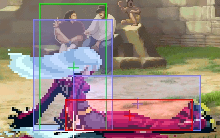 |
10 | 13 | KD | -11* | *= close. Safe from farther away. |
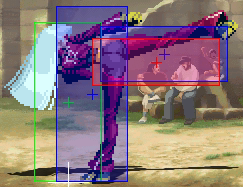
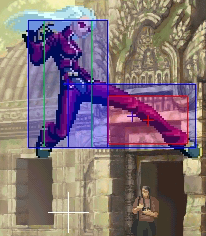
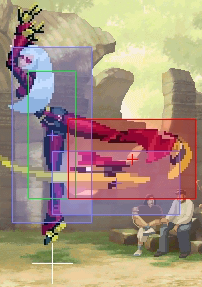
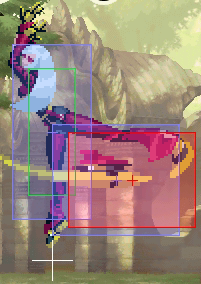
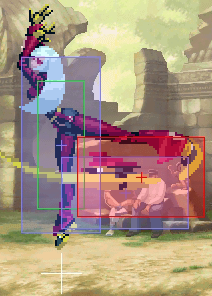
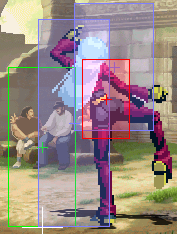
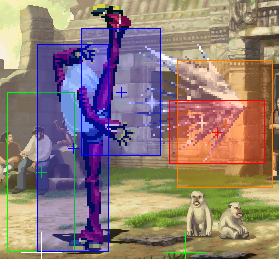
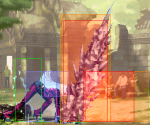
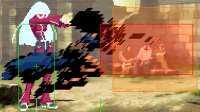
| 3C | 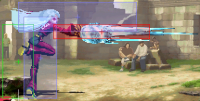   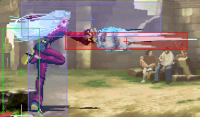 |
19 | 4+6+4+4 | KD | -4 |
Special Attributes & Bugs
- 236A/C is unblockable when done meaty from max range. This is tourney banned.
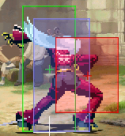
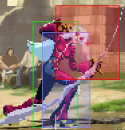
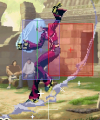
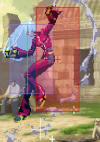
- Has a smaller than normal vertical collision during wakeup (128px instead the usual 160px), which allows smalljump crossups.
- Has no collision on back Ukemi (can run through)
- Kula has no recovery when landing from a DOWN! and can act immediately.
- Kula 214P > QS Kensou > LDM will cause a bug that interrupts the hard knockdown and resets the opponent into standing position, see here
- 214C has 2 points more damage and 1 point more guard damage than 214A, but otherwise both versions are identical, making 214C strictly better.
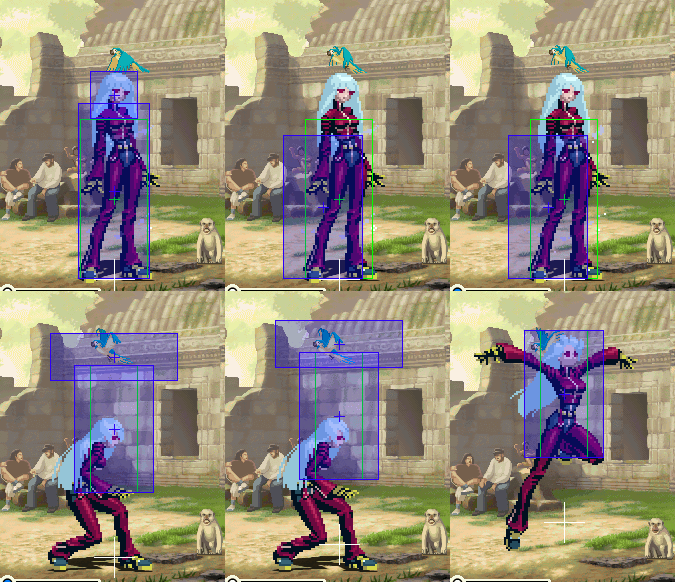
- Kula's arms have a hurtbox during her jump startup, for 2F (small jump) & 3F (normal jump).
Combos
- 2B>2B>(5B>), then...
- 623C: bread n butter against standing opponents.
- 623C super cancel 236236A/E: variation for more damage, also hits against crouching opponents.
- 623C > QS: quick shift to somebody else to finish the job. also useful against standing opponents.
- 2B>2B>(5B>)3B: bread n butter against crouching opponents without meter, but only causes soft knockdown. You could also intentionally drop the combo here and go for a pressure reset by cancelling into 236A or 214B.
- (j.C/D>)5C(2)>214B-6D, then...
- 623C: one of the most used combos, causes hard knockdown and works everywhere.
- 236236E: high damage. Best used midscreen only (doesn't hit fully in the corner). Since Kula can be below her opponent after 214B-6D, the 236236E input can get reversed - to avoid this, delay the 6D after 214B a bit.
- QS: one of the best quick shift setups in the game, easy to land and causes a high launch.
- 5A or 5C(1), link 214214E: an easy LDM setup, works everywhere.
- (j.C/D>)5C(1-2)>6A>214B-6D, 623C: the 6A only connects if you are very close after 5C, so either use j.C/D>5C(1) or start with 5C(2). While you can get 5C(2)>6A from a jump in, it needs precise timing and is therefore only used in QS or punish combos.
- Corner Combo in 5C(2)>236A, link 214B delay 6B, then:
- 623C (>QS): this is the corner bnb. The QS works on the first 623C hit only, and becomes much easier if 6B was delayed (because that way you can pre-buffer 623C, giving you more time for the QS input)
- 236236A: more damage, but causes soft knockdown - best use this to kill only.
- 2D>214214E: LDM setup. Do not delay the 6B if you go for this one.
Special Setups & Motions
Note: the below motions are only required if you can't delay the 6D-followup for whatever reason, or on back hit.
- Close 214B-6D, 623C: input the 623C as "41236C".
- Close 214B-6D, 236236E: input the 236263E as "214214E".
- 5C(2)>214B-6D, 236263E: input the 236236E as "214236E".
Other Combos
- 214D can cross up against these characters that are smaller when they wake up: Ryo, Ralf, Mary, Whip, Hayate. Sample Combo by u-rasia.
- After Stun: 236C(meaty) link 236C, smalljump D 5C(2)>6A delay 236A, link 236236E: crazy combo by u-rasia
Team Combos
Kula & Gato
- Corner combo in 214B-6D QS Gato whiff j.B, land, whiff 5B, 214B-B x 5, 6B, link 236236D(> DC 623Ex3): setup for the highly damaging Senga Loop.
- midscreen combo in 214B-5D QS Gato whiff j.B, dash, jump D, land, delay 236236B(>DC 623Ex3): midscreen setup to combo into Gato's LDM. Costs 2 shift stocks & 3 super gauges, but deals 80% damage.
Kula & Oswald
- Midscreen 214B-6D, QS Oswald,\/,5A whiff 3A>214A>236B>236E (ACE): easy & reliable midscreen ace-setup.
- Corner combo in 214B-6D, QS Oswald, backdash, 3A>236B-236A-236B-236E (ACE)
- Corner combo in 236A link 214B delay 6B, 623C(1) QS Oswald j.D, land, [4],646E: a setup for Oswald's LDM. Make sure to hold [4] already as you tag in oswald to have the charge ready when he lands.
Matchups
Vs Duck
According to Zerio & Nori the Kula vs. Duck matchup is roughly a 7.5 to 2.5 in favor of Kula. A quote on this delivered through Rock: "Kula just waits and uses 2B & 2D while buffering 623C, which she uses on reaction, if Duck jumps. Due to the 2B & 2D, Duck cannot approach from the ground, which makes the matchup very hard."
Based on Kyuntakuya & tests done just for us by Sawakoro & Rock there is evidence however that the matchup might very well be somewhat even. Particularly Duck's 2A is very useful to pressure Kula.
Vs Kula (mirror)
- 214B and 5C(c) on block can be punished with 623C. This means you should always cancel your 5C, and be very careful when to use 214B- you might have to use a 214B followup and shift to be safe against 623C, especially since it can be supercancelled into 236236E for brutal damage.
- Use j.C>236236E against a blocked 623C for an option select. If the opponent's Kula attempts to saving shift, the incoming character will get hit by 236236E. Source: u-rasia (note: broken timestamp!).
Vs Gato
Japanese player Shingo considers this matchup in favor of Gato: approaching him is difficult with Kula, even though she excels at corner pressure. On the other hand, if Gato & Kula are not Leaders in this matchup, Kula can also play this defensively and abuse her strong anti-airs.
- Use 214B during super freeze to beat Gato's 236236A.
- 214B goes over Gato's 2D
- For okizeme, you can use 2D, then cancel either into 236A or, on reaction, into 214B if Gato uses 236236A. Example from Shingo vs Gian
- Since Gato is tall while crouched, he is susceptible to instant overheads such as smalljump back j.D.
Vs K
- K' can punish 214B on block with 236236B, so either don't use it too much or, if you really have to, use followup 6B or 6D > QS to make it safe. This on the other hand creates a mindgame where K' can roll forward after 214B to punish the 6B followup.
- If you want to punish Heat Drive without fear of a saving shift, use dash up 214D> delay 214B > 214B>6B... combo, see u-rasia
- If K' uses the blockstring 2B>2A>2D>236P(whiff)>214K, you can always punish the 236P with 214B regardless of what followup they try.
Vs Mary
- It is possible to cross up mary with hyperhop j.A after Kula's midscreen BnB combo, see Shingo vs Sawakoro
Vs Ralf
- Punish Unblock (the uppercut) on block with 623C. This makes it way harder for Ralf to throw the move out randomly.
Universal strategy vs Kula
Corner Pressure
- Vs 2B,2B, cancel 236A/214B: rolling forward as late as possible allows a punish if Kula did 236A.
- Vs 2B,2B, 236C: jumping out enables a punish, if the air attack is done relatively early & high.
- Vs 214D: roll out, dash, punish.
Thanks to Kyuntakuya for these tips.
Kula's 623C
623C (her SRK) only has 3F startup and is therefore hard to safe jump, except if you manage to jump very early and possess a jump-in that hits very low (since the invulnerability does not extend to her feet). Since this isn't always an option, the following okizeme can be used:
- (Corner only) superjump as okizeme (623C will whiff right under)
- Meaty low Hit
- Use an attack as okizeme that both beats 623C AND 214B, eg a late 2C with K'
- A very early smalljump that makes it hard to see whether the attack is a safe jump or a fake safejump that lands a bit early (not a very solid strategy)
Kula's 214B
Since Kula's 214B (Ray Spin, the roundhouse kick jump) has invulnerability until just before the active time, she can use it as a reversal. This is a strong reversal option since it is relatively safe for her (punishes happen to her while airborne) and it can lead to a full combo if she actually hits with it. The threat of this move forces the opponent to guess between her 623C and 214B on wakeup, or her simply doing neither.
The best way to counter reversal 214B is by using a delayed okizeme attack with a hitbox that can hit ray spin, which then hits on counter-hit and enables a combo (if you immediately cancel any normal attack on air counterhit, you can combo after). Example from Tori, with Oswald: delay 5D(counter hit)>3A>214A...
When to Saving Shift
- It is advisable to use saving shift right after Kula's 214B hit, because the next hit (the 6D followup) usually launches. The decision is matchup specific however, since not all team compositions lead to big damage from the launcher.
- If Kula uses the 214B>6D string in the corner instead of using the 236A route, you can shift right before the 6D and punish the slide. Example from Shingo vs Gian
- Be aware that when you saving shift against Kula's 5C(c), if she uses her 236236E (the EX super) after, it will hit the incoming character out of the air.
Videos
Kula Guide from U-Rasia, part 1
Kula Guide from U-Rasia, part 2
- Sacred Treasures Team: Kyo | Iori | Shingo
- Hero Team: Ash | Oswald | Shen
- Fatal Fury Team: Terry | Kim | Duck King
- Agent Team: Vanessa | Mary | Ramon
- Art of Fighting Team: Ryo Sakazaki | Yuri Sakazaki | King
- Rival Team: Elisabeth | Duo Lon | Benimaru
- Team K': K' |Kula | Maxima
- Garou Team: Jenet | Gato | Griffon
- Ikari Warriors Team: Ralf | Clark | Whip
- Anti Kyokugenryu Team: Malin | Kasumi | Eiji
- Psycho Soldier Team: Athena Asamiya | Sie Kensou | Momoko
- Time Unlock: Adelheid | Gai | Hayate | Jazu | Silber
