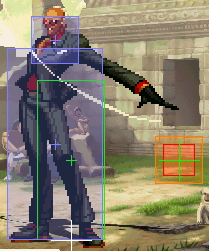
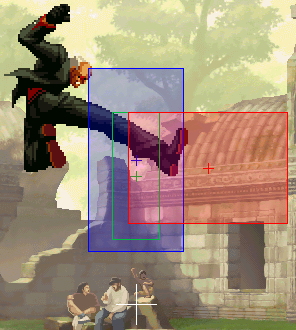
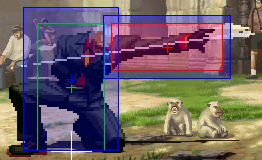
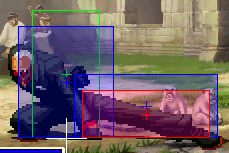
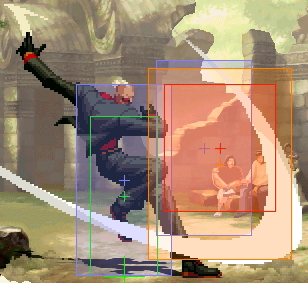
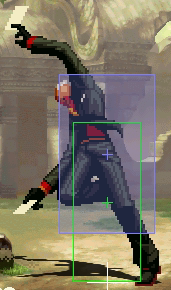
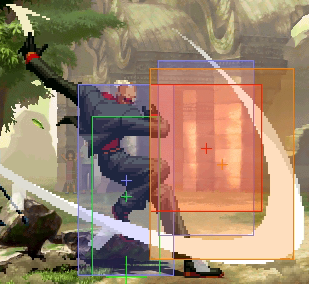
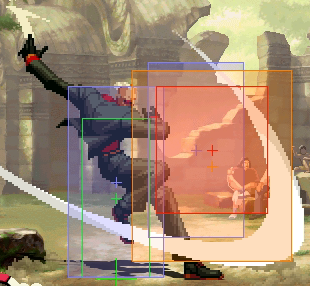
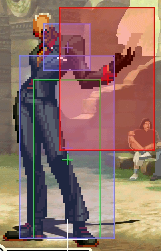
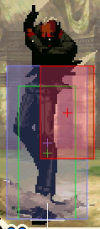
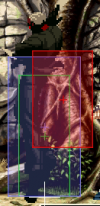
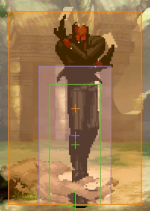
Oswald(KOFXI): Unterschied zwischen den Versionen
| (237 dazwischenliegende Versionen desselben Benutzers werden nicht angezeigt) | |||
| Zeile 3: | Zeile 3: | ||
| jcharname = オズワルド | | jcharname = オズワルド | ||
| portrait = [[Image:KOFXI oswald full.png]] | | portrait = [[Image:KOFXI oswald full.png]] | ||
|tier_rank = S | |tier_rank = A+ to S | ||
|ratio_rank = 6 | |ratio_rank = 6 Points | ||
|health = | |health = 1.0 | ||
|stun_gauge = | |stun_gauge = 1.02 | ||
|crouch_tier = F | |crouch_tier = F | ||
}} | }} | ||
== Quick Guide == | |||
:Oswald is a strong but very technical character that has high damage and shift potential, but from very situational hits. | |||
:He has strong offense, okizeme and mixups, but has a hard time dealing with pressure. | |||
:He is played as a point character (for his strong shift synergy) or as a Leader (for his powerful LDM that has only 2F startup & juggle anywhere). | |||
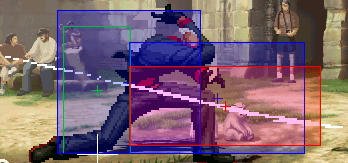
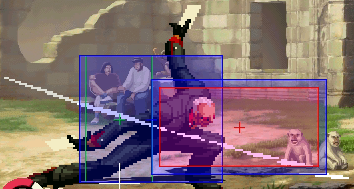
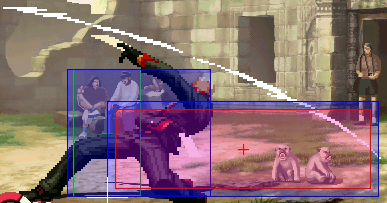
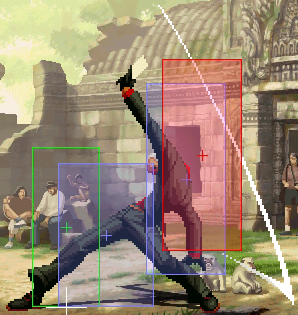
== | '''Neutral'''<br> | ||
{| | :On range, throw cards with 623X to cover your approach or protect yourself. | ||
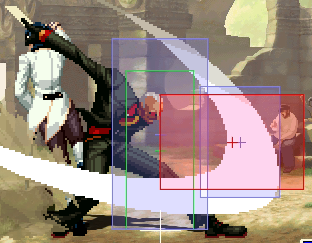
|[[Datei:KOFXI Oswald | :To get in on the opponent, use smalljump j.E from max range. | ||
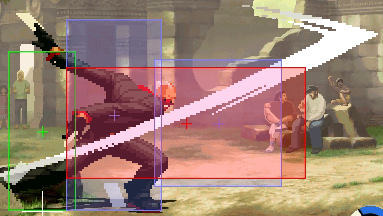
|[[Datei:KOFXI Oswald | :Far C is an excellent poke in neutral and good way to end blockstrings. | ||
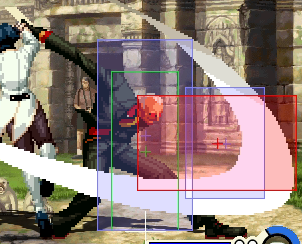
|[[Datei:KOFXI Oswald | :2D(1)>6A is also good in neutral and at the end of strings since it can lead to a full combo from a low hit with high range. Whiffing 2D enables a full punish, so this shouldn't be overused. | ||
|[[Datei:KOFXI Oswald | |||
'''Offense'''<br> | |||
:Once close, attack with a mix of very early smalljump Cs and 2Bs / 2As to open up the opponent. | |||
:Smalljump & jump C is excellent as a crossup and should be used frequently. | |||
:Make sure to learn from which range Oswald's BnB still connects (2B>2A>214C>236C>214B). Do not use the full string on block, it can be punished before 214B. | |||
'''Defense'''<br> | |||
:Against smalljumps, use 5A/5B (can be followed by LDM) | |||
:Against higher jumps, Use low profile 2B or jump up j.D or a very early 3A>combo | |||
:To escape from strings, use 2B/2A or 2-frame jump j.A away. Using the 421K-counter or rolling through the opponent is risky but rewarding, since it can lead to back-turned combos. | |||
:For reversals, use counter (421K) or 63214,63214P or LDM. It is advised to not overuse Oswald's reversals, as they are not particularly great (other than LDM, which is pricey). | |||
== Colors == | |||
{{KOF XI Colors | |||
|square=[[Datei:KOFXI Oswald S.png]] | |||
|cross=[[Datei:KOFXI Oswald X.png]] | |||
|triangle=[[Datei:KOFXI Oswald T.png]] | |||
|circle=[[Datei:KOFXI Oswald C.png]] | |||
|R1+square=[[Datei:KOFXI Oswald R1S.png]] | |||
|R1+cross=[[Datei:KOFXI Oswald R1X.png]] | |||
|R1+triangle=[[Datei:KOFXI Oswald R1T.png]] | |||
|R1+circle=[[Datei:KOFXI Oswald R1C.png]] | |||
|L1+square=[[Datei:KOFXI Oswald L1S.png]] | |||
|L1+cross=[[Datei:KOFXI Oswald L1X.png]] | |||
|L1+triangle=[[Datei:KOFXI Oswald L1T.png]] | |||
|L1+circle=[[Datei:KOFXI Oswald L1C.png]] | |||
}} | |||
== Frame Data == | |||
{| class="wikitable sortable mw-collapsible mw-collapsed" cellspacing="1" style="text-align: center; color:black;border: 1px solid #B5B5B5" | |||
|+Short List | |||
|- | |||
! Move !! S!! A!! Hit!! Blk!! Dmg!! Stn!! G-Dmg!! Gauge!! J-Type!! Air!! C-Air!! Note | |||
|- | |||
| '''Throw''' || 1 || 1 ||<span style="color: blue;"> +41 </span>|| /|| 16|| 0|| 0|| 0|| /|| /|| /|| | |||
|- | |||
| '''5A(c)''' || 5 || 2 || +0||<span style="color: red;"> -1 </span>|| 4|| 7|| 7|| 8||F+L|| JA||F1-14 F|| | |||
|- | |||
| '''5A(f)'''|| 5 || 2 || +0|| <span style="color: red;"> -1 </span>|| 4|| 9|| 9|| 8||F+L|| JA||F1-14 F|| | |||
|- | |||
| '''5B(c)'''|| 7|| 6|| <span style="color: blue;"> +4 </span>||<span style="color: blue;"> +3 </span>|| 5|| 9|| 7|| 8||F+L|| JA||F1-14 F|| | |||
|- | |||
| '''5B(f)'''|| 7|| 6||<span style="color: red;"> -1 </span>||<span style="color: red;"> -2 </span>|| 5|| 9|| 9|| 8||F+L|| JA||F1-14 F|| | |||
|- | |||
| '''5C(c)'''|| 8|| 8||<span style="color: red;"> -2 </span>||<span style="color: red;"> -3 </span>|| 9|| 14|| 13|| 14||F+L|| JA||F1-14 F|| | |||
|- | |||
| '''5C(f)'''|| 8|| 6||<span style="color: red;"> -5 </span>||<span style="color: red;"> -6 </span>|| 11|| 17|| 14|| 14||F+L|| JA||F1-14 F|| | |||
|- | |||
| '''5D(c)'''|| 5|| 8||<span style="color: red;"> -3 </span>||<span style="color: red;"> -4 </span>|| 9|| 17|| 15|| 14||F+L|| JA||F1-14 F|| | |||
|- | |||
| '''5D(f)'''|| 12|| 4||<span style="color: red;"> -10 </span>||<span style="color: red;"> -11 </span>|| 11|| 20|| 17|| 14||F+L|| JA||F1-14 F|| | |||
|- | |||
| '''5E'''|| 14|| 8|| KD||<span style="color: red;"> -25 </span>|| 16|| 12|| 14|| 16||F+L||N||F1-8 F, F9-28 L||F4-35 invul on feet. F36-59 recovery. | |||
|- | |||
| '''GC'''|| 9|| 8|| KD||<span style="color: red;"> -20 </span>|| ~4|| 0|| 0|| 0||?||N||F1-8 F, F9-28 L||F1-16 invul (until end of active time). Airborne/no hitbox on feet F17-28. 49F total duration. | |||
|- | |||
| '''2A'''|| 7|| 5||<span style="color: blue;"> +4 </span>||<span style="color: blue;"> +3 </span>|| 4|| 9|| 9|| 8||F+L||JA||F1-14 F|| | |||
|- | |||
| '''2B'''|| 5|| 6||<span style="color: blue;"> +4 </span>||<span style="color: blue;"> +3 </span>|| 4|| 9|| 7|| 8||F+L||JA||F1-14 F|| | |||
|- | |||
| '''2C'''|| 13|| 8||<span style="color: red;"> -13 </span>||<span style="color: red;"> -14 </span>|| 11|| 14|| 13|| 14||F+L||JA||F1-14 F|| | |||
|- | |||
| '''2D(1)'''|| 9|| 8||<span style="color: red;"> -33 </span>||<span style="color: red;"> -34 </span>|| 5|| 6|| 7|| 14||F+L||JA||F1-14 F||Conq. Guide combines dmg+stun+g-dmg, but not gauge gain | |||
|- | |||
| '''2D(2)'''|| 27*|| 8|| KD||<span style="color: red;"> -15 </span>|| 5|| 6|| 7|| 14||F+L||JA||JA||*If first hit whiffs. | |||
|- | |||
| '''6A''' || 39|| 5||<span style="color: blue;"> +4</span>||<span style="color: blue;"> +3 </span>|| 6|| 0|| 0|| 12|| F+L||JA||F1-8 F, F9-20 L|| | |||
|- | |||
| '''6A(can)''' || 16|| 4||<span style="color: blue;"> +4 </span>||<span style="color: blue;"> +3 </span>|| 6|| 0|| 0|| 12|| ?||JA||F1-8 F, F9-20 L|| | |||
|- | |||
| '''3A''' || 10|| 9|| KD||<span style="color: red;"> -16 </span>|| 12|| 8|| 7|| 14||F+L||F1-8 F,<br>F9-end L||F1-8 F,<br>F9-end L|| | |||
|- | |||
| '''3A(can)''' || 7|| 2||<span style="color: red;"> -5 </span>||<span style="color: red;"> -6 </span>|| 8|| 9|| 7|| 7||F+L||F1-8 F,<br>F9-end L||F1-8 F,<br>F9-end L|| | |||
|- | |||
| '''Saving Shift'''|| ? || n* || / || / ||?|| 0|| /|| 0||?||N||F1-8 F, F9-28 L||Active until landing. 9F/10F recovery (hit/whiff). | |||
|- | |||
| '''small A''' || 7|| 6|| /|| /|| 5|| 8|| 8|| 8||F+L||JA||F1-14 F||Identical to j.A except stun & guard dmg | |||
|- | |||
| '''j.A''' || 7|| 6|| /|| /|| 5|| 9|| 9|| 8||F+L||JA||F1-14 F|| | |||
|- | |||
| '''small B''' || 7|| 12|| /|| /|| 6|| 8|| 8|| 8||F+L||JA||F1-14 F|| | |||
|- | |||
| '''j.B''' || 5|| 12|| /|| /|| 6|| 9|| 9|| 8||F+L||JA||F1-14 F|| | |||
|- | |||
| '''j.C''' || 12|| 6|| /|| /|| 10|| 17|| 14|| 14||F+L||JA||F1-14 F|| | |||
|- | |||
| '''j.D''' || 11|| 2|| /|| /|| 10|| 17|| 15|| 14||F+L||JA||F1-14 F|| | |||
|- | |||
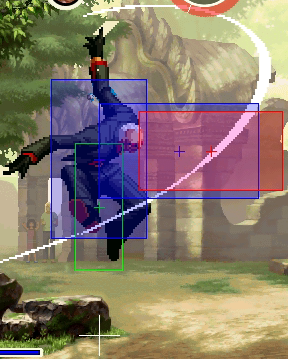
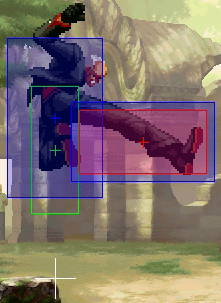
| '''j.E''' || 14|| 8|| KD|| /|| 14|| 10|| 10|| 16||F+L||N||F1-8 F,<br>F9-28 L|| | |||
|- | |||
| '''214A(1)''' || 5|| 1|| /|| /|| || || || ||F+L||F1-8 F,<br>F9-end L||F1-8 F,<br>F9-end L||Smaller hitbox than 214C(1). | |||
|- | |||
| '''214A(2)''' || 13|| 4||<span style="color: red;"> -16 </span>||<span style="color: red;"> -17 </span>|| 11|| 11|| 10|| 4+6/8||F+L||F1-8 F,<br>F9-end L||F1-8 F,<br>F9-end L||Runs slower than 214C(2). Dmg,Stun etc. data is hit 1+2. | |||
|- | |||
| '''214C(1)''' || 5|| 1|| /|| /|| || || || ||F+L||F1-8 F,<br>F9-end L||F1-8 F,<br>F9-end L||Bigger hitbox than 214A(1). | |||
|- | |||
| '''214C(2)''' || 14|| 5||<span style="color: red;"> -23 </span>||<span style="color: red;"> -24 </span>|| 12|| 11|| 10|| 5+4/6||F+L||F1-8 F,<br>F9-end L||F1-8 F,<br>F9-end L||Runs faster than 214A(2). Dmg,Stun etc. data is hit 1+2. | |||
|- | |||
| '''214P(2)>214A''' || 6|| 4|| KD||<span style="color: red;"> -19 </span>|| 5|| 5|| 5|| 6/4||F+L||JA||F1-8 F,<br>F9-28 L||Startup starts after 214P(2) active time. | |||
|- | |||
| '''214P(2)>214C''' || 8|| 5|| KD||<span style="color: red;"> -20 </span>|| 6|| 5|| 5|| 6/4||F+L||JA||F1-8 F,<br>F9-28 L||Startup starts after 214P(2) active time. | |||
|- | |||
| '''Derived 214A''' || 12*|| 4|| KD||<span style="color: red;"> -17 </span>|| 6|| 5|| 5|| 4+6/4||F+L||F1-8 F,<br>F9-end L||F1-8 F,<br>F9-end L||Has only 1 hit. *=fastest possible startup. | |||
|- | |||
| '''Derived 214C''' || 13*|| 5|| KD||<span style="color: red;"> -24 </span>|| 8|| 5|| 5|| 5+6/4||F+L||F1-8 F,<br>F9-end L||F1-8 F,<br>F9-end L||Has only 1 hit. *=fastest possible startup. | |||
|- | |||
| '''236A''' || 11|| 5||<span style="color: red;"> -19 </span>||<span style="color: red;"> -20 </span>|| 8|| 8|| 10|| 4/8||F+L||F1-8 F,<br>F9-end L||F1-8 F,<br>F9-end L||Super Cancel. | |||
|- | |||
| '''236C''' || 13|| 6||<span style="color: red;"> -26 </span>||<span style="color: red;"> -27 </span>|| 8|| 8|| 10|| 4/8||F+L||F1-8 F,<br>F9-end L||F1-8 F,<br>F9-end L||Super Cancel. | |||
|- | |||
| '''236P>236A''' || 6|| 4|| KD||<span style="color: red;"> -22 </span>|| 6|| 3|| 5|| 6/4||F+L||JA||F1-8 F,<br>F9-28 L||Followup to 236P. Same hitbox as 236P>236C. | |||
|- | |||
| '''236P>236C''' || 8|| 3|| KD||<span style="color: red;"> -18 </span>|| 7|| 3|| 5|| 6/4||F+L||JA||F1-8 F,<br>F9-28 L||Followup to 236P. Same hitbox as 236P>236A. | |||
|- | |||
| '''Derived 236A''' || 8|| 4|| KD||<span style="color: red;"> -12 </span>|| || || || ||F+L||F1-8 F,<br>F9-28 L||F1-8 F,<br>F9-end L||236A as a Rekka-Followup. Same Hitbox as 236P. | |||
|- | |||
| '''Derived 236C''' || 11|| 6|| KD||<span style="color: red;"> -27 </span>|| || || || ||F+L||F1-8 F,<br>F9-28 L||F1-8 F,<br>F9-end L||236C as a Rekka-Followup. Same Hitbox as 236P. | |||
|- | |||
| '''214B''' || 26|| 4||<span style="color: red;"> -8 </span>||<span style="color: red;"> -9 </span>|| 9|| 12|| 13|| 4/8||F+L||F1-8 F,<br>F9-end L||F1-8 F,<br>F9-end L||Overhead. Airborne from F13. | |||
|- | |||
| '''214D''' || 32|| 5||<span style="color: red;"> -14 </span>||<span style="color: red;"> -15 </span>|| 10|| 13|| 14|| 4/8||F+L||F1-8 F,<br>F9-end L||F1-8 F,<br>F9-end L||Overhead. Airborne from F16. Flies further than 214B. | |||
|- | |||
| '''Derived 214B''' || 26|| 4|| KD||<span style="color: red;"> -12 </span>|| || || || ||F+L||JA||JA||Airborne from F13.Hard Knockdown. Not an overhead (only overhead when used as first or third hit). | |||
|- | |||
| '''Derived 214D''' || 32|| 5|| KD||<span style="color: red;"> -18 </span>|| || || || ||F+L||JA||JA||Airborne from F16. Hard Knockdown. Not an overhead (only overhead when used as first or third hit). Flies further than 214B. | |||
|- | |||
| '''236B''' || 6|| 4||<span style="color: red;"> -31 </span>||<span style="color: red;"> -32 </span>|| 6|| 10|| 12|| 4/8||F+L||F1-8 F,<br>F9-end L||F1-8 F,<br>F9-end L||Negates projectiles for 15F. F10-29 invul on feet. | |||
|- | |||
| '''236D''' || 10|| 4|| KD||<span style="color: red;"> -36 </span>|| 8|| 10|| 13|| 4/8||F+L||JA||F1-8 F,<br>F9-28 L||Moves backwards. Negates projectiles for 15F. F14-33 invul on feet. | |||
|- | |||
| '''Derived 236B''' || 10|| 4|| KD||<span style="color: red;"> -75 </span>|| || || || ||F+L||F1-13 F,<br>F14-end L*||F1-8 F,<br>F9-end L*||Causes wall bounce (not on trade). Negates projectiles for 15F. F14-40 invul on feet. *=both counted after wall bounce hit stop. | |||
|- | |||
| '''Derived 236D''' || 14|| 5|| KD||<span style="color: red;"> -109 </span>|| || || || ||L||F1-13 F,<br>F14-end L*||F1-8 F,<br>F9-end L*||Causes wall bounce (not on trade). Moves backwards. Negates projectiles for 15F. F19-44 invul on feet. *=both counted after wall bounce hit stop. | |||
|- | |||
| '''236K>236E''' || 4|| 14+1||<span style="color: red;"> -3 </span>||<span style="color: red;"> -113 </span>|| 39|| 0|| 0|| 7/13||JA||/||/||Ace. No combo damage scaling. Needs perfect timing or specific setup. | |||
|- | |||
| '''623A''' || 58/63*|| 13||<span style="color: blue;"> + </span>||<span style="color: blue;"> + </span>|| 8|| 0|| 1|| 0/18||F+L||F1-8 F,<br>F9-28 L||F1-8 F,<br>F9-end L||Duration 45F (Oswald can move again on F46). *=F57=active over Oswald, F63 hits vs standing Kyo. | |||
|- | |||
| '''623B''' || 52/57*|| 13||<span style="color: blue;"> + </span>||<span style="color: blue;"> + </span>|| 8|| 0|| 1|| 0/18||F+L||F1-8 F,<br>F9-28 L||F1-8 F,<br>F9-end L||Duration 46F (Oswald can move again on F47). *F52=active over Oswald, F57 hits vs standing Kyo. | |||
|- | |||
| '''623C''' || 55/60*|| 14||<span style="color: blue;"> + </span>||<span style="color: blue;"> + </span>|| 8|| 0|| 1|| 0/18||F+L||F1-8 F,<br>F9-28 L||F1-8 F,<br>F9-end L||Duration 53F (Oswald can move again on F54). *F55=active over Oswald, F60 hits vs standing Kyo. | |||
|- | |||
| '''623D''' || 49/56*|| 17||<span style="color: blue;"> + </span>||<span style="color: blue;"> + </span>|| 8|| 0|| 1|| 4/18||F+L||F1-8 F,<br>F9-28 L||F1-8 F,<br>F9-end L||Duration 53F (Oswald can move again on F54). *F55=active over Oswald, F56 hits vs standing Kyo. | |||
|- | |- | ||
| | | '''421K''' || 4|| 17|| /|| /|| || || || ||/||/||/||F1-8 only invul on feet. B teleports behind, D behind & in the air. | ||
| | |||
| | |||
| | |||
|- | |- | ||
| | | '''2363214A''' || 3|| 25+1|| KD||<span style="color: red;"> -9 </span>|| 33|| 0|| 0|| 0||F+L||JA*||F1-8 F,<br>F9-28 L*||F1 invul. Button can be held to spin in place & reflect projectiles. *=if first hit trades / followup misses | ||
| | |||
| | |||
| | |||
| | |||
| | |||
| | |||
|- | |- | ||
| | | '''2363214C''' || 11|| 23+1|| KD||<span style="color: red;"> -9 </span>|| 37|| 0|| 0|| 0||F+L||F1-8 F,<br>F9-28 L*||F1-8 F,<br>F9-end L*||F1 invul. Button can be held to spin in place & reflect projectiles. *=if first hit trades / followup misses | ||
| | |||
| | |||
| | |||
|- | |- | ||
| | | '''63214,63214P''' || 9|| 10|| KD||<span style="color: red;">-30/-28</span>*|| 33|| 0|| 0|| 0||F+L||JA||JA||Negates projectiles. F1-17 invul. A-Version F18-79 counterhit state + F80-99 regular recovery. C-Version F18-77 counterhit-state + F78-97 regular recovery. *=A/C Version. | ||
| | |||
| | |||
| | |||
| | |||
|- | |- | ||
| | | '''[4],646E''' || 2|| 36|| KD||<span style="color: red;"> -27 </span>|| 57|| 0|| 0|| 0||JA||/||/||1F invul. F2-37 invul on legs. Has juggle-anywhere property. 40F charge time. | ||
| | |||
| | |||
| | |||
|- | |- | ||
|} | |} | ||
{| class="wikitable sortable mw-collapsible mw-collapsed" cellspacing="1" style="text-align: center; color:black;border: 1px solid #B5B5B5" | {| class="wikitable sortable mw-collapsible mw-collapsed" cellspacing="1" style="text-align: center; color:black;border: 1px solid #B5B5B5" | ||
|+ | |+ Standing Attacks | ||
! style="width:100px;background-color:#D9D9D9;" | | ! style="width:100px;background-color:#D9D9D9;" | Attack | ||
! style="width:100px;background-color:#D9D9D9;" | Hitbox | ! style="width:100px;background-color:#D9D9D9;" | Hitbox | ||
! style="width:60px;background-color:#FFd800;" | Startup | ! style="width:60px;background-color:#FFd800;" | Startup | ||
! style="width:60px;background-color:#FFd800;" | Active | ! style="width:60px;background-color:#FFd800;" | Active | ||
! style="width:60px;background-color:#FFd800;" | | ! style="width:60px;background-color:#FFd800;" | Hit | ||
! style="width:60px;background-color:#FFd800;" | Guard | |||
! style="width:60px;background-color:#FFd800;" | Cancel | ! style="width:60px;background-color:#FFd800;" | Cancel | ||
! style=" | ! style="background-color:#FFd800;" | Note | ||
|- | |- | ||
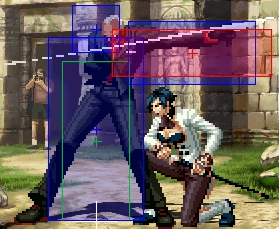
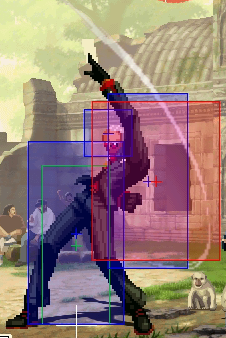
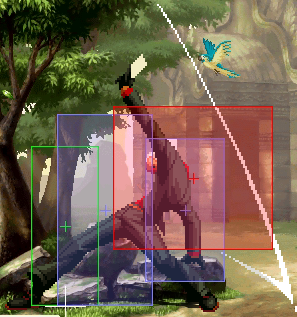
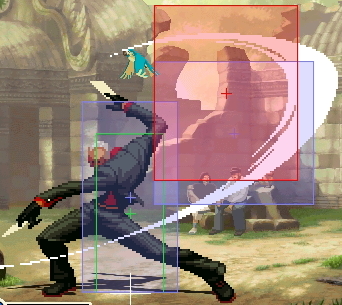
| style="background-color:#F9F9F9;" |'''5A(c)''' | | style="background-color:#F9F9F9;" |'''5A(c)''' | ||
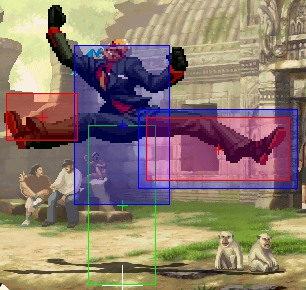
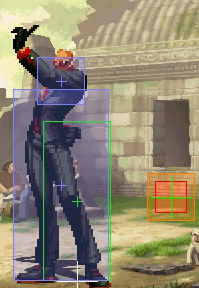
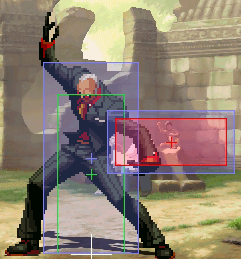
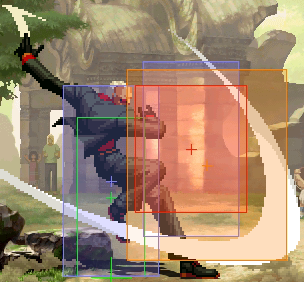
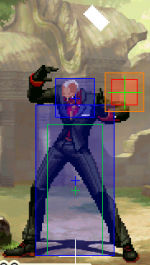
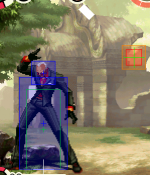
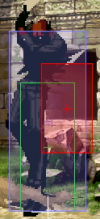
| style="background-color:#F9F9F9;" |[[Bild:kofxi_oswald_5A.png]] | | style="background-color:#F9F9F9;" |[[Bild:kofxi_oswald_5A.png]] | ||
| style="background-color:#F9F9F9;" |5 | | style="background-color:#F9F9F9;" |5 | ||
| style="background-color:#F9F9F9;" |2 | | style="background-color:#F9F9F9;" |2 | ||
| style="background-color:#F9F9F9;" |0 | |||
| style="background-color:#F9F9F9;" |-1 | | style="background-color:#F9F9F9;" |-1 | ||
| style="background-color:#F9F9F9;" |C,S | | style="background-color:#F9F9F9;" |C,S | ||
| style="background-color:#F9F9F9;" | | | style="background-color:#F9F9F9;" |good Anti-Air | ||
|- | |- | ||
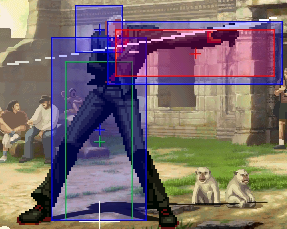
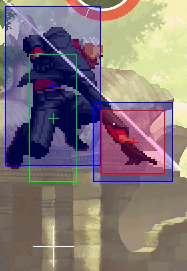
| style="background-color:#F9F9F9;" |'''5A(f)''' | | style="background-color:#F9F9F9;" |'''5A(f)''' | ||
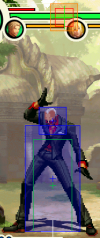
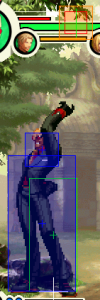
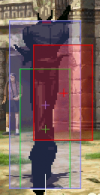
| style="background-color:#F9F9F9;" |[[Bild:kofxi_oswald_5A(f).png]] | | style="background-color:#F9F9F9;" |[[Bild:kofxi_oswald_5A(f).png]] | ||
| style="background-color:#F9F9F9;" |5 | | style="background-color:#F9F9F9;" |5 | ||
| style="background-color:#F9F9F9;" |2 | | style="background-color:#F9F9F9;" |2 | ||
| style="background-color:#F9F9F9;" |0 | |||
| style="background-color:#F9F9F9;" |-1 | | style="background-color:#F9F9F9;" |-1 | ||
| style="background-color:#F9F9F9;" |- | | style="background-color:#F9F9F9;" |- | ||
| style="background-color:#F9F9F9;" | | | style="background-color:#F9F9F9;" |Same as 5A(c), just without cancel. | ||
|- | |- | ||
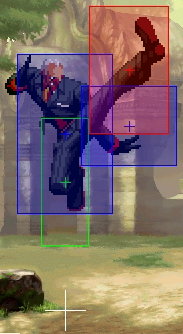
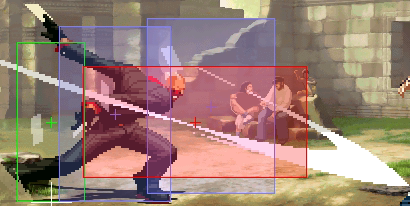
| style="background-color:#F9F9F9;" |'''5B(c)''' | | style="background-color:#F9F9F9;" |'''5B(c)''' | ||
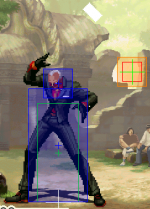
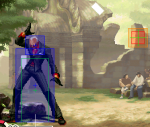
| style="background-color:#F9F9F9;" |[[Bild:kofxi_oswald_5B(c).png]] | | style="background-color:#F9F9F9;" |[[Bild:kofxi_oswald_5B(c).png]] | ||
| style="background-color:#F9F9F9;" |7 | | style="background-color:#F9F9F9;" |7 | ||
| style="background-color:#F9F9F9;" |6 | | style="background-color:#F9F9F9;" |6 | ||
| style="background-color:#F9F9F9;" |+4 | |||
| style="background-color:#F9F9F9;" |+3 | | style="background-color:#F9F9F9;" |+3 | ||
| style="background-color:#F9F9F9;" |C,S | | style="background-color:#F9F9F9;" |C,S | ||
| Zeile 103: | Zeile 215: | ||
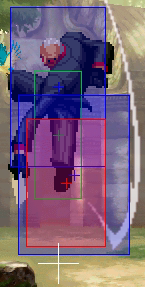
| style="background-color:#F9F9F9;" |'''5B(f)''' | | style="background-color:#F9F9F9;" |'''5B(f)''' | ||
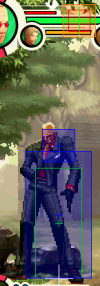
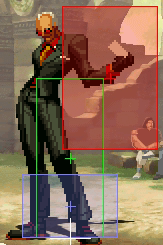
| style="background-color:#F9F9F9;" |[[Bild:kofxi_oswald_5B(f).png]] | | style="background-color:#F9F9F9;" |[[Bild:kofxi_oswald_5B(f).png]] | ||
| style="background-color:#F9F9F9;" |7 | | style="background-color:#F9F9F9;" |7 | ||
| style="background-color:#F9F9F9;" |6 | | style="background-color:#F9F9F9;" |6 | ||
| style="background-color:#F9F9F9;" |-1 | |||
| style="background-color:#F9F9F9;" |-2 | | style="background-color:#F9F9F9;" |-2 | ||
| style="background-color:#F9F9F9;" |- | | style="background-color:#F9F9F9;" |- | ||
| style="background-color:#F9F9F9;" | | | style="background-color:#F9F9F9;" |Good Anti-Air | ||
|- | |- | ||
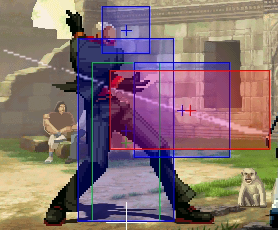
| style="background-color:#F9F9F9;" |'''5C(c)''' | | style="background-color:#F9F9F9;" |'''5C(c)''' | ||
| style="background-color:#F9F9F9;" |[[Bild:kofxi_oswald_5C(c).png]] | | style="background-color:#F9F9F9;" |[[Bild:kofxi_oswald_5C(c).png]] | ||
| style="background-color:#F9F9F9;" |8 | | style="background-color:#F9F9F9;" |8 | ||
| style="background-color:#F9F9F9;" |8 | | style="background-color:#F9F9F9;" |8 | ||
| style="background-color:#F9F9F9;" |-2 | | style="background-color:#F9F9F9;" |-2 | ||
| style="background-color:#F9F9F9;" |-3 | |||
| style="background-color:#F9F9F9;" |S | | style="background-color:#F9F9F9;" |S | ||
| style="background-color:#F9F9F9;" | | | style="background-color:#F9F9F9;" |cancels into 6A. More damage than 5D(c). | ||
|- | |- | ||
| style="background-color:#F9F9F9;" |'''5C(f)''' | | style="background-color:#F9F9F9;" |'''5C(f)''' | ||
| style="background-color:#F9F9F9;" |[[Bild:kofxi_oswald_5C(f).png]] | | style="background-color:#F9F9F9;" |[[Bild:kofxi_oswald_5C(f).png]] | ||
| style="background-color:#F9F9F9;" |8 | | style="background-color:#F9F9F9;" |8 | ||
| style="background-color:#F9F9F9;" |6 | | style="background-color:#F9F9F9;" |6 | ||
| style="background-color:#F9F9F9;" |-5 | | style="background-color:#F9F9F9;" |-5 | ||
| style="background-color:#F9F9F9;" |-6 | |||
| style="background-color:#F9F9F9;" |- | | style="background-color:#F9F9F9;" |- | ||
| style="background-color:#F9F9F9;" | | | style="background-color:#F9F9F9;" |best Poke | ||
|- | |- | ||
| style="background-color:#F9F9F9;" |'''5D(c)''' | | style="background-color:#F9F9F9;" |'''5D(c)''' | ||
| style="background-color:#F9F9F9;" |[[Bild:kofxi_oswald_5D(c).png]] | | style="background-color:#F9F9F9;" |[[Bild:kofxi_oswald_5D(c).png]] | ||
| style="background-color:#F9F9F9;" |5 | | style="background-color:#F9F9F9;" |5 | ||
| style="background-color:#F9F9F9;" |8 | | style="background-color:#F9F9F9;" |8 | ||
| style="background-color:#F9F9F9;" |- | | style="background-color:#F9F9F9;" |-3 | ||
| style="background-color:#F9F9F9;" |-4 | |||
| style="background-color:#F9F9F9;" |S | | style="background-color:#F9F9F9;" |S | ||
| style="background-color:#F9F9F9;" | | | style="background-color:#F9F9F9;" |Less pushback & faster than 5C(c) | ||
|- | |- | ||
| style="background-color:#F9F9F9;" |'''5D(f)''' | | style="background-color:#F9F9F9;" |'''5D(f)''' | ||
| style="background-color:#F9F9F9;" |[[Bild:kofxi_oswald_5D(f).png]] | | style="background-color:#F9F9F9;" |[[Bild:kofxi_oswald_5D(f).png]] | ||
| style="background-color:#F9F9F9;" |12 | | style="background-color:#F9F9F9;" |12 | ||
| style="background-color:#F9F9F9;" |4 | | style="background-color:#F9F9F9;" |4 | ||
| style="background-color:#F9F9F9;" |-10 | | style="background-color:#F9F9F9;" |-10 | ||
| style="background-color:#F9F9F9;" |-11 | |||
| style="background-color:#F9F9F9;" |- | | style="background-color:#F9F9F9;" |- | ||
| style="background-color:#F9F9F9;" | | | style="background-color:#F9F9F9;" | | ||
|- | |- | ||
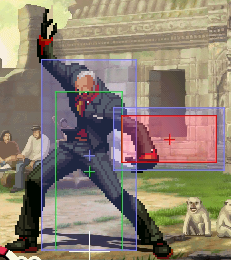
| style="background-color:#F9F9F9;" |'''5E''' | | style="background-color:#F9F9F9;" |'''5E''' | ||
| style="background-color:#F9F9F9;" |[[Bild:kofxi_oswald_5E.png]] | | style="background-color:#F9F9F9;" |[[Bild:kofxi_oswald_5E.png]] | ||
| style="background-color:#F9F9F9;" |14 | | style="background-color:#F9F9F9;" |14 | ||
| style="background-color:#F9F9F9;" |8 | | style="background-color:#F9F9F9;" |8 | ||
| style="background-color:#F9F9F9;" |- | | style="background-color:#F9F9F9;" |KD | ||
| style="background-color:#F9F9F9;" |-25 | |||
| style="background-color:#F9F9F9;" |S | | style="background-color:#F9F9F9;" |S | ||
| style="background-color:#F9F9F9;" | | | style="background-color:#F9F9F9;" |F4-35 invul on feet. F36-59 recovery. | ||
|- | |||
| style="background-color:#F9F9F9;" |'''GC''' | |||
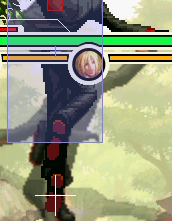
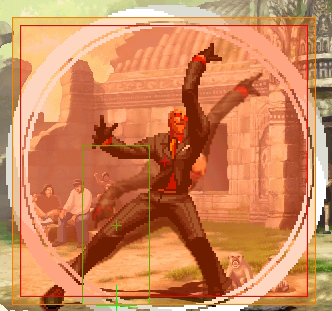
| style="background-color:#F9F9F9;" |[[Bild:kofxi_oswald_GC.png]][[Bild:kofxi_oswald_GC_gif.gif]] | |||
| style="background-color:#F9F9F9;" |9 | |||
| style="background-color:#F9F9F9;" |8 | |||
| style="background-color:#F9F9F9;" |KD | |||
| style="background-color:#F9F9F9;" |-20 | |||
| style="background-color:#F9F9F9;" |- | |||
| style="background-color:#F9F9F9;" |F1-16 invul (until end of active time). Airborne/no hitbox on feet F17-28. 49F total duration. | |||
|- | |- | ||
| style="background-color:#F9F9F9;" |'''6A''' | | style="background-color:#F9F9F9;" |'''6A''' | ||
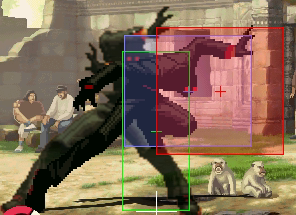
| style="background-color:#F9F9F9;" |[[Bild:kofxi_oswald_6A.png]] | | style="background-color:#F9F9F9;" |[[Bild:kofxi_oswald_6A.png]] | ||
| style="background-color:#F9F9F9;" |39 | | style="background-color:#F9F9F9;" |39 | ||
| style="background-color:#F9F9F9;" |5 | | style="background-color:#F9F9F9;" |5 | ||
| style="background-color:#F9F9F9;" |+4 | |||
| style="background-color:#F9F9F9;" |+3 | | style="background-color:#F9F9F9;" |+3 | ||
| style="background-color:#F9F9F9;" |- | | style="background-color:#F9F9F9;" |- | ||
| style="background-color:#F9F9F9;" | | | style="background-color:#F9F9F9;" |Locked after use until card disappears. Deals 0 Stun. | ||
|- | |- | ||
| style="background-color:#F9F9F9;" |'''6A(cancel)''' | | style="background-color:#F9F9F9;" |'''6A(cancel)''' | ||
| style="background-color:#F9F9F9;" |[[Bild:kofxi_oswald_6A(cancel).png]] | | style="background-color:#F9F9F9;" |[[Bild:kofxi_oswald_6A(cancel).png]] | ||
| style="background-color:#F9F9F9;" |16 | | style="background-color:#F9F9F9;" |16 | ||
| style="background-color:#F9F9F9;" |4 | | style="background-color:#F9F9F9;" |4 | ||
| style="background-color:#F9F9F9;" |+4 | |||
| style="background-color:#F9F9F9;" |+3 | | style="background-color:#F9F9F9;" |+3 | ||
| style="background-color:#F9F9F9;" |S | | style="background-color:#F9F9F9;" |S | ||
| style="background-color:#F9F9F9;" | | | style="background-color:#F9F9F9;" |Only combos from hard attacks, eg. 5C(c) or 2D(1). Deals 0 Stun. | ||
|- | |||
| style="background-color:#F9F9F9;" |'''Saving Shift''' | |||
| style="background-color:#F9F9F9;" |[[Bild:kofxi_oswald_saving.png]] | |||
| style="background-color:#F9F9F9;" |? | |||
| style="background-color:#F9F9F9;" |n* | |||
| style="background-color:#F9F9F9;" |/ | |||
| style="background-color:#F9F9F9;" |/ | |||
| style="background-color:#F9F9F9;" |/ | |||
| style="background-color:#F9F9F9;" |Active until landing. 9F/10F recovery (hit/whiff). | |||
|- | |- | ||
|} | |} | ||
{| class="wikitable sortable mw-collapsible mw-collapsed" cellspacing="1" style="text-align: center; color:black;border: 1px solid #B5B5B5" | {| class="wikitable sortable mw-collapsible mw-collapsed" cellspacing="1" style="text-align: center; color:black;border: 1px solid #B5B5B5" | ||
|+ | |+ Crouching Attacks | ||
! style="width:100px;background-color:#D9D9D9;" | | ! style="width:100px;background-color:#D9D9D9;" | Attack | ||
! style="width:100px;background-color:#D9D9D9;" | Hitbox | ! style="width:100px;background-color:#D9D9D9;" | Hitbox | ||
! style="width:60px;background-color:#FFd800;" | Startup | ! style="width:60px;background-color:#FFd800;" | Startup | ||
! style="width:60px;background-color:#FFd800;" | Active | ! style="width:60px;background-color:#FFd800;" | Active | ||
! style="width:60px;background-color:#FFd800;" | | ! style="width:60px;background-color:#FFd800;" | Hit | ||
! style="width:60px;background-color:#FFd800;" | Guard | |||
! style="width:60px;background-color:#FFd800;" | Cancel | ! style="width:60px;background-color:#FFd800;" | Cancel | ||
! style=" | ! style="background-color:#FFd800;" | Note | ||
|- | |- | ||
| style="background-color:#F9F9F9;" |'''2A''' | | style="background-color:#F9F9F9;" |'''2A''' | ||
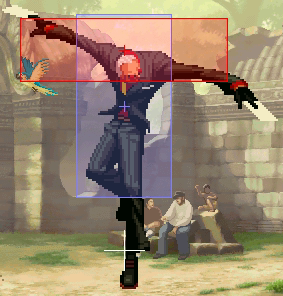
| style="background-color:#F9F9F9;" |[[Bild:kofxi_oswald_2A.png]] | | style="background-color:#F9F9F9;" |[[Bild:kofxi_oswald_2A.png]] | ||
| style="background-color:#F9F9F9;" |7 | | style="background-color:#F9F9F9;" |7 | ||
| style="background-color:#F9F9F9;" |5 | | style="background-color:#F9F9F9;" |5 | ||
| style="background-color:#F9F9F9;" |+4 | |||
| style="background-color:#F9F9F9;" |+3 | | style="background-color:#F9F9F9;" |+3 | ||
| style="background-color:#F9F9F9;" |C,S | | style="background-color:#F9F9F9;" |C,S | ||
| Zeile 197: | Zeile 327: | ||
| style="background-color:#F9F9F9;" |'''2B''' | | style="background-color:#F9F9F9;" |'''2B''' | ||
| style="background-color:#F9F9F9;" |[[Bild:kofxi_oswald_2B.png]] | | style="background-color:#F9F9F9;" |[[Bild:kofxi_oswald_2B.png]] | ||
| style="background-color:#F9F9F9;" |5 | | style="background-color:#F9F9F9;" |5 | ||
| style="background-color:#F9F9F9;" |6 | | style="background-color:#F9F9F9;" |6 | ||
| style="background-color:#F9F9F9;" |+4 | |||
| style="background-color:#F9F9F9;" |+3 | | style="background-color:#F9F9F9;" |+3 | ||
| style="background-color:#F9F9F9;" |C | | style="background-color:#F9F9F9;" |C | ||
| style="background-color:#F9F9F9;" | | | style="background-color:#F9F9F9;" |Low profile. | ||
|- | |- | ||
| style="background-color:#F9F9F9;" |'''2C''' | | style="background-color:#F9F9F9;" |'''2C''' | ||
| style="background-color:#F9F9F9;" |[[Bild:kofxi_oswald_2C.png]] | | style="background-color:#F9F9F9;" |[[Bild:kofxi_oswald_2C.png]] | ||
| style="background-color:#F9F9F9;" |13 | | style="background-color:#F9F9F9;" |13 | ||
| style="background-color:#F9F9F9;" |8 | | style="background-color:#F9F9F9;" |8 | ||
| style="background-color:#F9F9F9;" |-13 | | style="background-color:#F9F9F9;" |-13 | ||
| style="background-color:#F9F9F9;" |-14 | |||
| style="background-color:#F9F9F9;" |S | | style="background-color:#F9F9F9;" |S | ||
| style="background-color:#F9F9F9;" | | | style="background-color:#F9F9F9;" |Bad normal | ||
|- | |- | ||
| style="background-color:#F9F9F9;" |'''2D(1)''' | | style="background-color:#F9F9F9;" |'''2D(1)''' | ||
| style="background-color:#F9F9F9;" |[[Bild:kofxi_oswald_2D(1).png]] | | style="background-color:#F9F9F9;" |[[Bild:kofxi_oswald_2D(1).png]] | ||
| style="background-color:#F9F9F9;" |9 | | style="background-color:#F9F9F9;" |9 | ||
| style="background-color:#F9F9F9;" |8 | | style="background-color:#F9F9F9;" |8 | ||
| style="background-color:#F9F9F9;" | | | style="background-color:#F9F9F9;" |-33 | ||
| style="background-color:#F9F9F9;" |-34 | |||
| style="background-color:#F9F9F9;" |S | | style="background-color:#F9F9F9;" |S | ||
| style="background-color:#F9F9F9;" | | | style="background-color:#F9F9F9;" |Hits low. cancels into specials & 6A. | ||
|- | |- | ||
| style="background-color:#F9F9F9;" |'''2D(2)''' | | style="background-color:#F9F9F9;" |'''2D(2)''' | ||
| style="background-color:#F9F9F9;" |[[Bild:kofxi_oswald_2D(2).png]] | | style="background-color:#F9F9F9;" |[[Bild:kofxi_oswald_2D(2).png]] | ||
| style="background-color:#F9F9F9;" | | | style="background-color:#F9F9F9;" |27* | ||
| style="background-color:#F9F9F9;" |8 | | style="background-color:#F9F9F9;" |8 | ||
| style="background-color:#F9F9F9;" |KD | |||
| style="background-color:#F9F9F9;" |-15 | | style="background-color:#F9F9F9;" |-15 | ||
| style="background-color:#F9F9F9;" |- | | style="background-color:#F9F9F9;" |- | ||
| style="background-color:#F9F9F9;" | | | style="background-color:#F9F9F9;" |Hits low. Knockdown. *=if 2D(1) whiffs | ||
|- | |- | ||
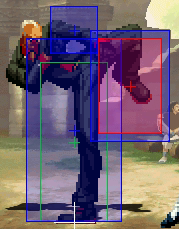
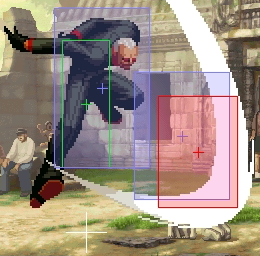
| style="background-color:#F9F9F9;" |'''3A''' | | style="background-color:#F9F9F9;" |'''3A''' | ||
| style="background-color:#F9F9F9;" |[[Bild:kofxi_oswald_3A.png]] | | style="background-color:#F9F9F9;" |[[Bild:kofxi_oswald_3A.png]] | ||
| style="background-color:#F9F9F9;" |10 | | style="background-color:#F9F9F9;" |10 | ||
| style="background-color:#F9F9F9;" |9 | | style="background-color:#F9F9F9;" |9 | ||
| style="background-color:#F9F9F9;" |KD | |||
| style="background-color:#F9F9F9;" |-16 | | style="background-color:#F9F9F9;" |-16 | ||
| style="background-color:#F9F9F9;" |S | | style="background-color:#F9F9F9;" |S | ||
| style="background-color:#F9F9F9;" | | | style="background-color:#F9F9F9;" |Juggles. Launches. Special Cancel. | ||
|- | |- | ||
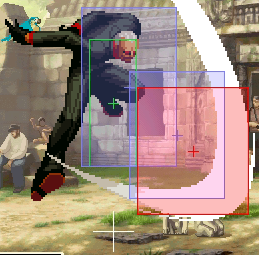
| style="background-color:#F9F9F9;" |'''3A (cancel)''' | | style="background-color:#F9F9F9;" |'''3A (cancel)''' | ||
| style="background-color:#F9F9F9;" |[[Bild:kofxi_oswald_3Ac.png]] | | style="background-color:#F9F9F9;" |[[Bild:kofxi_oswald_3Ac.png]] | ||
| style="background-color:#F9F9F9;" |7 | | style="background-color:#F9F9F9;" |7 | ||
| style="background-color:#F9F9F9;" |2 | | style="background-color:#F9F9F9;" |2 | ||
| style="background-color:#F9F9F9;" |-5 | |||
| style="background-color:#F9F9F9;" |-6 | | style="background-color:#F9F9F9;" |-6 | ||
| style="background-color:#F9F9F9;" |S | | style="background-color:#F9F9F9;" |S | ||
| style="background-color:#F9F9F9;" | | | style="background-color:#F9F9F9;" |Combos even from light attacks. No Launch. | ||
|- | |- | ||
|} | |} | ||
{| class="wikitable sortable mw-collapsible mw-collapsed" cellspacing="1" style="text-align: center; color:black;border: 1px solid #B5B5B5" | {| class="wikitable sortable mw-collapsible mw-collapsed" cellspacing="1" style="text-align: center; color:black;border: 1px solid #B5B5B5" | ||
|+ | |+ Jump Attacks | ||
! style="width:100px;background-color:#D9D9D9;" | | ! style="width:100px;background-color:#D9D9D9;" | Attack | ||
! style="width:100px;background-color:#D9D9D9;" | Hitbox | ! style="width:100px;background-color:#D9D9D9;" | Hitbox | ||
! style="width:60px;background-color:#FFd800;" | Startup | ! style="width:60px;background-color:#FFd800;" | Startup | ||
! style="width:60px;background-color:#FFd800;" | Active | ! style="width:60px;background-color:#FFd800;" | Active | ||
! style=" | ! style="background-color:#FFd800;" | Note | ||
|- | |- | ||
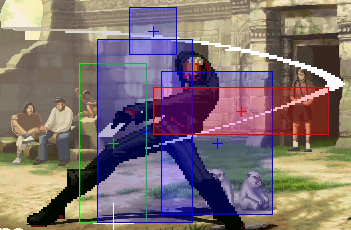
| style="background-color:#F9F9F9;" |'''j.A''' | | style="background-color:#F9F9F9;" |'''j.A''' | ||
| style="background-color:#F9F9F9;" |[[Bild:kofxi_oswald_j.A.png]] | | style="background-color:#F9F9F9;" |[[Bild:kofxi_oswald_j.A.png]] | ||
| style="background-color:#F9F9F9;" |7 | | style="background-color:#F9F9F9;" |7 | ||
| style="background-color:#F9F9F9;" |6 | | style="background-color:#F9F9F9;" |6 | ||
| style="background-color:#F9F9F9;" | | | style="background-color:#F9F9F9;" |Good Jump-In for Shift-ins. Can be used as instant overhead. | ||
|- | |- | ||
| style="background-color:#F9F9F9;" |'''j.B''' | | style="background-color:#F9F9F9;" |'''j.B''' | ||
| style="background-color:#F9F9F9;" |[[Bild:kofxi_oswald_j.B.png]] | | style="background-color:#F9F9F9;" |[[Bild:kofxi_oswald_j.B.png]] | ||
| style="background-color:#F9F9F9;" |5/7* | | style="background-color:#F9F9F9;" |5/7* | ||
| style="background-color:#F9F9F9;" |12 | | style="background-color:#F9F9F9;" |12 | ||
| style="background-color:#F9F9F9;" | | | style="background-color:#F9F9F9;" |Air-to-air. *5=normal jump, 7=smalljump. | ||
|- | |- | ||
| style="background-color:#F9F9F9;" |'''j.C''' | | style="background-color:#F9F9F9;" |'''j.C''' | ||
| style="background-color:#F9F9F9;" |[[Bild:kofxi_oswald_j.C.png]] | | style="background-color:#F9F9F9;" |[[Bild:kofxi_oswald_j.C.png]] | ||
| style="background-color:#F9F9F9;" |12 | | style="background-color:#F9F9F9;" |12 | ||
| style="background-color:#F9F9F9;" |6 | | style="background-color:#F9F9F9;" |6 | ||
| style="background-color:#F9F9F9;" | | | style="background-color:#F9F9F9;" |Great jump-In. Can crossup easily. | ||
|- | |- | ||
| style="background-color:#F9F9F9;" |'''j.D''' | | style="background-color:#F9F9F9;" |'''j.D''' | ||
| style="background-color:#F9F9F9;" |[[Bild:kofxi_oswald_j.D.png]] | | style="background-color:#F9F9F9;" |[[Bild:kofxi_oswald_j.D.png]] | ||
| style="background-color:#F9F9F9;" |11 | | style="background-color:#F9F9F9;" |11 | ||
| style="background-color:#F9F9F9;" |2 | | style="background-color:#F9F9F9;" |2 | ||
| Zeile 290: | Zeile 415: | ||
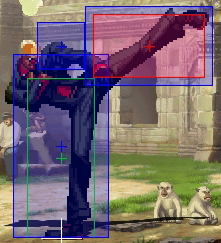
| style="background-color:#F9F9F9;" |'''j.E''' | | style="background-color:#F9F9F9;" |'''j.E''' | ||
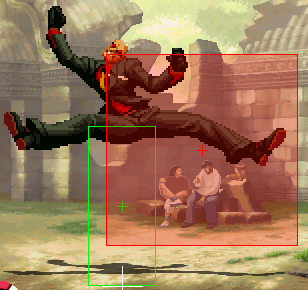
| style="background-color:#F9F9F9;" |[[Bild:kofxi_oswald_j.E.png]] | | style="background-color:#F9F9F9;" |[[Bild:kofxi_oswald_j.E.png]] | ||
| style="background-color:#F9F9F9;" |14 | | style="background-color:#F9F9F9;" |14 | ||
| style="background-color:#F9F9F9;" |8 | | style="background-color:#F9F9F9;" |8 | ||
| style="background-color:#F9F9F9;" | | | style="background-color:#F9F9F9;" |Good hitbox as a jump-in from further away. | ||
|- | |- | ||
|} | |} | ||
| Zeile 301: | Zeile 425: | ||
! style="width:100px;background-color:#D9D9D9;" | Name | ! style="width:100px;background-color:#D9D9D9;" | Name | ||
! style="width:100px;background-color:#D9D9D9;" | Hitbox | ! style="width:100px;background-color:#D9D9D9;" | Hitbox | ||
! style="width:60px;background-color:#FFd800;" | Startup | ! style="width:60px;background-color:#FFd800;" | Startup | ||
! style="width:60px;background-color:#FFd800;" | Active | ! style="width:60px;background-color:#FFd800;" | Active | ||
! style="width:60px;background-color:#FFd800;" | | ! style="width:60px;background-color:#FFd800;" | Hit | ||
! style="width: | ! style="width:60px;background-color:#FFd800;" | Guard | ||
! style="background-color:#FFd800;" | Note | |||
|- | |- | ||
| style="background-color:#F9F9F9;" |214A(1) | | style="background-color:#F9F9F9;" |214A(1) | ||
| style="background-color:#F9F9F9;" |[[Bild:kofxi_oswald_214A(1).png]] | | style="background-color:#F9F9F9;" |[[Bild:kofxi_oswald_214A(1).png]] | ||
| style="background-color:#F9F9F9;" |5 | | style="background-color:#F9F9F9;" |5 | ||
| style="background-color:#F9F9F9;" |1 | | style="background-color:#F9F9F9;" |1 | ||
| style="background-color:#F9F9F9;" | | | style="background-color:#F9F9F9;" |/ | ||
| style="background-color:#F9F9F9;" | | | style="background-color:#F9F9F9;" |/ | ||
| style="background-color:#F9F9F9;" |Different Hitbox as 214C. | |||
|- | |- | ||
| style="background-color:#F9F9F9;" |214A(2) | | style="background-color:#F9F9F9;" |214A(2) | ||
| style="background-color:#F9F9F9;" |[[Bild:kofxi_oswald_214A(3).png]] | | style="background-color:#F9F9F9;" |[[Bild:kofxi_oswald_214A(3).png]] | ||
| style="background-color:#F9F9F9;" | | | style="background-color:#F9F9F9;" |13* | ||
| style="background-color:#F9F9F9;" |4 | | style="background-color:#F9F9F9;" |4 | ||
| style="background-color:#F9F9F9;" | | | style="background-color:#F9F9F9;" |-16 | ||
| style="background-color:#F9F9F9;" | | | style="background-color:#F9F9F9;" |-17 | ||
| style="background-color:#F9F9F9;" |Activates on proximity. Runs slower than 214C. Super Cancel. Same Hitbox as 214C(2). *=if first hit whiffs + fastest activation. | |||
|- | |- | ||
| style="background-color:#F9F9F9;" |214C(1) | | style="background-color:#F9F9F9;" |214C(1) | ||
| style="background-color:#F9F9F9;" |[[Bild:kofxi_oswald_214C(1).png]] | | style="background-color:#F9F9F9;" |[[Bild:kofxi_oswald_214C(1).png]] | ||
| style="background-color:#F9F9F9;" |5 | | style="background-color:#F9F9F9;" |5 | ||
| style="background-color:#F9F9F9;" |1 | | style="background-color:#F9F9F9;" |1 | ||
| style="background-color:#F9F9F9;" | | | style="background-color:#F9F9F9;" |/ | ||
| style="background-color:#F9F9F9;" | | | style="background-color:#F9F9F9;" |/ | ||
| style="background-color:#F9F9F9;" |First Hit has more range than 214A. | |||
|- | |- | ||
| style="background-color:#F9F9F9;" |214C(2) | | style="background-color:#F9F9F9;" |214C(2) | ||
| style="background-color:#F9F9F9;" |[[Bild:kofxi_oswald_214C(3).png]] | | style="background-color:#F9F9F9;" |[[Bild:kofxi_oswald_214C(3).png]] | ||
| style="background-color:#F9F9F9;" | | | style="background-color:#F9F9F9;" |14* | ||
| style="background-color:#F9F9F9;" |5 | | style="background-color:#F9F9F9;" |5 | ||
| style="background-color:#F9F9F9;" | | | style="background-color:#F9F9F9;" |-23 | ||
| style="background-color:#F9F9F9;" | | | style="background-color:#F9F9F9;" |-24 | ||
| style="background-color:#F9F9F9;" |Activates on proximity. Runs faster than 214A. Super Cancel. Same Hitbox as 214A(2). *=if first hit whiffs + fastest activation. | |||
|- | |- | ||
| style="background-color:#F9F9F9;" |214P> | | style="background-color:#F9F9F9;" |214P>214A | ||
| style="background-color:#F9F9F9;" |[[Bild:kofxi_oswald_214P,214P.png]] | | style="background-color:#F9F9F9;" |[[Bild:kofxi_oswald_214P,214P.png]] | ||
| style="background-color:#F9F9F9;" | | | style="background-color:#F9F9F9;" |6 | ||
| style="background-color:#F9F9F9;" | | | style="background-color:#F9F9F9;" |4 | ||
| style="background-color:#F9F9F9;" |4 | | style="background-color:#F9F9F9;" |KD | ||
| style="background-color:#F9F9F9;" |- | | style="background-color:#F9F9F9;" |-19 | ||
| style="background-color:#F9F9F9;" |Followup | | style="background-color:#F9F9F9;" |Startup starts after 214P active time ends. Same hitbox as 214P>214C. | ||
|- | |||
| style="background-color:#F9F9F9;" |214P>214C | |||
| style="background-color:#F9F9F9;" |[[Bild:kofxi_oswald_214P,214P.png]] | |||
| style="background-color:#F9F9F9;" |8 | |||
| style="background-color:#F9F9F9;" |5 | |||
| style="background-color:#F9F9F9;" |KD | |||
| style="background-color:#F9F9F9;" |-20 | |||
| style="background-color:#F9F9F9;" |Startup starts after 214P active time ends. Same hitbox as 214P>214A. | |||
|- | |||
| style="background-color:#F9F9F9;" |Rekka>214A | |||
| style="background-color:#F9F9F9;" |[[Bild:kofxi_oswald_214P(followup).png]] | |||
| style="background-color:#F9F9F9;" |12* | |||
| style="background-color:#F9F9F9;" |4 | |||
| style="background-color:#F9F9F9;" |KD | |||
| style="background-color:#F9F9F9;" |-17 | |||
| style="background-color:#F9F9F9;" |214A-ender as a Rekka-Followup. Hitbox is different than 214P(2). *=fastest possible startup (runs close before activation). | |||
|- | |- | ||
| style="background-color:#F9F9F9;" |Rekka> | | style="background-color:#F9F9F9;" |Rekka>214C | ||
| style="background-color:#F9F9F9;" |[[Bild:kofxi_oswald_214P(followup).png]] | | style="background-color:#F9F9F9;" |[[Bild:kofxi_oswald_214P(followup).png]] | ||
| style="background-color:#F9F9F9;" | | | style="background-color:#F9F9F9;" |13* | ||
| style="background-color:#F9F9F9;" | | | style="background-color:#F9F9F9;" |5 | ||
| style="background-color:#F9F9F9;" | | | style="background-color:#F9F9F9;" |KD | ||
| style="background-color:#F9F9F9;" | | | style="background-color:#F9F9F9;" |-24 | ||
| style="background-color:#F9F9F9;" | | | style="background-color:#F9F9F9;" |2214A-ender as a Rekka-Followup. Hitbox is different than 214P(2). *=fastest possible startup (runs close before activation). | ||
|- | |- | ||
|} | |} | ||
| Zeile 362: | Zeile 501: | ||
! style="width:100px;background-color:#D9D9D9;" | Name | ! style="width:100px;background-color:#D9D9D9;" | Name | ||
! style="width:100px;background-color:#D9D9D9;" | Hitbox | ! style="width:100px;background-color:#D9D9D9;" | Hitbox | ||
! style="width:60px;background-color:#FFd800;" | Startup | ! style="width:60px;background-color:#FFd800;" | Startup | ||
! style="width:60px;background-color:#FFd800;" | Active | ! style="width:60px;background-color:#FFd800;" | Active | ||
! style="width:60px;background-color:#FFd800;" | | ! style="width:60px;background-color:#FFd800;" | Hit | ||
! style="width: | ! style="width:60px;background-color:#FFd800;" | Guard | ||
! style="background-color:#FFd800;" | Note | |||
|- | |- | ||
| style="background-color:#F9F9F9;" | | | style="background-color:#F9F9F9;" |236A | ||
| style="background-color:#F9F9F9;" |[[Bild:kofxi_oswald_236P.png]] | | style="background-color:#F9F9F9;" |[[Bild:kofxi_oswald_236P.png]] | ||
| style="background-color:#F9F9F9;" | | | style="background-color:#F9F9F9;" |11 | ||
| style="background-color:#F9F9F9;" | | | style="background-color:#F9F9F9;" |5 | ||
| style="background-color:#F9F9F9;" | | | style="background-color:#F9F9F9;" |-19 | ||
| style="background-color:#F9F9F9;" |- | | style="background-color:#F9F9F9;" |-20 | ||
| style="background-color:#F9F9F9;" |Super Cancel | | style="background-color:#F9F9F9;" |Super Cancel. | ||
|- | |- | ||
| style="background-color:#F9F9F9;" |236P> | | style="background-color:#F9F9F9;" |236C | ||
| style="background-color:#F9F9F9;" |[[Bild:kofxi_oswald_236P.png]] | |||
| style="background-color:#F9F9F9;" |13 | |||
| style="background-color:#F9F9F9;" |6 | |||
| style="background-color:#F9F9F9;" |-26 | |||
| style="background-color:#F9F9F9;" |-27 | |||
| style="background-color:#F9F9F9;" |Super Cancel. | |||
|- | |||
| style="background-color:#F9F9F9;" |236P>236A | |||
| style="background-color:#F9F9F9;" |[[Bild:kofxi_oswald_236P,236P.png]] | | style="background-color:#F9F9F9;" |[[Bild:kofxi_oswald_236P,236P.png]] | ||
| style="background-color:#F9F9F9;" | | | style="background-color:#F9F9F9;" |6 | ||
| style="background-color:#F9F9F9;" |- | | style="background-color:#F9F9F9;" |4 | ||
| style="background-color:#F9F9F9;" | | | style="background-color:#F9F9F9;" |KD | ||
| style="background-color:#F9F9F9;" |- | | style="background-color:#F9F9F9;" |-22 | ||
| style="background-color:#F9F9F9;" |Followup | | style="background-color:#F9F9F9;" |Followup to 236P. Same hitbox as 236P>236C. | ||
|- | |||
| style="background-color:#F9F9F9;" |236P>236C | |||
| style="background-color:#F9F9F9;" |[[Bild:kofxi_oswald_236P,236P.png]] | |||
| style="background-color:#F9F9F9;" |8 | |||
| style="background-color:#F9F9F9;" |3 | |||
| style="background-color:#F9F9F9;" |KD | |||
| style="background-color:#F9F9F9;" |-18 | |||
| style="background-color:#F9F9F9;" |Followup to 236P. Same hitbox as 236P>236A. Startup starts late after 236P active time. Can be delayed longer than 236A, which is useful for combos. | |||
|- | |||
| style="background-color:#F9F9F9;" |Rekka>236A | |||
| style="background-color:#F9F9F9;" |[[Bild:kofxi_oswald_236P.png]] | |||
| style="background-color:#F9F9F9;" |8 | |||
| style="background-color:#F9F9F9;" |4 | |||
| style="background-color:#F9F9F9;" |KD | |||
| style="background-color:#F9F9F9;" |-12 | |||
| style="background-color:#F9F9F9;" |236A as a Rekka-Followup. Same Hitbox as 236P. | |||
|- | |- | ||
| style="background-color:#F9F9F9;" |Rekka> | | style="background-color:#F9F9F9;" |Rekka>236C | ||
| style="background-color:#F9F9F9;" |[[Bild:kofxi_oswald_236P.png]] | | style="background-color:#F9F9F9;" |[[Bild:kofxi_oswald_236P.png]] | ||
| style="background-color:#F9F9F9;" | | | style="background-color:#F9F9F9;" |11 | ||
| style="background-color:#F9F9F9;" | | | style="background-color:#F9F9F9;" |6 | ||
| style="background-color:#F9F9F9;" | | | style="background-color:#F9F9F9;" |KD | ||
| style="background-color:#F9F9F9;" | | | style="background-color:#F9F9F9;" |-27 | ||
| style="background-color:#F9F9F9;" | | | style="background-color:#F9F9F9;" |236C as a Rekka-Followup. Same Hitbox as 236P. | ||
|- | |- | ||
|} | |} | ||
| Zeile 398: | Zeile 561: | ||
! style="width:100px;background-color:#D9D9D9;" | Name | ! style="width:100px;background-color:#D9D9D9;" | Name | ||
! style="width:100px;background-color:#D9D9D9;" | Hitbox | ! style="width:100px;background-color:#D9D9D9;" | Hitbox | ||
! style="width:60px;background-color:#FFd800;" | Startup | ! style="width:60px;background-color:#FFd800;" | Startup | ||
! style="width:60px;background-color:#FFd800;" | Active | ! style="width:60px;background-color:#FFd800;" | Active | ||
! style="width:60px;background-color:#FFd800;" | | ! style="width:60px;background-color:#FFd800;" | Hit | ||
! style="width: | ! style="width:60px;background-color:#FFd800;" | Guard | ||
! style="background-color:#FFd800;" | Note | |||
|- | |- | ||
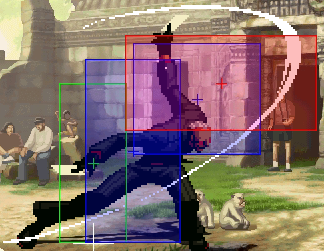
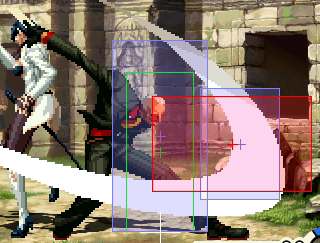
| style="background-color:#F9F9F9;" |214B | | style="background-color:#F9F9F9;" |214B | ||
| style="background-color:#F9F9F9;" |[[Bild:kofxi_oswald_214B.png]] | | style="background-color:#F9F9F9;" |[[Bild:kofxi_oswald_214B.png]] | ||
| style="background-color:#F9F9F9;" |26 | | style="background-color:#F9F9F9;" |26 | ||
| style="background-color:#F9F9F9;" |4 | | style="background-color:#F9F9F9;" |4 | ||
| style="background-color:#F9F9F9;" |-8 | | style="background-color:#F9F9F9;" |-8 | ||
| style="background-color:#F9F9F9;" |Hard Knockdown | | style="background-color:#F9F9F9;" |-9 | ||
| style="background-color:#F9F9F9;" |Overhead. Airborne from F13. | |||
|- | |||
| style="background-color:#F9F9F9;" |Rekka>214B | |||
| style="background-color:#F9F9F9;" |[[Bild:kofxi_oswald_214B.png]] | |||
| style="background-color:#F9F9F9;" |26 | |||
| style="background-color:#F9F9F9;" |4 | |||
| style="background-color:#F9F9F9;" |KD | |||
| style="background-color:#F9F9F9;" |-12 | |||
| style="background-color:#F9F9F9;" |Not an overhead (only overhead when used as first or third hit). Airborne from F13. Juggle as second Rekka. Hard Knockdown on ground hit or as last Rekka on juggle. | |||
|- | |- | ||
| style="background-color:#F9F9F9;" |214D | | style="background-color:#F9F9F9;" |214D | ||
| style="background-color:#F9F9F9;" |[[Bild:kofxi_oswald_214D.png]] | | style="background-color:#F9F9F9;" |[[Bild:kofxi_oswald_214D.png]] | ||
| style="background-color:#F9F9F9;" |32 | | style="background-color:#F9F9F9;" |32 | ||
| style="background-color:#F9F9F9;" |5 | | style="background-color:#F9F9F9;" |5 | ||
| style="background-color:#F9F9F9;" |-14 | | style="background-color:#F9F9F9;" |-14 | ||
| style="background-color:#F9F9F9;" | | | style="background-color:#F9F9F9;" |-15 | ||
| style="background-color:#F9F9F9;" |Overhead. Airborne from F16. Flies further than 214B. | |||
|- | |- | ||
| style="background-color:#F9F9F9;" |Rekka>214D | |||
| style="background-color:#F9F9F9;" |[[Bild:kofxi_oswald_214D.png]] | |||
| style="background-color:#F9F9F9;" |32 | |||
| style="background-color:#F9F9F9;" |5 | |||
| style="background-color:#F9F9F9;" |KD | |||
| style="background-color:#F9F9F9;" |-18 | |||
| style="background-color:#F9F9F9;" |Not an overhead (only overhead when used as first or third hit). Flies further than 214B. Airborne from F16. Juggle as second Rekka. Hard Knockdown on ground hit or as last Rekka on juggle. | |||
|- | |||
|} | |||
{| class="wikitable sortable mw-collapsible mw-collapsed" cellspacing="1" style="text-align: center; color:black;border: 1px solid #B5B5B5" | {| class="wikitable sortable mw-collapsible mw-collapsed" cellspacing="1" style="text-align: center; color:black;border: 1px solid #B5B5B5" | ||
| Zeile 425: | Zeile 605: | ||
! style="width:100px;background-color:#D9D9D9;" | Name | ! style="width:100px;background-color:#D9D9D9;" | Name | ||
! style="width:100px;background-color:#D9D9D9;" | Hitbox | ! style="width:100px;background-color:#D9D9D9;" | Hitbox | ||
! style="width:60px;background-color:#FFd800;" | Startup | ! style="width:60px;background-color:#FFd800;" | Startup | ||
! style="width:60px;background-color:#FFd800;" | Active | ! style="width:60px;background-color:#FFd800;" | Active | ||
! style="width:60px;background-color:#FFd800;" | | ! style="width:60px;background-color:#FFd800;" | Hit | ||
! style="width: | ! style="width:60px;background-color:#FFd800;" | Guard | ||
! style="background-color:#FFd800;" | Note | |||
|- | |- | ||
| style="background-color:#F9F9F9;" |236B | | style="background-color:#F9F9F9;" |236B | ||
| style="background-color:#F9F9F9;" |[[Bild:kofxi_oswald_236B.png]][[Bild:kofxi_oswald_236K_2.png]] | | style="background-color:#F9F9F9;" |[[Bild:kofxi_oswald_236B.png]][[Bild:kofxi_oswald_236K_2.png]] | ||
| style="background-color:#F9F9F9;" |6 | | style="background-color:#F9F9F9;" |6 | ||
| style="background-color:#F9F9F9;" |4 | | style="background-color:#F9F9F9;" |4 | ||
| style="background-color:#F9F9F9;" | | | style="background-color:#F9F9F9;" |-31 | ||
| style="background-color:#F9F9F9;" | | | style="background-color:#F9F9F9;" |-32 | ||
| style="background-color:#F9F9F9;" |Negates projectiles for 15F. F10-29 invul on feet (Pirouette). | |||
|- | |- | ||
| style="background-color:#F9F9F9;" |Rekka>236B | | style="background-color:#F9F9F9;" |Rekka>236B | ||
| style="background-color:#F9F9F9;" |[[Bild:kofxi_oswald_236B(followup).png]] | | style="background-color:#F9F9F9;" |[[Bild:kofxi_oswald_236B(followup).png]] | ||
| style="background-color:#F9F9F9;" | | | style="background-color:#F9F9F9;" |10 | ||
| style="background-color:#F9F9F9;" |4 | | style="background-color:#F9F9F9;" |4 | ||
| style="background-color:#F9F9F9;" | | | style="background-color:#F9F9F9;" |KD | ||
| style="background-color:#F9F9F9;" |236B | | style="background-color:#F9F9F9;" |-75 | ||
| style="background-color:#F9F9F9;" |236B as a followup. Wall Bounce. Negates projectiles for 15F. F14-40 invul on feet (Pirouette). | |||
|- | |- | ||
| style="background-color:#F9F9F9;" |236D | | style="background-color:#F9F9F9;" |236D | ||
| style="background-color:#F9F9F9;" |[[Bild:kofxi_oswald_236D.png]][[Bild:kofxi_oswald_236K_2.png]] | | style="background-color:#F9F9F9;" |[[Bild:kofxi_oswald_236D.png]][[Bild:kofxi_oswald_236K_2.png]] | ||
| style="background-color:#F9F9F9;" |10 | | style="background-color:#F9F9F9;" |10 | ||
| style="background-color:#F9F9F9;" |4 | | style="background-color:#F9F9F9;" |4 | ||
| style="background-color:#F9F9F9;" | | | style="background-color:#F9F9F9;" |KD | ||
| style="background-color:#F9F9F9;" | | | style="background-color:#F9F9F9;" |-36 | ||
| style="background-color:#F9F9F9;" |Negates projectiles for 15F. Moves backwards. F14-33 invul on feet (Pirouette). Bigger projectile negation hitbox than 236B. | |||
|- | |- | ||
| style="background-color:#F9F9F9;" |Rekka>236D | | style="background-color:#F9F9F9;" |Rekka>236D | ||
| style="background-color:#F9F9F9;" |[[Bild:kofxi_oswald_236D(followup).png]] | | style="background-color:#F9F9F9;" |[[Bild:kofxi_oswald_236D(followup).png]] | ||
| style="background-color:#F9F9F9;" |14 | |||
| style="background-color:#F9F9F9;" |14 | |||
| style="background-color:#F9F9F9;" |5 | | style="background-color:#F9F9F9;" |5 | ||
| style="background-color:#F9F9F9;" | | | style="background-color:#F9F9F9;" |KD | ||
| style="background-color:#F9F9F9;" |236D | | style="background-color:#F9F9F9;" |-109 | ||
| style="background-color:#F9F9F9;" |236D as a followup. Moves backwards. Wall Bounce. Negates projectiles for 15F. F19-44 invul on feet (Pirouette). | |||
|- | |- | ||
| style="background-color:#F9F9F9;" |Ace(A)(236E) | | style="background-color:#F9F9F9;" |Ace(A)(236E) | ||
| style="background-color:#F9F9F9;" |[[Bild:kofxi_oswald_ace(1).png]][[Bild:kofxi_oswald_ace(2).png]] | | style="background-color:#F9F9F9;" |[[Bild:kofxi_oswald_ace(1).png]][[Bild:kofxi_oswald_ace(2).png]] | ||
| style="background-color:#F9F9F9;" |4 | | style="background-color:#F9F9F9;" |4 | ||
| style="background-color:#F9F9F9;" |14+1 | | style="background-color:#F9F9F9;" |14+1 | ||
| style="background-color:#F9F9F9;" | | | style="background-color:#F9F9F9;" |-3 | ||
| style="background-color:#F9F9F9;" |Followup | | style="background-color:#F9F9F9;" |-113* | ||
| style="background-color:#F9F9F9;" |Followup to Rekka>236B/D. Airborne from F1. No combo damage scaling. Only triggers on perfectly timed hit or with specific setup. *=if 236B was blocked. | |||
|- | |- | ||
|} | |} | ||
{| class="wikitable sortable mw-collapsible mw-collapsed" cellspacing="1" style="text-align: center; color:black;border: 1px solid #B5B5B5" | {| class="wikitable sortable mw-collapsible mw-collapsed" cellspacing="1" style="text-align: center; color:black;border: 1px solid #B5B5B5" | ||
|+ | |+ Other Specials & Supers | ||
! style="width:100px;background-color:#D9D9D9;" | Name | ! style="width:100px;background-color:#D9D9D9;" | Name | ||
! style="width:100px;background-color:#D9D9D9;" | Hitbox | ! style="width:100px;background-color:#D9D9D9;" | Hitbox | ||
! style="width:60px;background-color:#FFd800;" | Startup | ! style="width:60px;background-color:#FFd800;" | Startup | ||
! style="width:60px;background-color:#FFd800;" | Active | ! style="width:60px;background-color:#FFd800;" | Active | ||
! style="width:60px;background-color:#FFd800;" | | ! style="width:60px;background-color:#FFd800;" | Hit | ||
! style="width: | ! style="width:60px;background-color:#FFd800;" | Guard | ||
! style="background-color:#FFd800;" | Note | |||
|- | |- | ||
| style="background-color:#F9F9F9;" |Queen( | | style="background-color:#F9F9F9;" |Queen(623A) | ||
| style="background-color:#F9F9F9;" |[[Bild:kofxi_oswald_623X_1.png]][[Bild:kofxi_oswald_623P(2).png]] | | style="background-color:#F9F9F9;" |[[Bild:kofxi_oswald_623X_1.png|100px]][[Bild:kofxi_oswald_623P(2).png|150px]] | ||
| style="background-color:#F9F9F9;" | | | style="background-color:#F9F9F9;" |58*/63* | ||
| style="background-color:#F9F9F9;" | | | style="background-color:#F9F9F9;" |13 | ||
| style="background-color:#F9F9F9;" | | | style="background-color:#F9F9F9;" |+ | ||
| style="background-color:#F9F9F9;" |- | | style="background-color:#F9F9F9;" |+ | ||
| style="background-color:#F9F9F9;" | | | style="background-color:#F9F9F9;" |Duration 45F (Oswald can move again on F46). *=F57=active over Oswald, F63 hits vs standing Kyo. | ||
|- | |||
| style="background-color:#F9F9F9;" |Queen(623B) | |||
| style="background-color:#F9F9F9;" |[[Bild:kofxi_oswald_623B_1.png|100px]][[Bild:kofxi_oswald_623B_2.png|150px]] | |||
| style="background-color:#F9F9F9;" |52*/57* | |||
| style="background-color:#F9F9F9;" |13 | |||
| style="background-color:#F9F9F9;" |+ | |||
| style="background-color:#F9F9F9;" |+ | |||
| style="background-color:#F9F9F9;" |Duration 46F (Oswald can move again on F47). *=F52=active over Oswald, F57 hits vs standing Kyo. | |||
|- | |||
| style="background-color:#F9F9F9;" |Queen(623C) | |||
| style="background-color:#F9F9F9;" |[[Bild:kofxi_oswald_623C_1.png|100px]][[Bild:kofxi_oswald_623C_2.png|150px]] | |||
| style="background-color:#F9F9F9;" |55*/60* | |||
| style="background-color:#F9F9F9;" |14 | |||
| style="background-color:#F9F9F9;" |+ | |||
| style="background-color:#F9F9F9;" |+ | |||
| style="background-color:#F9F9F9;" |Duration 53F (Oswald can move again on F54). *=F55=active over Oswald, F60 hits vs standing Kyo. | |||
|- | |||
| style="background-color:#F9F9F9;" |Queen(623D) | |||
| style="background-color:#F9F9F9;" |[[Bild:kofxi_oswald_623D_1.png|100px]][[Bild:kofxi_oswald_623D_2.png|150px]] | |||
| style="background-color:#F9F9F9;" |49*/56* | |||
| style="background-color:#F9F9F9;" |17 | |||
| style="background-color:#F9F9F9;" |+ | |||
| style="background-color:#F9F9F9;" |+ | |||
| style="background-color:#F9F9F9;" |Duration 53F (Oswald can move again on F54). *=F49=active over Oswald, F56 hits vs standing Kyo. Builds 4 meter on whiff, unlike the other versions. | |||
|- | |- | ||
| style="background-color:#F9F9F9;" |King(421K) | | style="background-color:#F9F9F9;" |King(421K) | ||
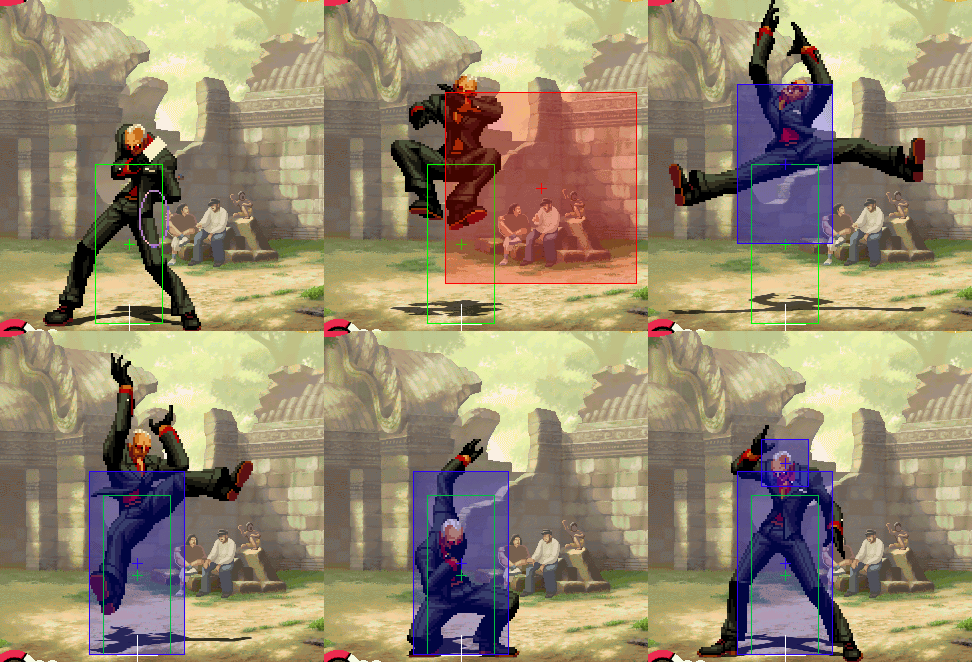
| style="background-color:#F9F9F9;" |[[Bild:kofxi_oswald_421K.png]][[Bild:kofxi_oswald_421K_2.png]] | | style="background-color:#F9F9F9;" |[[Bild:kofxi_oswald_421K.png]][[Bild:kofxi_oswald_421K_2.png]] | ||
| style="background-color:#F9F9F9;" |4 | | style="background-color:#F9F9F9;" |4 | ||
| style="background-color:#F9F9F9;" | | | style="background-color:#F9F9F9;" |17 | ||
| style="background-color:#F9F9F9;" |- | | style="background-color:#F9F9F9;" |/ | ||
| style="background-color:#F9F9F9;" |Mid- | | style="background-color:#F9F9F9;" |/ | ||
| style="background-color:#F9F9F9;" |Mid- & High Counter. F1-8 only invul on feet. B-Version teleports behind, D-Version behind & in the air. | |||
|- | |- | ||
| style="background-color:#F9F9F9;" |♠♦♥♣(2363214A) | | style="background-color:#F9F9F9;" |♠♦♥♣(2363214A) | ||
| style="background-color:#F9F9F9;" |[[Bild:kofxi_oswald_2363214A(1).png|100px]][[Bild:kofxi_oswald_2363214A(2).png|100px]][[Bild:kofxi_oswald_2363214C hold.png|150px]] | | style="background-color:#F9F9F9;" |[[Bild:kofxi_oswald_2363214A(1).png|100px]][[Bild:kofxi_oswald_2363214A(2).png|100px]][[Bild:kofxi_oswald_2363214C hold.png|150px]] | ||
| style="background-color:#F9F9F9;" |3 | | style="background-color:#F9F9F9;" |3 | ||
| style="background-color:#F9F9F9;" | | | style="background-color:#F9F9F9;" |25+1 | ||
| style="background-color:#F9F9F9;" |- | | style="background-color:#F9F9F9;" |KD | ||
| style="background-color:#F9F9F9;" | | | style="background-color:#F9F9F9;" |-9 | ||
| style="background-color:#F9F9F9;" |F1 invul. Button can be held to spin in place & reflect projectiles. A-Version has a smaller vertical hitbox. | |||
|- | |- | ||
| style="background-color:#F9F9F9;" |♠♦♥♣(2363214C) | | style="background-color:#F9F9F9;" |♠♦♥♣(2363214C) | ||
| style="background-color:#F9F9F9;" |[[Bild:kofxi_oswald_2363214C(1).png|100px]][[Bild:kofxi_oswald_2363214C(2).png|100px]][[Bild:kofxi_oswald_2363214C hold.png|150px]] | | style="background-color:#F9F9F9;" |[[Bild:kofxi_oswald_2363214C(1).png|100px]][[Bild:kofxi_oswald_2363214C(2).png|100px]][[Bild:kofxi_oswald_2363214C hold.png|150px]] | ||
| style="background-color:#F9F9F9;" |11 | | style="background-color:#F9F9F9;" |11 | ||
| style="background-color:#F9F9F9;" |23+1 | | style="background-color:#F9F9F9;" |23+1 | ||
| style="background-color:#F9F9F9;" |- | | style="background-color:#F9F9F9;" |KD | ||
| style="background-color:#F9F9F9;" | | | style="background-color:#F9F9F9;" |-9 | ||
| style="background-color:#F9F9F9;" |F1 invul. Button can be held to spin in place & reflect projectiles. C-Version moves Oswald further than A-Version & has bigger hurtbox. | |||
|- | |- | ||
| style="background-color:#F9F9F9;" |10JQKA(63214,63214P) | | style="background-color:#F9F9F9;" |10JQKA(63214,63214P) | ||
| style="background-color:#F9F9F9;" |[[Bild:kofxi_oswald_63214,63214P.png]] | | style="background-color:#F9F9F9;" |[[Bild:kofxi_oswald_63214,63214P.png]] | ||
| style="background-color:#F9F9F9;" |9 | | style="background-color:#F9F9F9;" |9 | ||
| style="background-color:#F9F9F9;" |10 | | style="background-color:#F9F9F9;" |10 | ||
| style="background-color:#F9F9F9;" |- | | style="background-color:#F9F9F9;" |KD | ||
| style="background-color:#F9F9F9;" | | | style="background-color:#F9F9F9;" |-30/-28* | ||
| style="background-color:#F9F9F9;" |Negates projectiles. F1-17 invul. A-Version F18-79 counterhit state + F80-99 regular recovery. C-Version F18-77 counterhit-state + F78-97 regular recovery. *=A/C Version. | |||
|- | |- | ||
| style="background-color:#F9F9F9;" |JOKER([4],646E) | | style="background-color:#F9F9F9;" |JOKER([4],646E) | ||
| style="background-color:#F9F9F9;" |[[Bild:kofxi_oswald_4646E.png]] | | style="background-color:#F9F9F9;" |[[Bild:kofxi_oswald_4646E.png]] | ||
| style="background-color:#F9F9F9;" |2 | | style="background-color:#F9F9F9;" |2 | ||
| style="background-color:#F9F9F9;" |36 | | style="background-color:#F9F9F9;" |36 | ||
| style="background-color:#F9F9F9;" |- | | style="background-color:#F9F9F9;" |KD | ||
| style="background-color:#F9F9F9;" | | | style="background-color:#F9F9F9;" |-27 | ||
| style="background-color:#F9F9F9;" |1F invul. F2-37 invul on legs. Has juggle-anywhere property. 40F charge time. | |||
|} | |} | ||
== | '''Special Frame Data'''<br> | ||
{| class="wikitable sortable" cellspacing="1" style="text-align: center; color:black;border: 1px solid #B5B5B5" | |||
! style="width:100px;background-color:#D9D9D9;" | Situation | |||
! style="width:60px;background-color:#FFd800;" | Hit | |||
! style="width:60px;background-color:#FFd800;" | Guard | |||
! style="background-color:#FFd800;" | Note | |||
|- | |||
| style="background-color:#F9F9F9;" |'''214C>236A/C>214B''' | |||
| style="background-color:#F9F9F9;" |+54 | |||
| style="background-color:#F9F9F9;" |-12 | |||
| style="background-color:#F9F9F9;" |Gap between 236A/C & 214B is 5F on guard (6F attack trades) | |||
|- | |||
| style="background-color:#F9F9F9;" |'''214C>236A/C>214B,623A''' | |||
| style="background-color:#F9F9F9;" |+9 | |||
| style="background-color:#F9F9F9;" |/ | |||
| style="background-color:#F9F9F9;" |Card Hits on F63 (9F after advantage ends) | |||
|- | |||
| style="background-color:#F9F9F9;" |'''214C>236A/C>214B,623B''' | |||
| style="background-color:#F9F9F9;" |+8 | |||
| style="background-color:#F9F9F9;" |/ | |||
| style="background-color:#F9F9F9;" |Card hits on F57 (3F after advantage ends) | |||
|- | |||
| style="background-color:#F9F9F9;" |'''214C>236A/C>214B,623B''' | |||
| style="background-color:#F9F9F9;" |+8 | |||
| style="background-color:#F9F9F9;" |/ | |||
| style="background-color:#F9F9F9;" |Card hits on F57 (3F after advantage ends) | |||
|- | |||
|} | |||
'''Oswald' | '''Queen Frame Data'''<br> | ||
''Note: startup was measured against standing Kyo.'' | |||
{| class="wikitable sortable" cellspacing="1" style="text-align: center; color:black;border: 1px solid #B5B5B5" | |||
! style="width:100px;background-color:#D9D9D9;" | Version | |||
! style="width:60px;background-color:#FFd800;" | Startup | |||
! style="width:60px;background-color:#FFd800;" | Oswald Recovery | |||
! style="width:60px;background-color:#FFd800;" | Gauge (whiff) | |||
! style="background-color:#FFd800;" | Gauge (hit) | |||
|- | |||
| style="background-color:#F9F9F9;" |'''623A''' | |||
| style="background-color:#F9F9F9;" |<span style="color: red;"> 63 </span> | |||
| style="background-color:#F9F9F9;" |<span style="color: blue;"> 45F </span> | |||
| style="background-color:#F9F9F9;" |+0 | |||
| style="background-color:#F9F9F9;" |+18 | |||
|- | |||
| style="background-color:#F9F9F9;" |'''623B''' | |||
| style="background-color:#F9F9F9;" |57 | |||
| style="background-color:#F9F9F9;" |46F | |||
| style="background-color:#F9F9F9;" |+0 | |||
| style="background-color:#F9F9F9;" |+18 | |||
|- | |||
| style="background-color:#F9F9F9;" |'''623C''' | |||
| style="background-color:#F9F9F9;" |60 | |||
| style="background-color:#F9F9F9;" |<span style="color: red;"> 53F </span> | |||
| style="background-color:#F9F9F9;" |+0 | |||
| style="background-color:#F9F9F9;" |+18 | |||
|- | |||
| style="background-color:#F9F9F9;" |'''623D''' | |||
| style="background-color:#F9F9F9;" |<span style="color: blue;"> 56 </span> | |||
| style="background-color:#F9F9F9;" |<span style="color: red;"> 53F </span> | |||
| style="background-color:#F9F9F9;" |+4 | |||
| style="background-color:#F9F9F9;" |+22 (4+18) | |||
|- | |||
|} | |||
*'' | ==Special Attributes & Bugs== | ||
*Has no collision on back ukemi (can run through) | |||
*Oswald's Front Ukemi takes 26+1F instead of the regular 22+1F | |||
*Oswald's back roll goes further than normal (178px instead of 160px) | |||
*Oswald's throw pulls the opponent slightly out of the corner, which allows corner crossups. | |||
*Oswald's 3A is unblockable if done meaty (tourney-banned). | |||
*If the 421B counter is followed up with a combo shortly after, the super freeze breaks and does not stop time anymore. This can lead to combos not comboing. Example: 421B counter > combo into 214P > shift > any chain into command normal is done, it breaks the super freeze during combo, example [https://www.youtube.com/clip/UgkxUZoRbDjg1c4OR6aLzD9wFOtxRK6sN4Ez here]. | |||
= Combos = | |||
*''' | ==Basic Combos== | ||
**''' | *'''[2B,2A] or [C,6A] or [2D(1 Hit),6A] or [close 2B,2A,3A], then:''' | ||
**''' | **'''214C,236C,214B:''' Bread n Butter. The 214C only connects if the combo was started from fairly close. Can link 623A after in corner for Okizeme. | ||
**'''214C(1-2), Quick Shift:''' a basic quick shift setup. | |||
*''' | *'''2B/2A>2A>3A>Quick Shift:''' a very useful quick shift setup that can be used from various ranges. | ||
*'''midscreen crossup (eg. j.C,2B,)2A,214C(2),236D,236A (whiff), turn around delay 3A, then: | |||
**'''214A/C,214D,236A(whiff):''' Basic midscreen crossup setup into knockdown. The 236A at the end is to build meter - leaving it away will make Oswald recover slightly faster. | |||
**'''214D,236A/C,214B:''' Midscreen-into-corner setup. Can start card Okizeme after. | |||
**'''delay 214C,236B,236E:''' Ace Setup with tricky timing. The combo must not end in the corner for this to work. | |||
*''' | *'''Corner Crossup (after throw or on incoming) (j.C,\/,)2B,2A,(3A,)214C,236B/236D,236A (Whiff), (Opponent flies back into the corner), delay 3A>214B,then: | ||
**'''delay 236C,214B,''' start card Okizeme | |||
**'''2363214A,''' immediately quickshift or kill with the super | |||
**'''link 3A>214B>236C>214B:''' hard combo that requires the very first 3A>214B to hit as high as possible. | |||
**'''link 236B>236A>214B:''' hard combo that can be done if the very first 3A>214B hits high, but not high enough for another 3A. The "link 236B" part is hard because it cannot be pre-buffered (doing it early will result in the 214B still becoming part of the rekka chain from before) - try pushing the button for the motion once your opponent is very low already, about the height of Oswald's head or even lower. | |||
*''' | *'''From further away 2B>2A>3A>236A(whiff)>236A:''' fancy situational combo that is rarely seen. Used in case you are too far away for the BnB, but hit with 2B,2A.. | ||
== Ace Setups == | |||
*''' | *'''Enemy cornered, Oswald slightly outside of corner: 3A,236B,236A,236B,236E:''' Guaranteed Ace setup, is always used on stunned opponents. Can use 623A or (623A > j.C > 3A..) before for added damage. | ||
*''' | *'''Midscreen, 3A-Hit from further away, [immediate 214A] or [delay 214C],236B,236E:''' Guaranteed Ace setup. | ||
*'''[ | *'''Midscreen j.C crossup,\/,5D or [2B,2A,]214C(2 Hits),236D,236A, [delay 3A, delay 214C] or [delay 3A, small delay 214A (easier!)] or [max delay 3A>214A],236B,236E''' | ||
*'''Midscreen 421D hit, j.A, land, immediate 214C,236D,236A, turn around, ender from above''' | |||
*'''Corner Cross j.C,2B,2A,3A,214C,236B,236A(whiff), 3A,236B whiff,236A,236B,236E''' the second 3A has to be put in as 1A (with 1, even though Oswald is then doing the attack in the direction of the corner because of the auto turn!). The 1A also has to be done as soon as possible after the 236A whiff, otherwise 2A will come out. The 236B after 1A is put in normally(from the 1P-side). Source: http://hartheon.web.fc2.com/character/oswald.html | |||
*'''Opp. in Corner & Dizzy, Oswald slightly outside of corner: 623A, immediatey 3A-236C>(Card hits)>236B>236E:''' Stylish setup that deals less damage than the regular ace setup. | |||
*'''Incoming in corner, dash under, 2B,2A,214C, delay 236B, 236A whiff, 2B(whiff), turn around 236B,236A,236B,236E:''' see [https://youtu.be/8VnC0a0g0jk?t=1583 here]. | |||
*''' | |||
*''' | *'''close to screen edge (midscreen) 2B,2A,214C, delay 236B; delay 236E:''' time the 236E so the opponent is right above you. This setup still requires 1F-timing, but the pause between the bounce and the 236E motion is short enough that it is doable. Example from [https://youtu.be/0oLnlxfOLsw?t=1081 U-Rasia] | ||
*''' | *'''Midscreen 623A, 5D(c) (card hits) link 3A>214A>236B>236E.''' [https://youtu.be/C9iYIdF2vaU?t=6912 Source: BZR @ port24] | ||
*'''Back to corner combo with few hits into 214C,236D,236A (Whiff), walk back into corner if needed, 3A delay > 21A>236B>236A (Whiff), run back, 3A delay 214B, link 3A>236B>236A>236B>236E:''' Source (dropped combo): [https://www.youtube.com/watch?t=1881&v=R8CDHgJepRY&feature=youtu.be youtube] | |||
=== | ===ACE Setups Stage Help=== | ||
To maximize your ace combos, you should always know how far you are away from the corner. The following locations should help identify these spots for each stage, all considering the setup to be a juggle 3A hit (eg. after close to screen edge 2B,2A,214C,236D,236A(whiff), turn around...) | |||
'''Cambodia'''<br> | |||
*1P Corner: dude with white shirt | |||
*2P Corner: left of big window | |||
'''Japan:'''<br> | |||
*1P Corner: right-side edge of the door | |||
*2P Corner: middle of big wooden pillar | |||
'''America'''<br> | |||
*1P Corner: 3 dudes | |||
*2P Corner: Trashcan | |||
'''Russia'''<br> | |||
*1P Corner: under the rightmost ice statue | |||
*2P Corner: under the leftmost cheering dude | |||
'''South:'''<br> | |||
*1P Corner: Right side of the right Jeep | |||
*2P Corner: in front of the leftmost palm | |||
'''Italy:'''<br> | |||
*1P Corner: between the man & the kid | |||
*2P Corner: in front of the tall potted plant | |||
'''Spain:'''<br> | |||
*'''Preventive 3A > confirm > 214C, 214D | *1P Corner: right side of the pillar that is in front of the black, smaller building | ||
*2P Corner: to the left of the brighter line of tiles on the stage floor | |||
==Anti-Air== | |||
*'''Preventive 3A > confirm > 214C, 214D (>236A whiff, for meter building)''' | |||
*'''5A/5B, LDM''' | *'''5A/5B, LDM''' | ||
===Saving Shift > LDM Setups=== | |||
*Either Saving Shift to Oswald with cornered opponent, OR Saving Shift while back-turned & cornered > Saving Shift hits on Counter hit > 3A>214B, [4],D>6A46E (LDM): [https://youtu.be/cACD28g_uNA?t=326 Source: k-tani] | |||
*Cornered Saving Shift (Counter Hit), 3A,delay 214A/C,236B, delay 214A/C (the other way, back into the corner), link LDM. [https://youtu.be/HuzRK3aPDYE?list=PL-hmDsRR276qskxUL9VesOPCcZocwxahQ&t=265 Source: Okinawa-Kaz] | |||
== Team Combos == | |||
'''Preferred Quick Shift Normals:''' | |||
:Standing opponent: '''j.D''' | |||
:Crouching opponent: '''j.A''' | |||
:Cornered or Back-turned opponent: '''j.C''', j.D will often whiff | |||
:Close to own corner: '''late j.A''' | |||
===Universal=== | |||
*Corner Crossup j.C (eg. after DOWN), 2B,2A,3A,214C,236B/D,236A(whiff), turn around 3A>214B, then: | |||
**2363214A, QS on 2. Hit for Stun Combos''' [https://youtu.be/pKR6-ZreE0s?t=508 Example: player @ Playland Carnival] | |||
**214C > QS for Juggle Anywhere Setups | |||
*Corner 2B,2A,214C,236C, max delay 214C > QS: Very difficult quick shift setup because of the max delay 214C. Afterwards, eg. Vanessa oder K' j.D, land, LDM. | |||
*Corner crossup combo into 214C,236B,214B (whiff), turn around link 236B > QS (to Kula, land, 214B,6B..): This combo is used when Oswald is already so far out of the corner that 236A(whiff) wouldn't work and 214B(whiff) has to be used. | |||
===Gato & Oswald=== | |||
*Gato Combo in 236236P with a lot of distance to the corner, QS Oswald, backdash (input: 46, not 44!), 214A>236B>236A(whiff), turn around 2D kara cancel 214C>236B>236E (ACE): [https://youtu.be/nwfvAj5wT40?t=4455 Source: K-Tani] or [https://youtu.be/AQioI445IgU?t=335 playland carnival] | |||
* Gato Combo in 236236P mit very little distance to the corner, QS Oswald, backdash, 214X>236B>236A(whiff), turn around 2C kara cancel 214A/C>214B (Knockdown), [https://youtu.be/nwfvAj5wT40?t=5218 Source: K-Tani] | |||
*Gato Incoming j.B,2B,236236A, QS Oswald, backdash, 3A>214B>236A?>236B>236E (ACE): [https://youtu.be/qhC5xw_MRtY?t=570 Source: Pie from Korea] | |||
*Gato Corner Combo by Pi, [https://twitter.com/ljh5599/status/1465157033544593408 twitter], [https://www.youtube.com/watch?v=oZO3iUi4HIM youtube] | |||
* | *Variation of the above combo by SenseiEnrique [https://twitter.com/SenseiEnrique98/status/1493707964171141125 twitter] | ||
*Senga Loop into Ace: 214B-B loop, then let the opponent fall into 236236A, QS oswald, j.A whiff, land, dash (minimum time), backdash, 236B>236A>236B>236E. Found by SenseiEnrique, [https://twitter.com/SenseiEnrique98/status/1695103149231452585 video] | |||
===Vanessa & Oswald=== | |||
* | *Vanessa (Back to the corner) Super QS Oswald (crossup, no Jump-in), \/, 3A,236B,236A,236B,236E | ||
* | *Vanessa (Back to the corner) 2C>[4],6A> QS Oswald (j.A whiff),\/, 5A whiff, 3A,214A,236B,236E | ||
*Vanessa, Corner, SRK loop, QS Oswald, backdash, 3A,236B,236A,236B,236E | |||
*Vanessa, midscreen 236236P(2-3) or 41236P(3), QS Oswald, land behind opponent, 5D,214C(2 hits),236D,236A (whiff), max delay 236A-214A-236B-236E | |||
* | |||
* | *Vamessa, midscreen 236236P(2-3) or 41236P(3), QS Oswald, land behind opponent, 5D(c)>6A>214B>236A>214A>236B>236E [https://youtu.be/cKm0rlZQhps?t=1643 Source: Port24] | ||
* | *Vamessa, midscreen 236236P(2) or 41236P(3), QS Oswald, land behind opponent, 3A, delay 214C>236B>236E. Useful since the combo cannot be saving shifted if the 236236P super was used before the QS. | ||
* | *Vanessa cornered, wakeup ranbu, shift Oswald, turn around 3A,236B,236A,236B,236E: [https://www.youtube.com/watch?v=C9iYIdF2vaU Source: port24] | ||
*Vanessa j.C,\/,C,[4],6A QS Oswald whiff j.A, run through, turn around 236P>236B>236A(whiff), 2B(whiff) turn around 3A,214D>236C>214B. [https://youtu.be/C9iYIdF2vaU?t=8446 Source: BZR @ port24] | |||
*Vanessa > Oswald Ace Setup from [https://twitter.com/dagun7676/status/1564752886181273600 Dagun] | |||
* | |||
* | *Vanessa 2141236P > QS oswald > \/, 3A>214A>236B>236E. No delay after 3A. works on hits 3,7,8 (hit 3 only from 2141236A). | ||
* | ===Adelheid & Oswald=== | ||
*Adelheid, 236236D(1 Hit) QS Oswald (no Jumpin, \/,) Crossup 5D... | |||
* | ===Gai & Oswald=== | ||
*Midscreen/Fullscreen Gai Rekkas in Upper, QS Oswald (no Jumpin, \/,) 5B(close, whiff), 5B(close, whiff), 3A>-214A>236B-236E (ACE) [https://youtu.be/1zbK7qMUuHc?t=7355 Source: Rojar @ port24] | |||
*Midscreen Gai Deadly Rave, QS Oswald, \/, 214C?,236B,236E (ACE) [https://youtu.be/cKm0rlZQhps?t=12258 Source: Port24 ] | |||
===Elisabeth & Oswald=== | |||
* | *Elisabeth combo in upper super, QS Oswald (j.D whiff, \/,) 2C(whiff cancel)214A/C (whiff), turn around link 3A>214A>236B>236E [https://youtu.be/DVyL96Fhss0?t=739 Source] | ||
*[https://youtu.be/Ut6uAF_rJtA?t=2945 strange Setup] | |||
*[https://youtu.be/ouFk2SAex0s?t=330 Ace Setup from BZR] | |||
===Oswald & K=== | |||
* | *Oswald Corner Combo in 214C>236A QS K' j.D,\/, backdash, LDM | ||
* | *Oswald Corner Combo in 214C>236B>236A QS K',\/, LDM (thanks to nishikawaguchiterry!) | ||
*Oswald midscreen crossup combo in 214C,236D,236A(whiff), turn around 3A delay 214C>236B>214A (whiff, auto turn), link C(f), QS K' j.C(whiff),\/, LDM [https://youtu.be/4A7epGmhbSI?t=261 Source: U-Rasia] You have to be in the corner together with the opponent during the "3A delay 214C"-Part for the combo to work. | |||
**Alternative: nach 214A whiff link 236B > shift K' > j.X(whiff),\/,236236A [https://youtu.be/nCklvw58enE?t=1316 Source: u-rasia] | |||
*Oswald corner 421D, (in air in corner)j.A,5D,3A,214C,236D,236A, turn around 3A,214B,2363214A QS K', BnB > Stun | |||
*K' DOWN! in the corner, crossup 214K-214K QS Oswald, \/, 3A,... leads to a juggle combo, see [https://youtu.be/URz7ayqcCnk?t=4093 miekazu] | |||
===Ryo & Oswald=== | |||
* | *Ryo 646P, QS Oswald, Rolle, 3A>214P>236B>236E(ACE): [https://youtu.be/GwZuhu396_c?t=270 Source: k-tani] | ||
* | ===Ash & Oswald=== | ||
*Corner Side switch from Oswald to ash LDM & back to Oswald, by [https://youtu.be/TrqRcPWzGn4?t=1093 k-tani] | |||
===Duck & Oswald=== | |||
* | *Duck 2A,2A,5B,6C, Shift Oswald, j.A,\/,3A delay 214C,236B,236E. The time window for the QS is 11F (for the j.A to still hit). | ||
*Duck Dance, 214214B > shift Oswald, backdash, 236A?,236B,236E: [https://www.youtube.com/watch?v=C9iYIdF2vaU BZR @port24] | |||
*Duck corner Chain in 3D, Shift Oswald,\/,236A(turn around),236B,236A(whiff), max delay 3A, max delay 214A,236B,(delay)236A(whiff), turn around, run back towards corner, 3A>214B,delay 236C>214B. Hard combo because of the corner crossup (needs perfect shift & 236A timing). | |||
===Terry & Oswald=== | |||
*[https://youtu.be/ | *Midscreen into corner ace setup from [https://youtu.be/6uvTEztyPLY?t=221 Nishikawaguchi Terry] | ||
* | ===Kula & Oswald=== | ||
*Midscreen Kula combo into 214B-6D QS Oswald,\/, 5A (whiff) 3A>214A>236B>236E | |||
*Corner Kula combo into 214B-6D QS Oswald,\/, backdash, 236B,236A,236B,236E, see [https://youtu.be/Lx0Qyp5UHPA?t=3049 here] | |||
*Cornered 2B>2A>214C>236D>236A(whiff), | |||
===Silber & Oswald=== | |||
*Midscreen combo into Silber Super, QS Oswald, walk back 3A,214A,236B,236E (ACE), Source: [https://youtu.be/rgMX0pYgfcg?t=1297 Ryoji] | |||
===Kensou & Oswald=== | |||
*[https://twitter.com/SenseiEnrique98/status/1437404384980312071 corner ace setup from SenseiEnrique] | |||
== Other Combos == | |||
*Cornered 2B>2A>214C>236D>214B, turn around 236B>236A/C>214B [https://youtu.be/Ij0XThlVZTc?t=3560 Source: U-Rasia] | |||
*incoming smalljump j.C crossup,2B,2A,3A,214C,236B,236A(whiff), turn around 3A>AB roll cancel > 3A> delay 214B link 3A>214B... [https://youtu.be/pKR6-ZreE0s?t=225 Source: u-rasia], Quote: "This combo's second 3A is very important .This 3A , you enter the command 1A.Left and right reversed . It is the fastest command until second 214B. And this stun combo is only Adelheid ,Jazu and hayate." | |||
*Solo stun vs Adelheid: Corner DOWN! Card Okizeme, crossup j.C (card hits), 2B,2A,3A,214C(2 hits),236B,236A(whiff), turn around 3A>AB>3A>214B, link 3A>214B, delay 214C,214C (stun), Source: [https://youtu.be/CWJDfp9K2Y8?t=14535 u-rasia @por24] | |||
*Cornered 2B>2A>214C>236D>236A(whiff), walk back 3A, long delay 214A>236B>236A(whiff, opp. flies over Oswald), run for a bit, 3A>214B, then: | |||
**236C>214B | **236C>214B | ||
**link 2363214P, shift out | **link 2363214P, shift out etc. | ||
**delay 214A, shift out | **delay 214A, shift out etc. | ||
*cornered 3A, delay 214C?>236B>236A(whiff), link 214C?>236B>214A?(whiff), link 236B? [https://youtu.be/0oLnlxfOLsw?t=5011 Source: U-Rasia] | |||
= | = Strategy & Setups = | ||
'''Neutral'''<br> | '''Neutral'''<br> | ||
Oswald | Oswald wants to get in as close as possible to make the most out of j.C pressure and to maximize his combo opportunities, particularly from crossups. The latter is best achieved by j.C crossups against crouching opponents, strategic AB-rolls or by using 2B as an anti-air against badly-spaced jumps. If you are forced to play more defensively due to hard matchups, turtling behind the 623X-cards is a valid strategy, particularly when rolling forward as they would hit (which can lead to crossups).<br> | ||
The most important normals in neutral are:<br> | |||
far C: | far C: excellent Poke, great to end blockstrings<br> | ||
2B: low Profile, | 2B: low Profile, can be used as Anti-Air. Is also very fast(5F), gives +3 advantage and leads to combos.<br> | ||
5A/2A: | 5A/2A: good, fast pokes. 2A can be confirmed into 3A if mashed, and 5A ist good as an anti-smalljump attack.<br> | ||
j.C: | j.C: Very strong jump in, hits early and reaches far down and also has a great crossup hitbox. Can be done right at the start of a smalljump, repeatedly, to exert a lot of pressure.<br> | ||
j.E: | j.E: comparatively strong but somewhat slow j.E, good horizontal Hitbox which is useful to get in on the opponent. | ||
'''Anti-Air''' | '''Anti-Air''' | ||
*2B: Low Profile | *2B: Low Profile. | ||
*5B | *5B | ||
*5A | *5A | ||
*5D(c)(counter hit) > 3A: | *5D(c)(counter hit) > 3A: vs Smalljumps | ||
*63214,63214P ( | *j.D (strong air-to-air, has to be done early, will stop almost anything) | ||
*63214,63214P (slow but strong) | |||
'''Special Setups''' | |||
*'''Corner Throw > Corner Crossup''' (eg. with AB-Roll>2B or j.C crossup). | |||
*'''far C > Quick Shift''' good to punish from further away or to escape under pressure. | |||
*''' | |||
*''' | *'''2B,2A>6A>214C:''' Frame Trap. There is no time to hit confirm the 214C, but enough time to decide what rekka to do after in case the opponent has blocked. | ||
*''' | *'''2B,2A, 2D>6A (Hit Confirm 214C):''' Frame Trap. Note: enemy can jump out & punish. | ||
*''' | *'''Jump-in on Block, micro dash, smalljump j.C (crossup if opp. crouched):''' Setup for a midscreen backturned combo: j.C Cross,\/,5D,6A,214C(2 Hits),236D,236A, turn-around 3A, max delay 214C,236B,236E. | ||
*'''With back to wall poke with 2D > 6A, confirm into 214C (1-2 Hits), 236B/D (B if 2 Hits of 214C hit, D if 1 hits), 236A (Whiff), Corner Combo | |||
== Blockstrings & Okizeme == | |||
=== | ===Blockstrings=== | ||
*2B,2A/B, then... | |||
*dash 2B: to reset pressure | |||
*hyperhop j.C: to reset pressure - big gap | |||
*5C: ends pressure since 5C(f) is minus, but is a good option against mashers and for the pusback | |||
*2D>6A hit confirm: has a 6F gap, opponent can jump out, but is still very useful. | |||
*delay 2A>3A hit confirm: good blockstring with only a very small gap that can lead into QS combos or 2363214P-super. | |||
*>6A>214C...: advanced blockstring. The gap before 6A is small, and the additional 214C gives time to hit confirm. Since this can be unsafe on block, it is best used against specific characters or early in the match when guardcancel-roll is not available for your opponent yet. [https://youtu.be/0oLnlxfOLsw?t=1522 Example] by u-rasia. | |||
===Basic Okizeme=== | |||
* | *Midscreen Combo in 214B (knockdown), | ||
**dash, roll,attack: left/right Okizeme | |||
**mini-dash, superjump j.C: Crossup / fake crossup. To prevent your opponent from rolling this mixup, you can use 2D>6A after the j.C, the 2D will automatically beat the roll. | |||
**short pause, dash, hyperhop j.C Crossup: only vs Adelheid, Athena, Mary, Ralf, Ryo, Whip | |||
*Corner Combo in 214B (knockdown) > 623A, then: | |||
**slight delay 2B (card hits)> hit confirm 5D: the low option. The 5D automatically hits players rolling forward. The delay on 2B is necessary to turn the j.C / 2B into a true 50/50, otherwise people will just block low, then high and cover both options. | |||
**Smalljump up instant j.C (card hits), \/, hit confirm 5D: the overhead option. if you time it perfectly you land in time to punish a forward roll with 5D against Ryo, Kim, Maxima, Duo Lon (because they wake up slower) and Yuri + all console characters except Geese (because their front roll is longer). | |||
**Smalljump Back instant j.A (card hits), 2D>6A>214C... (Note: character specific, only against taller crouching characters) | |||
**Block or roll or backdash (Opponent attempted a reversal, card hits in air) > 3A>214B... | |||
*Corner Backturned knockdown (eg. after 214B), then: | |||
* | **backdash, superjump j.C: auto-timing for a crossup. If you delay the button press, it will be a fake crossup. This setup also works without the backdash but needs manual timing (which isn't too hard). | ||
===Throw Okizeme=== | |||
'''Midscreen:''' | |||
*Throw, smalljump j.C: simple safe jump. | |||
*Throw, walk back, roll: a late crossup that hopefully flips your opponent's inputs. | |||
*Throw, walk back, superjump j.C: always a crossup if it is somehwat meaty, but still good to block your opponent from using specific reversals due to the j.C angle. | |||
''' | '''Corner:'''<br> | ||
* | *Throw, roll or Superjump > Crossup | ||
*Throw, dash, then Roll: pseudo-50/50 left/right Mixup, since the opponent is pushed into the corner (or not) by the running. Note: against Iori only, stand still and delay the roll a little or a lot - a little will be a fake crossup, a lot will be a true crossup. | |||
*Throw, 5A whiff, then smalljump j.C oder hyperhop j.C (50/50 left right). This only works against characters with lower vertical hitbox while rising, eg. Kula, Kim, Adelheid, Whip, Mary etc.<br> | |||
*Corner Throw > smalljump over opponent into corner > smalljump back j.C (crossup vs crouch): a (silly) variation to the above, works against Kim (stands up very slowly), possibly also others. | |||
'''Midscreen Smalljump Crossups:'''<br> | |||
*Throw> walk back> Hyperhop j.C works as a crossup against: | |||
**Adelheid, Athena, Mary, Ralf, Ryo, Whip (easy) | |||
**Kim (easy if you whiff 2Ax2 before the smalljump more difficult, less telegraphed: walk back far, jump late) | |||
*Throw, then: | |||
* | *5A-5A chain whiff, smalljump j.C Crossup (Kim) | ||
*5A whiff, smalljump j.C Crossup (Adel, Mary,Ralf, Ryo, Whip) | |||
*5A whiff, smalljump, early j.C Crossup (Athena) | |||
''' | === Okizeme on DOWN (KOed opponent) === | ||
*After ACE-Kill walk slightly back, then meaty 3A > 236B > 236A > 236B > 236E: unblockable Bug Setup into Ace. '''Tourney banned.''' | |||
*After ACE-Kill in corner: whiff 5A, smalljump j.C - fake crossup. Hits meaty & leads to 2B,2B,2A,3A, shiftout combo. | |||
*After ACE-Kill in corner: small delay, hyperhop j.C - hits crossup. Afterwards do 2B,2A,214C(2 hits),236B/D, 236A(whiff), turn around 3A,214B... etc | |||
*2B,2A, | |||
* | *After 2363214P Kill in corner: immediate 623A, instant smalljump j.C: does not look meaty, but enables a combo. [https://youtu.be/WnGyaxllhp4?t=2180 Source: u-rasia] | ||
*Crazy run-over Okizeme from Tori: [https://youtu.be/fo8gDtqlSGE?t=244 Link] | |||
'''Setups for Meaty Card:''' | |||
* | *Corner Kill with 236Chit, z.B. 5D>3A>214C>236C(kill), link 623A > Roll through Opponent (left/right Oki) or instant smalljump C(card hits), Combo | ||
* | *Corner Kill with 214B hit, eg. from 5D>3A>214C>236C>214B(kill), 2A(whiff),5E~kara cancel 623A > Rolle through opponent (left/right Oki) or instant smalljump C(card hits), Combo | ||
* | *Corner Kill with 214B(Juggle) Hit> cancel in 214P(whiff)>236P(whiff), 623A, instant smalljump j.A > card hits > Combo. [https://youtu.be/WnGyaxllhp4?t=2453 Source:u-rasia] | ||
** | *Midscreen run right in front of corpse, 623A, then: [https://youtu.be/wmWwJini6sE?t=327 Source: U-Rasia] | ||
**Roll through opponent | |||
**Jump over j.C | |||
**wait | |||
===Other Stuff=== | |||
*On a back-turned BnB combo that ends in the corner, you can use backdash > superjump j.C, which then hits as meaty crossup. For a mixup, delay the j.C to trigger a fake crossup. | |||
*Corner cross 2B,2A,214C,236B,236A(whiff), turn around 3A>214B with fastest timing is an auto-timed 3A relaunch setup. | |||
= Matchups = | |||
=== Vs Kula === | |||
Note by ATG: I asked u-rasia about this matchup, because he plays it exceptionally well. This is the original quote on this:<br> | |||
''VS kura''<br> | |||
''①Little 8JE is so important action .''<br> | |||
''Kuras J action lose this action so so .''<br> | |||
''②Oswalds 5C range is so long .''<br> | |||
''You have to keep separation 5C hit and kuras 5B does not hit .''<br> | |||
''③Let's hit JE(counter) and hit 3A + ace !''<br> | |||
''But It's hard for Oswald to beat Kura .''<br> | |||
''If you receive damage Kuras 2B or JC or JE , Subsequent developments require reading .''<br> | |||
''Good lack .''<br> | |||
:In neutral, 2B can beat Kula's j.C since the hurtbox reaches into the ground. | |||
:Against B-Ray Spin abuse, you can guess and roll. If Kula used Ray Spin, you can use an immediate 214C after your roll to punish her (this is a technique used by u-rasia). | |||
:If you play Leader Oswald, you can punish B-Ray Spin on block with LDM. | |||
:Vs reversal B-Ray Spin: use a delayed 5D>3A or delayed smalljump j.E as Okizeme. The 5D hits on Counter Hit and then combos into 3A which leads into followup combos such as 214P / 214K etc, and j.E leads to a similar situation. | |||
:You can use meaty 2B against Kula on wakeup, then link 5D(c). 2B beats her 623C and 5D(c) her 214B. If she gets hit by the 2B, it can actually combo into 5D(c) if it was an early meaty. | |||
:Blockstring 2B>2A>6A>214C>214B>236A: using this blockstring is more often than not safe against Kula if she has no meter to guard cancel roll. Also, the 214C can beat her 214B if she times it during 6A (seen @ u-rasia vs yanjirou 2023/06/23 at big1). | |||
:Specific Ace-Setups against blocked 623C, from [https://twitter.com/dagun7676/status/1407319860678250496 Dagun Tachi] | |||
=== Vs Gato === | |||
Very difficult matchup. | |||
:Use smalljump E from max range, and repeatedly, as much as possible, this is one of the few ways to beat Gato's pokes. | |||
:Crouching Gato cannot be crossed up by smalljump j.C, since his collision is too high, Oswald will remain on the side he jumped from. | |||
:Vs Gato's 236236A, use 421D or 63214,63214P during the Super Freeze. Corner high damage combo for this situation: 421D -> j.D>land>5D(c)>3A>214C>236D>236A (Whiff), turn around 3A>214B, then either 236C>2124B or 2363214A > QS | |||
:Point Blank vs Gato's 236236A (block) > link 236236A frame trap, use reversal 2B. The 2B beats the next 236236A. | |||
:To beat reversal 236236A, you can also do a meaty smalljump attack that hits at the apex of the small jump, this goes over 236236's hitbox. | |||
:When expecting Gato's 2B or 2D, u-rasia uses 5E>236A occasionally. The leg invulnerability of 5E makes this possible, and a counter hit (eg. if gato smalljump-attacked) makes a combo possible, eg. 5E(ch)>236A>214D (seen at u-rasia vs yanjirou 2023/06/23 at big1). | |||
:Wakeup 421K is risky against Gato since his 5D(c) beats it cleanly. | |||
=== Vs Ryo === | |||
Matchup likely in favor of Ryo. His normal attacks are strong and his pressure (j.E, j.D, 5A, 2B etc.) can be very oppressive for Oswald. | |||
:Punish Ryo LDM on block with 2D>6A>combo. You can also act after the super freeze and before the hit since the attack is so slow, eg. with a very late 421D or 63214,63214P. | |||
:Punish Ryo 623A on block with 3A>214A>236B>236E(ACE), or 2D>6A>combo. From max range, your only options are 5D(f) (minus on hit) or 2363214P or LDM. | |||
:U-Rasia appears to like using Oswald's 421B/D counter in this matchup, likely since Ryo can be somewhat straightforward in his poking game | |||
=== Vs Kim === | |||
: Against [2],8B on guard, use 3A>214A>236B>236E(ACE), or 2D>6A. The latter works from all ranges. | |||
: Against the 2B>2B>2A>63214K block string, use 421D before the 63214K (might be spacing and string dependent, see [https://youtu.be/YHWE00i69QU?t=1549 here] ) | |||
=== Vs Oswald (mirror) === | |||
:Oswald Rekka string on block: before the last hit (214B) use 421B/D Counter > punish | |||
:Alternatively, use guard cancel roll, it can lead to big damage (see [https://youtu.be/0oLnlxfOLsw?t=3242 here]). | |||
:You can run through Oswald and cross him up whenever he does a recovery roll back. | |||
=== | === Vs Adelheid === | ||
:If Adelheid is cornered & uses LDM on block, it can be punished with 5C(f) > QS. | |||
===Vs Maxima=== | |||
In favour of Oswald due to his strong 2B anti-air in this matchup | |||
:Use 2B as an anti-air against Maxima, it will always win against his j.C. Once Maxima has to use his other air attacks, a big threat is eliminated from the matchup (crossup j.C stun combos). | |||
* | ===Vs Jazu === | ||
Neutral is difficult against Jazu, but if you hit him, you can frequently kill him with just one shift stock due to his low stun (depending on your team setup) | |||
*Jazu's J.E and 5E are very hard to deal with in neutral, respect them and learn their ranges. | |||
*Jazu's 632146P Super can be punished after the super freeze with 2D>6A (or 5D(c)) before it even comes out. | |||
*When Jazu is cornered, expect a wall dive that will likely cross you up if you are standing near him. He can convert into a full combo, so be careful. | |||
* | ===Vs Ash=== | ||
*Smalljump B goes over Ash's projectiles. | |||
===Vs Iori=== | |||
Slightly in favor of Iori. | |||
:Iori's 2D beats all of Oswald's jump-ins except crossup j.C, which makes approaching for Oswald very difficult. Try to dash into 2D>6A range if possible, or use crossup j.C. | |||
:Badly spaced jump-ins can be easily anti-aired / low profiled with Oswald's 2B. | |||
:Don't forget that Iori wakes up in the corner with a slight gap behind him that not only allows corner crossups but will also make you land behind him. If you get a knockdown with a good distance to the corner, you can go for a 50 / 50 depending on your spacing and j.C timing. | |||
:If you throw Iori in the corner, you can 50/50 him by rolling early or late, without moving at all. This is related to the above behavior. | |||
' | ===Vs Kensou=== | ||
Difficult matchup. Oswald has trouble approaching Kensou due to his fireballs, anti-airs, dive & lunge punch. | |||
:Jumping in on Kensou is extremely hard with Oswald due to Kensou's hurtbox when throwing a fireball (leans backwards) and his strong anti-air normals. | |||
:This is also true in situations when you are closer: attempting to smalljump in on Kensou when pressuring him will often lead to you getting anti-aired by his normals, pushing you back into his fireball game again. | |||
:Instead, try to approach on the ground, by dashing up, and by only reacting to fireballs at the last second (eg. very late block, or late roll, or smalljump B/D over them, see below). | |||
:On the ground, 5C(f) is very useful against Kensou, as it can beat many of his annoying pokes, eg. 5B(f), 5A(f) | |||
:you can use smalljump j.D or j.B to go over projectiles without having to block them. This starts a mindgame of whether you will do this / roll / superjump or simply block in the last minute. | |||
:Oswald's j.D is excellent at dodging other pokes from Kensou as well, particularly if you are up close: you can smalljump early j.D to "pull in" your legs and dodge some attacks, then land > 2B>2A.. etc. | |||
:j.D is also better than you would think when jumping in on Kensou: j.C and j.E often lose against his pokes, but the extra range of j:D and the lack of a hurtbox on the feet can help beating his anti airs (occasionally). | |||
:Kensou's 421D shoryuken is annoying: it has some invul, hits late and causes hard knockdown. You can actually throw it during startup however, so try to use throw option selects whenever you jump in on him, particularly during okizeme. | |||
:If you go into the BnB ending with 214B > A-card and Kensou uses a wakeup 421D, you will be at +4 only if you block it and he gets hit by the card, which isn't enough to combo after. If you have a read, you can try and roll forward (~+22) or backdash (~+26) to bait it, see [https://youtu.be/yDjOKZPFmzQ?t=17654 here] for a clip. The latter option is also safe against reversal command grab super and leaves you space and time to punish forward roll. | |||
:Kensou's A-Version Lunge Punch can be punished more easily on block than the C-Version, the latter only if spaced badly. If Kensou is out of range of 5D(c), 214C is the preferred punish. Also, you can try rolling forward on a guess to make the lunge punch whiff, then punish with 2B or 2D > combo. Another option is to smalljump straight up and use j.D, that way the A-lunge punch will whiff completely, enabling a punish, but this is only possible as a guess, not on reaction. | |||
:Kensou is tall when crouching. Use instant smalljump A during Card Okizeme for an overhead that is quicker than instant smalljump C. | |||
:Kensou has higher stun than normal. Keep this in mind when planning shift combos to stun. | |||
:Kensou's dive is a very dangerous punish against Oswald's blockstring>2D. To punish dive, either do an early jump up -> land on top of him with either j.C or j.E (depending on distance), or roll back on reaction -> punish (eg. with 5D(c) or 214C). | |||
:After blocking a sweep, you can roll > confirm that Kensou used a fireball > use 236321A, or use the 2363214A right away and hold down the button to reflect the projectile, then follow it up with the super by releasing the button. This is a costly and somehwat dangerous strategy however and should be used sparingly. | |||
:Kensou's smalljumps are so high that it is best to use 5A against them instead of eg. 5D(counter hit) > 3A, since the latter will whiff. | |||
=== | ===Vs K'=== | ||
According to Miekazu, a somewhat difficult matchup. | |||
:Max range j.E is hard to deal with. Your best bet is to either be preemptive with your own attacks (which can lose to 623A), use 63214,63214P or simply try and avoid it as good as possible. | |||
:K' can use 623A to anti-air oswald relatively reliably, and even on trade, the damage is quite good for K'. | |||
:You can run through K' and cross him up whenever he does a recovery roll back. | |||
:If you expect ain trigger > slide during a blockstring, you can (guard cancel) roll back and immediately use 214C (or 5D if you are very close). See an application here from [https://youtu.be/cez5patcmcA?t=19739 u-rasia]. | |||
===Vs Griffon=== | |||
Likely slightly in favor of Oswald. | |||
:Fighting Griffon at mid range can be difficult - Sawakoro suggests using j.E (from max range) and 2D (also from far range) to deal with Griffon in the best possible way. | |||
== | ===Vs Vanessa=== | ||
' | Easy matchup. | ||
:2B beats Vanessa's otherwise very strong j.C clean, from all angles. | |||
:Generally, 2B, 5C and 2D are excellent in this matchup. 2B also beats her 5C(c) clean in scramble situations, and Oswald's 5C & 2D hit from a perfect range where vanessa has no tools to answer them. These attacks can stop vanessa from approaching very well. | |||
:You can 2B or even throw her [4],6P uppercut before the hit. | |||
''' | ===Vs Eiji=== | ||
..., | Difficult matchup according to Kyuntakuya. | ||
:Eiji's overall pressure is hard to deal with for Oswald. If he corners you with his reflector pressure, try to backdash the normal hit right after the reflector to flip out of the string. Depending on Eiji's followup, you can sometimes punish with 5D(c)>3A>214C>236B/D>236A whiff etc, leading to good damage and a cornered opponemt. | |||
:Eiji's 2B/2D cleanly beats Oswald's 5C(f), leading into knockdown, see [https://youtu.be/0oLnlxfOLsw?t=2132 here]. | |||
:Eiji's j.B reaches far into the ground, forget using 2B to low profile it, instead, try to not let Eiji jump on top of you by jumping away yourself with j.A. This should not be something you are actively looking for however, since the damage is low and it resets the situation back into neutral. | |||
===Vs Mary=== | |||
:Mary can be crossed up with a smalljump j.C after throwing her, midscreen and corner. | |||
:Punish [4],6B on block with 214C> rekka series or 214C>236D>236A whiff... etc | |||
:Punish [4],6D on block with 5D(or2D>6A>)>214C>the above followups | |||
== | == Universal Strategy against Oswald == | ||
''' | '''Oswald's Card Throw(623A/B/C/D)''' | ||
Oswald | While Oswald is mostly harmless on distance, he can use his cards to protect himself from attempts to get in on him, or cover his own approach. The cards do not disappear if Oswald blocks, so it important to not get too greedy when you jump or run in on Oswald and saw him throw a card in the meantime. Oswalds also like to roll through you at the very last moment while they are having a card out, forcing a crossup. The best way to approach is to wait for the card to land, Oswald cannot immediately use another one for a short time. | ||
''' | '''Oswald's Pressure''' | ||
Oswald | Oswald usually attempts to open the opponent up with a mix of very early j.Cs that hit almost as an instant overhead and 2B, which is a quick low poke with +3F advantage. The best way to escape from this pressure is to wait for oswald to a particularly high j.C and block it. afterwards, both you and your opponent will recover at about the same time, which should allow you to use a quick poke to break free. Judging when the j.C was high enough for this to become possible is an important skill that can also be used against the smalljump pressure of other characters. | ||
== Videos == | == Videos == | ||
[https://www.youtube.com/watch?v=2EfIiwWRNu8 Oswald Guide | [https://www.youtube.com/watch?v=2EfIiwWRNu8 Oswald Guide from U-Rasia, part 1]<br> | ||
[https://www.youtube.com/watch?v=v0yB-K9MAUc Oswald Guide | [https://www.youtube.com/watch?v=v0yB-K9MAUc Oswald Guide from U-Rasia, part 2]<br> | ||
[http://www.nicovideo.jp/watch/sm27257854 Ace Setups | [http://www.nicovideo.jp/watch/sm27257854 Ace Setups for particular Teams]<br> | ||
[https://youtu.be/epNPEEPpTXs 12-hour long file with Korean top players, lots of Leader Oswald] | |||
{{KOFXI_Navi}} | {{KOFXI_Navi}} | ||
Aktuelle Version vom 6. April 2024, 16:54 Uhr
| Oswald オズワルド | |

| |
| Tiers & Ranking | |
| Tier: | A+ to S |
| Ratio Cost: | 6 Points |
| Properties | |
| Damage Modifier: | 1.0 |
| Stun Modifier: | 1.02 |
| Crouch height (Tier): | F |
Quick Guide
- Oswald is a strong but very technical character that has high damage and shift potential, but from very situational hits.
- He has strong offense, okizeme and mixups, but has a hard time dealing with pressure.
- He is played as a point character (for his strong shift synergy) or as a Leader (for his powerful LDM that has only 2F startup & juggle anywhere).
Neutral
- On range, throw cards with 623X to cover your approach or protect yourself.
- To get in on the opponent, use smalljump j.E from max range.
- Far C is an excellent poke in neutral and good way to end blockstrings.
- 2D(1)>6A is also good in neutral and at the end of strings since it can lead to a full combo from a low hit with high range. Whiffing 2D enables a full punish, so this shouldn't be overused.
Offense
- Once close, attack with a mix of very early smalljump Cs and 2Bs / 2As to open up the opponent.
- Smalljump & jump C is excellent as a crossup and should be used frequently.
- Make sure to learn from which range Oswald's BnB still connects (2B>2A>214C>236C>214B). Do not use the full string on block, it can be punished before 214B.
Defense
- Against smalljumps, use 5A/5B (can be followed by LDM)
- Against higher jumps, Use low profile 2B or jump up j.D or a very early 3A>combo
- To escape from strings, use 2B/2A or 2-frame jump j.A away. Using the 421K-counter or rolling through the opponent is risky but rewarding, since it can lead to back-turned combos.
- For reversals, use counter (421K) or 63214,63214P or LDM. It is advised to not overuse Oswald's reversals, as they are not particularly great (other than LDM, which is pricey).
Colors
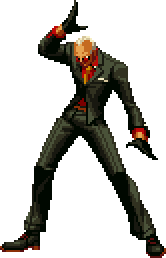
|
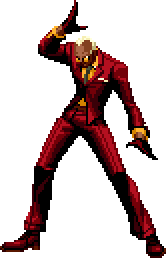
|
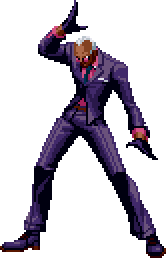
|
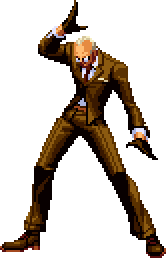
|
| A | B | C | D |
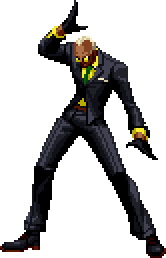
|
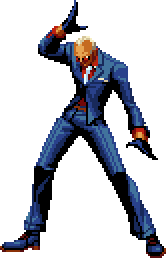
|
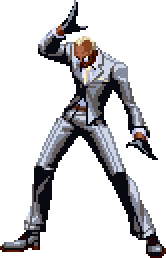
|
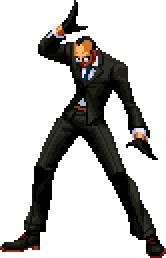
|
| R1 + |
R1 + |
R1 + |
R1 + |
| E+A | E+B | E+C | E+D |
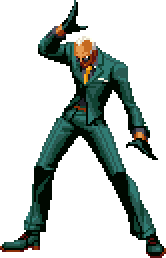
|
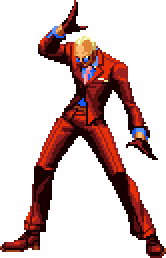
|
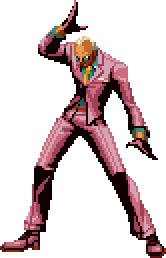
|
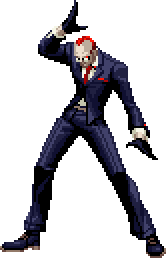
|
| L1 + |
L1 + |
L1 + |
L1 + |
| Start+A | Start+B | Start+C | Start+D |
Frame Data
| Move | S | A | Hit | Blk | Dmg | Stn | G-Dmg | Gauge | J-Type | Air | C-Air | Note |
|---|---|---|---|---|---|---|---|---|---|---|---|---|
| Throw | 1 | 1 | +41 | / | 16 | 0 | 0 | 0 | / | / | / | |
| 5A(c) | 5 | 2 | +0 | -1 | 4 | 7 | 7 | 8 | F+L | JA | F1-14 F | |
| 5A(f) | 5 | 2 | +0 | -1 | 4 | 9 | 9 | 8 | F+L | JA | F1-14 F | |
| 5B(c) | 7 | 6 | +4 | +3 | 5 | 9 | 7 | 8 | F+L | JA | F1-14 F | |
| 5B(f) | 7 | 6 | -1 | -2 | 5 | 9 | 9 | 8 | F+L | JA | F1-14 F | |
| 5C(c) | 8 | 8 | -2 | -3 | 9 | 14 | 13 | 14 | F+L | JA | F1-14 F | |
| 5C(f) | 8 | 6 | -5 | -6 | 11 | 17 | 14 | 14 | F+L | JA | F1-14 F | |
| 5D(c) | 5 | 8 | -3 | -4 | 9 | 17 | 15 | 14 | F+L | JA | F1-14 F | |
| 5D(f) | 12 | 4 | -10 | -11 | 11 | 20 | 17 | 14 | F+L | JA | F1-14 F | |
| 5E | 14 | 8 | KD | -25 | 16 | 12 | 14 | 16 | F+L | N | F1-8 F, F9-28 L | F4-35 invul on feet. F36-59 recovery. |
| GC | 9 | 8 | KD | -20 | ~4 | 0 | 0 | 0 | ? | N | F1-8 F, F9-28 L | F1-16 invul (until end of active time). Airborne/no hitbox on feet F17-28. 49F total duration. |
| 2A | 7 | 5 | +4 | +3 | 4 | 9 | 9 | 8 | F+L | JA | F1-14 F | |
| 2B | 5 | 6 | +4 | +3 | 4 | 9 | 7 | 8 | F+L | JA | F1-14 F | |
| 2C | 13 | 8 | -13 | -14 | 11 | 14 | 13 | 14 | F+L | JA | F1-14 F | |
| 2D(1) | 9 | 8 | -33 | -34 | 5 | 6 | 7 | 14 | F+L | JA | F1-14 F | Conq. Guide combines dmg+stun+g-dmg, but not gauge gain |
| 2D(2) | 27* | 8 | KD | -15 | 5 | 6 | 7 | 14 | F+L | JA | JA | *If first hit whiffs. |
| 6A | 39 | 5 | +4 | +3 | 6 | 0 | 0 | 12 | F+L | JA | F1-8 F, F9-20 L | |
| 6A(can) | 16 | 4 | +4 | +3 | 6 | 0 | 0 | 12 | ? | JA | F1-8 F, F9-20 L | |
| 3A | 10 | 9 | KD | -16 | 12 | 8 | 7 | 14 | F+L | F1-8 F, F9-end L |
F1-8 F, F9-end L |
|
| 3A(can) | 7 | 2 | -5 | -6 | 8 | 9 | 7 | 7 | F+L | F1-8 F, F9-end L |
F1-8 F, F9-end L |
|
| Saving Shift | ? | n* | / | / | ? | 0 | / | 0 | ? | N | F1-8 F, F9-28 L | Active until landing. 9F/10F recovery (hit/whiff). |
| small A | 7 | 6 | / | / | 5 | 8 | 8 | 8 | F+L | JA | F1-14 F | Identical to j.A except stun & guard dmg |
| j.A | 7 | 6 | / | / | 5 | 9 | 9 | 8 | F+L | JA | F1-14 F | |
| small B | 7 | 12 | / | / | 6 | 8 | 8 | 8 | F+L | JA | F1-14 F | |
| j.B | 5 | 12 | / | / | 6 | 9 | 9 | 8 | F+L | JA | F1-14 F | |
| j.C | 12 | 6 | / | / | 10 | 17 | 14 | 14 | F+L | JA | F1-14 F | |
| j.D | 11 | 2 | / | / | 10 | 17 | 15 | 14 | F+L | JA | F1-14 F | |
| j.E | 14 | 8 | KD | / | 14 | 10 | 10 | 16 | F+L | N | F1-8 F, F9-28 L |
|
| 214A(1) | 5 | 1 | / | / | F+L | F1-8 F, F9-end L |
F1-8 F, F9-end L |
Smaller hitbox than 214C(1). | ||||
| 214A(2) | 13 | 4 | -16 | -17 | 11 | 11 | 10 | 4+6/8 | F+L | F1-8 F, F9-end L |
F1-8 F, F9-end L |
Runs slower than 214C(2). Dmg,Stun etc. data is hit 1+2. |
| 214C(1) | 5 | 1 | / | / | F+L | F1-8 F, F9-end L |
F1-8 F, F9-end L |
Bigger hitbox than 214A(1). | ||||
| 214C(2) | 14 | 5 | -23 | -24 | 12 | 11 | 10 | 5+4/6 | F+L | F1-8 F, F9-end L |
F1-8 F, F9-end L |
Runs faster than 214A(2). Dmg,Stun etc. data is hit 1+2. |
| 214P(2)>214A | 6 | 4 | KD | -19 | 5 | 5 | 5 | 6/4 | F+L | JA | F1-8 F, F9-28 L |
Startup starts after 214P(2) active time. |
| 214P(2)>214C | 8 | 5 | KD | -20 | 6 | 5 | 5 | 6/4 | F+L | JA | F1-8 F, F9-28 L |
Startup starts after 214P(2) active time. |
| Derived 214A | 12* | 4 | KD | -17 | 6 | 5 | 5 | 4+6/4 | F+L | F1-8 F, F9-end L |
F1-8 F, F9-end L |
Has only 1 hit. *=fastest possible startup. |
| Derived 214C | 13* | 5 | KD | -24 | 8 | 5 | 5 | 5+6/4 | F+L | F1-8 F, F9-end L |
F1-8 F, F9-end L |
Has only 1 hit. *=fastest possible startup. |
| 236A | 11 | 5 | -19 | -20 | 8 | 8 | 10 | 4/8 | F+L | F1-8 F, F9-end L |
F1-8 F, F9-end L |
Super Cancel. |
| 236C | 13 | 6 | -26 | -27 | 8 | 8 | 10 | 4/8 | F+L | F1-8 F, F9-end L |
F1-8 F, F9-end L |
Super Cancel. |
| 236P>236A | 6 | 4 | KD | -22 | 6 | 3 | 5 | 6/4 | F+L | JA | F1-8 F, F9-28 L |
Followup to 236P. Same hitbox as 236P>236C. |
| 236P>236C | 8 | 3 | KD | -18 | 7 | 3 | 5 | 6/4 | F+L | JA | F1-8 F, F9-28 L |
Followup to 236P. Same hitbox as 236P>236A. |
| Derived 236A | 8 | 4 | KD | -12 | F+L | F1-8 F, F9-28 L |
F1-8 F, F9-end L |
236A as a Rekka-Followup. Same Hitbox as 236P. | ||||
| Derived 236C | 11 | 6 | KD | -27 | F+L | F1-8 F, F9-28 L |
F1-8 F, F9-end L |
236C as a Rekka-Followup. Same Hitbox as 236P. | ||||
| 214B | 26 | 4 | -8 | -9 | 9 | 12 | 13 | 4/8 | F+L | F1-8 F, F9-end L |
F1-8 F, F9-end L |
Overhead. Airborne from F13. |
| 214D | 32 | 5 | -14 | -15 | 10 | 13 | 14 | 4/8 | F+L | F1-8 F, F9-end L |
F1-8 F, F9-end L |
Overhead. Airborne from F16. Flies further than 214B. |
| Derived 214B | 26 | 4 | KD | -12 | F+L | JA | JA | Airborne from F13.Hard Knockdown. Not an overhead (only overhead when used as first or third hit). | ||||
| Derived 214D | 32 | 5 | KD | -18 | F+L | JA | JA | Airborne from F16. Hard Knockdown. Not an overhead (only overhead when used as first or third hit). Flies further than 214B. | ||||
| 236B | 6 | 4 | -31 | -32 | 6 | 10 | 12 | 4/8 | F+L | F1-8 F, F9-end L |
F1-8 F, F9-end L |
Negates projectiles for 15F. F10-29 invul on feet. |
| 236D | 10 | 4 | KD | -36 | 8 | 10 | 13 | 4/8 | F+L | JA | F1-8 F, F9-28 L |
Moves backwards. Negates projectiles for 15F. F14-33 invul on feet. |
| Derived 236B | 10 | 4 | KD | -75 | F+L | F1-13 F, F14-end L* |
F1-8 F, F9-end L* |
Causes wall bounce (not on trade). Negates projectiles for 15F. F14-40 invul on feet. *=both counted after wall bounce hit stop. | ||||
| Derived 236D | 14 | 5 | KD | -109 | L | F1-13 F, F14-end L* |
F1-8 F, F9-end L* |
Causes wall bounce (not on trade). Moves backwards. Negates projectiles for 15F. F19-44 invul on feet. *=both counted after wall bounce hit stop. | ||||
| 236K>236E | 4 | 14+1 | -3 | -113 | 39 | 0 | 0 | 7/13 | JA | / | / | Ace. No combo damage scaling. Needs perfect timing or specific setup. |
| 623A | 58/63* | 13 | + | + | 8 | 0 | 1 | 0/18 | F+L | F1-8 F, F9-28 L |
F1-8 F, F9-end L |
Duration 45F (Oswald can move again on F46). *=F57=active over Oswald, F63 hits vs standing Kyo. |
| 623B | 52/57* | 13 | + | + | 8 | 0 | 1 | 0/18 | F+L | F1-8 F, F9-28 L |
F1-8 F, F9-end L |
Duration 46F (Oswald can move again on F47). *F52=active over Oswald, F57 hits vs standing Kyo. |
| 623C | 55/60* | 14 | + | + | 8 | 0 | 1 | 0/18 | F+L | F1-8 F, F9-28 L |
F1-8 F, F9-end L |
Duration 53F (Oswald can move again on F54). *F55=active over Oswald, F60 hits vs standing Kyo. |
| 623D | 49/56* | 17 | + | + | 8 | 0 | 1 | 4/18 | F+L | F1-8 F, F9-28 L |
F1-8 F, F9-end L |
Duration 53F (Oswald can move again on F54). *F55=active over Oswald, F56 hits vs standing Kyo. |
| 421K | 4 | 17 | / | / | / | / | / | F1-8 only invul on feet. B teleports behind, D behind & in the air. | ||||
| 2363214A | 3 | 25+1 | KD | -9 | 33 | 0 | 0 | 0 | F+L | JA* | F1-8 F, F9-28 L* |
F1 invul. Button can be held to spin in place & reflect projectiles. *=if first hit trades / followup misses |
| 2363214C | 11 | 23+1 | KD | -9 | 37 | 0 | 0 | 0 | F+L | F1-8 F, F9-28 L* |
F1-8 F, F9-end L* |
F1 invul. Button can be held to spin in place & reflect projectiles. *=if first hit trades / followup misses |
| 63214,63214P | 9 | 10 | KD | -30/-28* | 33 | 0 | 0 | 0 | F+L | JA | JA | Negates projectiles. F1-17 invul. A-Version F18-79 counterhit state + F80-99 regular recovery. C-Version F18-77 counterhit-state + F78-97 regular recovery. *=A/C Version. |
| [4],646E | 2 | 36 | KD | -27 | 57 | 0 | 0 | 0 | JA | / | / | 1F invul. F2-37 invul on legs. Has juggle-anywhere property. 40F charge time. |
Special Frame Data
| Situation | Hit | Guard | Note |
|---|---|---|---|
| 214C>236A/C>214B | +54 | -12 | Gap between 236A/C & 214B is 5F on guard (6F attack trades) |
| 214C>236A/C>214B,623A | +9 | / | Card Hits on F63 (9F after advantage ends) |
| 214C>236A/C>214B,623B | +8 | / | Card hits on F57 (3F after advantage ends) |
| 214C>236A/C>214B,623B | +8 | / | Card hits on F57 (3F after advantage ends) |
Queen Frame Data
Note: startup was measured against standing Kyo.
| Version | Startup | Oswald Recovery | Gauge (whiff) | Gauge (hit) |
|---|---|---|---|---|
| 623A | 63 | 45F | +0 | +18 |
| 623B | 57 | 46F | +0 | +18 |
| 623C | 60 | 53F | +0 | +18 |
| 623D | 56 | 53F | +4 | +22 (4+18) |
Special Attributes & Bugs
- Has no collision on back ukemi (can run through)
- Oswald's Front Ukemi takes 26+1F instead of the regular 22+1F
- Oswald's back roll goes further than normal (178px instead of 160px)
- Oswald's throw pulls the opponent slightly out of the corner, which allows corner crossups.
- Oswald's 3A is unblockable if done meaty (tourney-banned).
- If the 421B counter is followed up with a combo shortly after, the super freeze breaks and does not stop time anymore. This can lead to combos not comboing. Example: 421B counter > combo into 214P > shift > any chain into command normal is done, it breaks the super freeze during combo, example here.
Combos
Basic Combos
- [2B,2A] or [C,6A] or [2D(1 Hit),6A] or [close 2B,2A,3A], then:
- 214C,236C,214B: Bread n Butter. The 214C only connects if the combo was started from fairly close. Can link 623A after in corner for Okizeme.
- 214C(1-2), Quick Shift: a basic quick shift setup.
- 2B/2A>2A>3A>Quick Shift: a very useful quick shift setup that can be used from various ranges.
- midscreen crossup (eg. j.C,2B,)2A,214C(2),236D,236A (whiff), turn around delay 3A, then:
- 214A/C,214D,236A(whiff): Basic midscreen crossup setup into knockdown. The 236A at the end is to build meter - leaving it away will make Oswald recover slightly faster.
- 214D,236A/C,214B: Midscreen-into-corner setup. Can start card Okizeme after.
- delay 214C,236B,236E: Ace Setup with tricky timing. The combo must not end in the corner for this to work.
- Corner Crossup (after throw or on incoming) (j.C,\/,)2B,2A,(3A,)214C,236B/236D,236A (Whiff), (Opponent flies back into the corner), delay 3A>214B,then:
- delay 236C,214B, start card Okizeme
- 2363214A, immediately quickshift or kill with the super
- link 3A>214B>236C>214B: hard combo that requires the very first 3A>214B to hit as high as possible.
- link 236B>236A>214B: hard combo that can be done if the very first 3A>214B hits high, but not high enough for another 3A. The "link 236B" part is hard because it cannot be pre-buffered (doing it early will result in the 214B still becoming part of the rekka chain from before) - try pushing the button for the motion once your opponent is very low already, about the height of Oswald's head or even lower.
- From further away 2B>2A>3A>236A(whiff)>236A: fancy situational combo that is rarely seen. Used in case you are too far away for the BnB, but hit with 2B,2A..
Ace Setups
- Enemy cornered, Oswald slightly outside of corner: 3A,236B,236A,236B,236E: Guaranteed Ace setup, is always used on stunned opponents. Can use 623A or (623A > j.C > 3A..) before for added damage.
- Midscreen, 3A-Hit from further away, [immediate 214A] or [delay 214C],236B,236E: Guaranteed Ace setup.
- Midscreen j.C crossup,\/,5D or [2B,2A,]214C(2 Hits),236D,236A, [delay 3A, delay 214C] or [delay 3A, small delay 214A (easier!)] or [max delay 3A>214A],236B,236E
- Midscreen 421D hit, j.A, land, immediate 214C,236D,236A, turn around, ender from above
- Corner Cross j.C,2B,2A,3A,214C,236B,236A(whiff), 3A,236B whiff,236A,236B,236E the second 3A has to be put in as 1A (with 1, even though Oswald is then doing the attack in the direction of the corner because of the auto turn!). The 1A also has to be done as soon as possible after the 236A whiff, otherwise 2A will come out. The 236B after 1A is put in normally(from the 1P-side). Source: http://hartheon.web.fc2.com/character/oswald.html
- Opp. in Corner & Dizzy, Oswald slightly outside of corner: 623A, immediatey 3A-236C>(Card hits)>236B>236E: Stylish setup that deals less damage than the regular ace setup.
- Incoming in corner, dash under, 2B,2A,214C, delay 236B, 236A whiff, 2B(whiff), turn around 236B,236A,236B,236E: see here.
- close to screen edge (midscreen) 2B,2A,214C, delay 236B; delay 236E: time the 236E so the opponent is right above you. This setup still requires 1F-timing, but the pause between the bounce and the 236E motion is short enough that it is doable. Example from U-Rasia
- Midscreen 623A, 5D(c) (card hits) link 3A>214A>236B>236E. Source: BZR @ port24
- Back to corner combo with few hits into 214C,236D,236A (Whiff), walk back into corner if needed, 3A delay > 21A>236B>236A (Whiff), run back, 3A delay 214B, link 3A>236B>236A>236B>236E: Source (dropped combo): youtube
ACE Setups Stage Help
To maximize your ace combos, you should always know how far you are away from the corner. The following locations should help identify these spots for each stage, all considering the setup to be a juggle 3A hit (eg. after close to screen edge 2B,2A,214C,236D,236A(whiff), turn around...)
Cambodia
- 1P Corner: dude with white shirt
- 2P Corner: left of big window
Japan:
- 1P Corner: right-side edge of the door
- 2P Corner: middle of big wooden pillar
America
- 1P Corner: 3 dudes
- 2P Corner: Trashcan
Russia
- 1P Corner: under the rightmost ice statue
- 2P Corner: under the leftmost cheering dude
South:
- 1P Corner: Right side of the right Jeep
- 2P Corner: in front of the leftmost palm
Italy:
- 1P Corner: between the man & the kid
- 2P Corner: in front of the tall potted plant
Spain:
- 1P Corner: right side of the pillar that is in front of the black, smaller building
- 2P Corner: to the left of the brighter line of tiles on the stage floor
Anti-Air
- Preventive 3A > confirm > 214C, 214D (>236A whiff, for meter building)
- 5A/5B, LDM
Saving Shift > LDM Setups
- Either Saving Shift to Oswald with cornered opponent, OR Saving Shift while back-turned & cornered > Saving Shift hits on Counter hit > 3A>214B, [4],D>6A46E (LDM): Source: k-tani
- Cornered Saving Shift (Counter Hit), 3A,delay 214A/C,236B, delay 214A/C (the other way, back into the corner), link LDM. Source: Okinawa-Kaz
Team Combos
Preferred Quick Shift Normals:
- Standing opponent: j.D
- Crouching opponent: j.A
- Cornered or Back-turned opponent: j.C, j.D will often whiff
- Close to own corner: late j.A
Universal
- Corner Crossup j.C (eg. after DOWN), 2B,2A,3A,214C,236B/D,236A(whiff), turn around 3A>214B, then:
- 2363214A, QS on 2. Hit for Stun Combos Example: player @ Playland Carnival
- 214C > QS for Juggle Anywhere Setups
- Corner 2B,2A,214C,236C, max delay 214C > QS: Very difficult quick shift setup because of the max delay 214C. Afterwards, eg. Vanessa oder K' j.D, land, LDM.
- Corner crossup combo into 214C,236B,214B (whiff), turn around link 236B > QS (to Kula, land, 214B,6B..): This combo is used when Oswald is already so far out of the corner that 236A(whiff) wouldn't work and 214B(whiff) has to be used.
Gato & Oswald
- Gato Combo in 236236P with a lot of distance to the corner, QS Oswald, backdash (input: 46, not 44!), 214A>236B>236A(whiff), turn around 2D kara cancel 214C>236B>236E (ACE): Source: K-Tani or playland carnival
- Gato Combo in 236236P mit very little distance to the corner, QS Oswald, backdash, 214X>236B>236A(whiff), turn around 2C kara cancel 214A/C>214B (Knockdown), Source: K-Tani
- Gato Incoming j.B,2B,236236A, QS Oswald, backdash, 3A>214B>236A?>236B>236E (ACE): Source: Pie from Korea
- Senga Loop into Ace: 214B-B loop, then let the opponent fall into 236236A, QS oswald, j.A whiff, land, dash (minimum time), backdash, 236B>236A>236B>236E. Found by SenseiEnrique, video
Vanessa & Oswald
- Vanessa (Back to the corner) Super QS Oswald (crossup, no Jump-in), \/, 3A,236B,236A,236B,236E
- Vanessa (Back to the corner) 2C>[4],6A> QS Oswald (j.A whiff),\/, 5A whiff, 3A,214A,236B,236E
- Vanessa, Corner, SRK loop, QS Oswald, backdash, 3A,236B,236A,236B,236E
- Vanessa, midscreen 236236P(2-3) or 41236P(3), QS Oswald, land behind opponent, 5D,214C(2 hits),236D,236A (whiff), max delay 236A-214A-236B-236E
- Vamessa, midscreen 236236P(2-3) or 41236P(3), QS Oswald, land behind opponent, 5D(c)>6A>214B>236A>214A>236B>236E Source: Port24
- Vamessa, midscreen 236236P(2) or 41236P(3), QS Oswald, land behind opponent, 3A, delay 214C>236B>236E. Useful since the combo cannot be saving shifted if the 236236P super was used before the QS.
- Vanessa cornered, wakeup ranbu, shift Oswald, turn around 3A,236B,236A,236B,236E: Source: port24
- Vanessa j.C,\/,C,[4],6A QS Oswald whiff j.A, run through, turn around 236P>236B>236A(whiff), 2B(whiff) turn around 3A,214D>236C>214B. Source: BZR @ port24
- Vanessa > Oswald Ace Setup from Dagun
- Vanessa 2141236P > QS oswald > \/, 3A>214A>236B>236E. No delay after 3A. works on hits 3,7,8 (hit 3 only from 2141236A).
Adelheid & Oswald
- Adelheid, 236236D(1 Hit) QS Oswald (no Jumpin, \/,) Crossup 5D...
Gai & Oswald
- Midscreen/Fullscreen Gai Rekkas in Upper, QS Oswald (no Jumpin, \/,) 5B(close, whiff), 5B(close, whiff), 3A>-214A>236B-236E (ACE) Source: Rojar @ port24
- Midscreen Gai Deadly Rave, QS Oswald, \/, 214C?,236B,236E (ACE) Source: Port24
Elisabeth & Oswald
- Elisabeth combo in upper super, QS Oswald (j.D whiff, \/,) 2C(whiff cancel)214A/C (whiff), turn around link 3A>214A>236B>236E Source
- strange Setup
- Ace Setup from BZR
Oswald & K
- Oswald Corner Combo in 214C>236A QS K' j.D,\/, backdash, LDM
- Oswald Corner Combo in 214C>236B>236A QS K',\/, LDM (thanks to nishikawaguchiterry!)
- Oswald midscreen crossup combo in 214C,236D,236A(whiff), turn around 3A delay 214C>236B>214A (whiff, auto turn), link C(f), QS K' j.C(whiff),\/, LDM Source: U-Rasia You have to be in the corner together with the opponent during the "3A delay 214C"-Part for the combo to work.
- Alternative: nach 214A whiff link 236B > shift K' > j.X(whiff),\/,236236A Source: u-rasia
- Oswald corner 421D, (in air in corner)j.A,5D,3A,214C,236D,236A, turn around 3A,214B,2363214A QS K', BnB > Stun
- K' DOWN! in the corner, crossup 214K-214K QS Oswald, \/, 3A,... leads to a juggle combo, see miekazu
Ryo & Oswald
- Ryo 646P, QS Oswald, Rolle, 3A>214P>236B>236E(ACE): Source: k-tani
Ash & Oswald
- Corner Side switch from Oswald to ash LDM & back to Oswald, by k-tani
Duck & Oswald
- Duck 2A,2A,5B,6C, Shift Oswald, j.A,\/,3A delay 214C,236B,236E. The time window for the QS is 11F (for the j.A to still hit).
- Duck Dance, 214214B > shift Oswald, backdash, 236A?,236B,236E: BZR @port24
- Duck corner Chain in 3D, Shift Oswald,\/,236A(turn around),236B,236A(whiff), max delay 3A, max delay 214A,236B,(delay)236A(whiff), turn around, run back towards corner, 3A>214B,delay 236C>214B. Hard combo because of the corner crossup (needs perfect shift & 236A timing).
Terry & Oswald
- Midscreen into corner ace setup from Nishikawaguchi Terry
Kula & Oswald
- Midscreen Kula combo into 214B-6D QS Oswald,\/, 5A (whiff) 3A>214A>236B>236E
- Corner Kula combo into 214B-6D QS Oswald,\/, backdash, 236B,236A,236B,236E, see here
Silber & Oswald
- Midscreen combo into Silber Super, QS Oswald, walk back 3A,214A,236B,236E (ACE), Source: Ryoji
Kensou & Oswald
Other Combos
- Cornered 2B>2A>214C>236D>214B, turn around 236B>236A/C>214B Source: U-Rasia
- incoming smalljump j.C crossup,2B,2A,3A,214C,236B,236A(whiff), turn around 3A>AB roll cancel > 3A> delay 214B link 3A>214B... Source: u-rasia, Quote: "This combo's second 3A is very important .This 3A , you enter the command 1A.Left and right reversed . It is the fastest command until second 214B. And this stun combo is only Adelheid ,Jazu and hayate."
- Solo stun vs Adelheid: Corner DOWN! Card Okizeme, crossup j.C (card hits), 2B,2A,3A,214C(2 hits),236B,236A(whiff), turn around 3A>AB>3A>214B, link 3A>214B, delay 214C,214C (stun), Source: u-rasia @por24
- Cornered 2B>2A>214C>236D>236A(whiff), walk back 3A, long delay 214A>236B>236A(whiff, opp. flies over Oswald), run for a bit, 3A>214B, then:
- 236C>214B
- link 2363214P, shift out etc.
- delay 214A, shift out etc.
- cornered 3A, delay 214C?>236B>236A(whiff), link 214C?>236B>214A?(whiff), link 236B? Source: U-Rasia
Strategy & Setups
Neutral
Oswald wants to get in as close as possible to make the most out of j.C pressure and to maximize his combo opportunities, particularly from crossups. The latter is best achieved by j.C crossups against crouching opponents, strategic AB-rolls or by using 2B as an anti-air against badly-spaced jumps. If you are forced to play more defensively due to hard matchups, turtling behind the 623X-cards is a valid strategy, particularly when rolling forward as they would hit (which can lead to crossups).
The most important normals in neutral are:
far C: excellent Poke, great to end blockstrings
2B: low Profile, can be used as Anti-Air. Is also very fast(5F), gives +3 advantage and leads to combos.
5A/2A: good, fast pokes. 2A can be confirmed into 3A if mashed, and 5A ist good as an anti-smalljump attack.
j.C: Very strong jump in, hits early and reaches far down and also has a great crossup hitbox. Can be done right at the start of a smalljump, repeatedly, to exert a lot of pressure.
j.E: comparatively strong but somewhat slow j.E, good horizontal Hitbox which is useful to get in on the opponent.
Anti-Air
- 2B: Low Profile.
- 5B
- 5A
- 5D(c)(counter hit) > 3A: vs Smalljumps
- j.D (strong air-to-air, has to be done early, will stop almost anything)
- 63214,63214P (slow but strong)
Special Setups
- Corner Throw > Corner Crossup (eg. with AB-Roll>2B or j.C crossup).
- far C > Quick Shift good to punish from further away or to escape under pressure.
- 2B,2A>6A>214C: Frame Trap. There is no time to hit confirm the 214C, but enough time to decide what rekka to do after in case the opponent has blocked.
- 2B,2A, 2D>6A (Hit Confirm 214C): Frame Trap. Note: enemy can jump out & punish.
- Jump-in on Block, micro dash, smalljump j.C (crossup if opp. crouched): Setup for a midscreen backturned combo: j.C Cross,\/,5D,6A,214C(2 Hits),236D,236A, turn-around 3A, max delay 214C,236B,236E.
- With back to wall poke with 2D > 6A, confirm into 214C (1-2 Hits), 236B/D (B if 2 Hits of 214C hit, D if 1 hits), 236A (Whiff), Corner Combo
Blockstrings & Okizeme
Blockstrings
- 2B,2A/B, then...
- dash 2B: to reset pressure
- hyperhop j.C: to reset pressure - big gap
- 5C: ends pressure since 5C(f) is minus, but is a good option against mashers and for the pusback
- 2D>6A hit confirm: has a 6F gap, opponent can jump out, but is still very useful.
- delay 2A>3A hit confirm: good blockstring with only a very small gap that can lead into QS combos or 2363214P-super.
- >6A>214C...: advanced blockstring. The gap before 6A is small, and the additional 214C gives time to hit confirm. Since this can be unsafe on block, it is best used against specific characters or early in the match when guardcancel-roll is not available for your opponent yet. Example by u-rasia.
Basic Okizeme
- Midscreen Combo in 214B (knockdown),
- dash, roll,attack: left/right Okizeme
- mini-dash, superjump j.C: Crossup / fake crossup. To prevent your opponent from rolling this mixup, you can use 2D>6A after the j.C, the 2D will automatically beat the roll.
- short pause, dash, hyperhop j.C Crossup: only vs Adelheid, Athena, Mary, Ralf, Ryo, Whip
- Corner Combo in 214B (knockdown) > 623A, then:
- slight delay 2B (card hits)> hit confirm 5D: the low option. The 5D automatically hits players rolling forward. The delay on 2B is necessary to turn the j.C / 2B into a true 50/50, otherwise people will just block low, then high and cover both options.
- Smalljump up instant j.C (card hits), \/, hit confirm 5D: the overhead option. if you time it perfectly you land in time to punish a forward roll with 5D against Ryo, Kim, Maxima, Duo Lon (because they wake up slower) and Yuri + all console characters except Geese (because their front roll is longer).
- Smalljump Back instant j.A (card hits), 2D>6A>214C... (Note: character specific, only against taller crouching characters)
- Block or roll or backdash (Opponent attempted a reversal, card hits in air) > 3A>214B...
- Corner Backturned knockdown (eg. after 214B), then:
- backdash, superjump j.C: auto-timing for a crossup. If you delay the button press, it will be a fake crossup. This setup also works without the backdash but needs manual timing (which isn't too hard).
Throw Okizeme
Midscreen:
- Throw, smalljump j.C: simple safe jump.
- Throw, walk back, roll: a late crossup that hopefully flips your opponent's inputs.
- Throw, walk back, superjump j.C: always a crossup if it is somehwat meaty, but still good to block your opponent from using specific reversals due to the j.C angle.
Corner:
- Throw, roll or Superjump > Crossup
- Throw, dash, then Roll: pseudo-50/50 left/right Mixup, since the opponent is pushed into the corner (or not) by the running. Note: against Iori only, stand still and delay the roll a little or a lot - a little will be a fake crossup, a lot will be a true crossup.
- Throw, 5A whiff, then smalljump j.C oder hyperhop j.C (50/50 left right). This only works against characters with lower vertical hitbox while rising, eg. Kula, Kim, Adelheid, Whip, Mary etc.
- Corner Throw > smalljump over opponent into corner > smalljump back j.C (crossup vs crouch): a (silly) variation to the above, works against Kim (stands up very slowly), possibly also others.
Midscreen Smalljump Crossups:
- Throw> walk back> Hyperhop j.C works as a crossup against:
- Adelheid, Athena, Mary, Ralf, Ryo, Whip (easy)
- Kim (easy if you whiff 2Ax2 before the smalljump more difficult, less telegraphed: walk back far, jump late)
- Throw, then:
- 5A-5A chain whiff, smalljump j.C Crossup (Kim)
- 5A whiff, smalljump j.C Crossup (Adel, Mary,Ralf, Ryo, Whip)
- 5A whiff, smalljump, early j.C Crossup (Athena)
Okizeme on DOWN (KOed opponent)
- After ACE-Kill walk slightly back, then meaty 3A > 236B > 236A > 236B > 236E: unblockable Bug Setup into Ace. Tourney banned.
- After ACE-Kill in corner: whiff 5A, smalljump j.C - fake crossup. Hits meaty & leads to 2B,2B,2A,3A, shiftout combo.
- After ACE-Kill in corner: small delay, hyperhop j.C - hits crossup. Afterwards do 2B,2A,214C(2 hits),236B/D, 236A(whiff), turn around 3A,214B... etc
- After 2363214P Kill in corner: immediate 623A, instant smalljump j.C: does not look meaty, but enables a combo. Source: u-rasia
- Crazy run-over Okizeme from Tori: Link
Setups for Meaty Card:
- Corner Kill with 236Chit, z.B. 5D>3A>214C>236C(kill), link 623A > Roll through Opponent (left/right Oki) or instant smalljump C(card hits), Combo
- Corner Kill with 214B hit, eg. from 5D>3A>214C>236C>214B(kill), 2A(whiff),5E~kara cancel 623A > Rolle through opponent (left/right Oki) or instant smalljump C(card hits), Combo
- Corner Kill with 214B(Juggle) Hit> cancel in 214P(whiff)>236P(whiff), 623A, instant smalljump j.A > card hits > Combo. Source:u-rasia
- Midscreen run right in front of corpse, 623A, then: Source: U-Rasia
- Roll through opponent
- Jump over j.C
- wait
Other Stuff
- On a back-turned BnB combo that ends in the corner, you can use backdash > superjump j.C, which then hits as meaty crossup. For a mixup, delay the j.C to trigger a fake crossup.
- Corner cross 2B,2A,214C,236B,236A(whiff), turn around 3A>214B with fastest timing is an auto-timed 3A relaunch setup.
Matchups
Vs Kula
Note by ATG: I asked u-rasia about this matchup, because he plays it exceptionally well. This is the original quote on this:
VS kura
①Little 8JE is so important action .
Kuras J action lose this action so so .
②Oswalds 5C range is so long .
You have to keep separation 5C hit and kuras 5B does not hit .
③Let's hit JE(counter) and hit 3A + ace !
But It's hard for Oswald to beat Kura .
If you receive damage Kuras 2B or JC or JE , Subsequent developments require reading .
Good lack .
- In neutral, 2B can beat Kula's j.C since the hurtbox reaches into the ground.
- Against B-Ray Spin abuse, you can guess and roll. If Kula used Ray Spin, you can use an immediate 214C after your roll to punish her (this is a technique used by u-rasia).
- If you play Leader Oswald, you can punish B-Ray Spin on block with LDM.
- Vs reversal B-Ray Spin: use a delayed 5D>3A or delayed smalljump j.E as Okizeme. The 5D hits on Counter Hit and then combos into 3A which leads into followup combos such as 214P / 214K etc, and j.E leads to a similar situation.
- You can use meaty 2B against Kula on wakeup, then link 5D(c). 2B beats her 623C and 5D(c) her 214B. If she gets hit by the 2B, it can actually combo into 5D(c) if it was an early meaty.
- Blockstring 2B>2A>6A>214C>214B>236A: using this blockstring is more often than not safe against Kula if she has no meter to guard cancel roll. Also, the 214C can beat her 214B if she times it during 6A (seen @ u-rasia vs yanjirou 2023/06/23 at big1).
- Specific Ace-Setups against blocked 623C, from Dagun Tachi
Vs Gato
Very difficult matchup.
- Use smalljump E from max range, and repeatedly, as much as possible, this is one of the few ways to beat Gato's pokes.
- Crouching Gato cannot be crossed up by smalljump j.C, since his collision is too high, Oswald will remain on the side he jumped from.
- Vs Gato's 236236A, use 421D or 63214,63214P during the Super Freeze. Corner high damage combo for this situation: 421D -> j.D>land>5D(c)>3A>214C>236D>236A (Whiff), turn around 3A>214B, then either 236C>2124B or 2363214A > QS
- Point Blank vs Gato's 236236A (block) > link 236236A frame trap, use reversal 2B. The 2B beats the next 236236A.
- To beat reversal 236236A, you can also do a meaty smalljump attack that hits at the apex of the small jump, this goes over 236236's hitbox.
- When expecting Gato's 2B or 2D, u-rasia uses 5E>236A occasionally. The leg invulnerability of 5E makes this possible, and a counter hit (eg. if gato smalljump-attacked) makes a combo possible, eg. 5E(ch)>236A>214D (seen at u-rasia vs yanjirou 2023/06/23 at big1).
- Wakeup 421K is risky against Gato since his 5D(c) beats it cleanly.
Vs Ryo
Matchup likely in favor of Ryo. His normal attacks are strong and his pressure (j.E, j.D, 5A, 2B etc.) can be very oppressive for Oswald.
- Punish Ryo LDM on block with 2D>6A>combo. You can also act after the super freeze and before the hit since the attack is so slow, eg. with a very late 421D or 63214,63214P.
- Punish Ryo 623A on block with 3A>214A>236B>236E(ACE), or 2D>6A>combo. From max range, your only options are 5D(f) (minus on hit) or 2363214P or LDM.
- U-Rasia appears to like using Oswald's 421B/D counter in this matchup, likely since Ryo can be somewhat straightforward in his poking game
Vs Kim
- Against [2],8B on guard, use 3A>214A>236B>236E(ACE), or 2D>6A. The latter works from all ranges.
- Against the 2B>2B>2A>63214K block string, use 421D before the 63214K (might be spacing and string dependent, see here )
Vs Oswald (mirror)
- Oswald Rekka string on block: before the last hit (214B) use 421B/D Counter > punish
- Alternatively, use guard cancel roll, it can lead to big damage (see here).
- You can run through Oswald and cross him up whenever he does a recovery roll back.
Vs Adelheid
- If Adelheid is cornered & uses LDM on block, it can be punished with 5C(f) > QS.
Vs Maxima
In favour of Oswald due to his strong 2B anti-air in this matchup
- Use 2B as an anti-air against Maxima, it will always win against his j.C. Once Maxima has to use his other air attacks, a big threat is eliminated from the matchup (crossup j.C stun combos).
Vs Jazu
Neutral is difficult against Jazu, but if you hit him, you can frequently kill him with just one shift stock due to his low stun (depending on your team setup)
- Jazu's J.E and 5E are very hard to deal with in neutral, respect them and learn their ranges.
- Jazu's 632146P Super can be punished after the super freeze with 2D>6A (or 5D(c)) before it even comes out.
- When Jazu is cornered, expect a wall dive that will likely cross you up if you are standing near him. He can convert into a full combo, so be careful.
Vs Ash
- Smalljump B goes over Ash's projectiles.
Vs Iori
Slightly in favor of Iori.
- Iori's 2D beats all of Oswald's jump-ins except crossup j.C, which makes approaching for Oswald very difficult. Try to dash into 2D>6A range if possible, or use crossup j.C.
- Badly spaced jump-ins can be easily anti-aired / low profiled with Oswald's 2B.
- Don't forget that Iori wakes up in the corner with a slight gap behind him that not only allows corner crossups but will also make you land behind him. If you get a knockdown with a good distance to the corner, you can go for a 50 / 50 depending on your spacing and j.C timing.
- If you throw Iori in the corner, you can 50/50 him by rolling early or late, without moving at all. This is related to the above behavior.
Vs Kensou
Difficult matchup. Oswald has trouble approaching Kensou due to his fireballs, anti-airs, dive & lunge punch.
- Jumping in on Kensou is extremely hard with Oswald due to Kensou's hurtbox when throwing a fireball (leans backwards) and his strong anti-air normals.
- This is also true in situations when you are closer: attempting to smalljump in on Kensou when pressuring him will often lead to you getting anti-aired by his normals, pushing you back into his fireball game again.
- Instead, try to approach on the ground, by dashing up, and by only reacting to fireballs at the last second (eg. very late block, or late roll, or smalljump B/D over them, see below).
- On the ground, 5C(f) is very useful against Kensou, as it can beat many of his annoying pokes, eg. 5B(f), 5A(f)
- you can use smalljump j.D or j.B to go over projectiles without having to block them. This starts a mindgame of whether you will do this / roll / superjump or simply block in the last minute.
- Oswald's j.D is excellent at dodging other pokes from Kensou as well, particularly if you are up close: you can smalljump early j.D to "pull in" your legs and dodge some attacks, then land > 2B>2A.. etc.
- j.D is also better than you would think when jumping in on Kensou: j.C and j.E often lose against his pokes, but the extra range of j:D and the lack of a hurtbox on the feet can help beating his anti airs (occasionally).
- Kensou's 421D shoryuken is annoying: it has some invul, hits late and causes hard knockdown. You can actually throw it during startup however, so try to use throw option selects whenever you jump in on him, particularly during okizeme.
- If you go into the BnB ending with 214B > A-card and Kensou uses a wakeup 421D, you will be at +4 only if you block it and he gets hit by the card, which isn't enough to combo after. If you have a read, you can try and roll forward (~+22) or backdash (~+26) to bait it, see here for a clip. The latter option is also safe against reversal command grab super and leaves you space and time to punish forward roll.
- Kensou's A-Version Lunge Punch can be punished more easily on block than the C-Version, the latter only if spaced badly. If Kensou is out of range of 5D(c), 214C is the preferred punish. Also, you can try rolling forward on a guess to make the lunge punch whiff, then punish with 2B or 2D > combo. Another option is to smalljump straight up and use j.D, that way the A-lunge punch will whiff completely, enabling a punish, but this is only possible as a guess, not on reaction.
- Kensou is tall when crouching. Use instant smalljump A during Card Okizeme for an overhead that is quicker than instant smalljump C.
- Kensou has higher stun than normal. Keep this in mind when planning shift combos to stun.
- Kensou's dive is a very dangerous punish against Oswald's blockstring>2D. To punish dive, either do an early jump up -> land on top of him with either j.C or j.E (depending on distance), or roll back on reaction -> punish (eg. with 5D(c) or 214C).
- After blocking a sweep, you can roll > confirm that Kensou used a fireball > use 236321A, or use the 2363214A right away and hold down the button to reflect the projectile, then follow it up with the super by releasing the button. This is a costly and somehwat dangerous strategy however and should be used sparingly.
- Kensou's smalljumps are so high that it is best to use 5A against them instead of eg. 5D(counter hit) > 3A, since the latter will whiff.
Vs K'
According to Miekazu, a somewhat difficult matchup.
- Max range j.E is hard to deal with. Your best bet is to either be preemptive with your own attacks (which can lose to 623A), use 63214,63214P or simply try and avoid it as good as possible.
- K' can use 623A to anti-air oswald relatively reliably, and even on trade, the damage is quite good for K'.
- You can run through K' and cross him up whenever he does a recovery roll back.
- If you expect ain trigger > slide during a blockstring, you can (guard cancel) roll back and immediately use 214C (or 5D if you are very close). See an application here from u-rasia.
Vs Griffon
Likely slightly in favor of Oswald.
- Fighting Griffon at mid range can be difficult - Sawakoro suggests using j.E (from max range) and 2D (also from far range) to deal with Griffon in the best possible way.
Vs Vanessa
Easy matchup.
- 2B beats Vanessa's otherwise very strong j.C clean, from all angles.
- Generally, 2B, 5C and 2D are excellent in this matchup. 2B also beats her 5C(c) clean in scramble situations, and Oswald's 5C & 2D hit from a perfect range where vanessa has no tools to answer them. These attacks can stop vanessa from approaching very well.
- You can 2B or even throw her [4],6P uppercut before the hit.
Vs Eiji
Difficult matchup according to Kyuntakuya.
- Eiji's overall pressure is hard to deal with for Oswald. If he corners you with his reflector pressure, try to backdash the normal hit right after the reflector to flip out of the string. Depending on Eiji's followup, you can sometimes punish with 5D(c)>3A>214C>236B/D>236A whiff etc, leading to good damage and a cornered opponemt.
- Eiji's 2B/2D cleanly beats Oswald's 5C(f), leading into knockdown, see here.
- Eiji's j.B reaches far into the ground, forget using 2B to low profile it, instead, try to not let Eiji jump on top of you by jumping away yourself with j.A. This should not be something you are actively looking for however, since the damage is low and it resets the situation back into neutral.
Vs Mary
- Mary can be crossed up with a smalljump j.C after throwing her, midscreen and corner.
- Punish [4],6B on block with 214C> rekka series or 214C>236D>236A whiff... etc
- Punish [4],6D on block with 5D(or2D>6A>)>214C>the above followups
Universal Strategy against Oswald
Oswald's Card Throw(623A/B/C/D) While Oswald is mostly harmless on distance, he can use his cards to protect himself from attempts to get in on him, or cover his own approach. The cards do not disappear if Oswald blocks, so it important to not get too greedy when you jump or run in on Oswald and saw him throw a card in the meantime. Oswalds also like to roll through you at the very last moment while they are having a card out, forcing a crossup. The best way to approach is to wait for the card to land, Oswald cannot immediately use another one for a short time.
Oswald's Pressure Oswald usually attempts to open the opponent up with a mix of very early j.Cs that hit almost as an instant overhead and 2B, which is a quick low poke with +3F advantage. The best way to escape from this pressure is to wait for oswald to a particularly high j.C and block it. afterwards, both you and your opponent will recover at about the same time, which should allow you to use a quick poke to break free. Judging when the j.C was high enough for this to become possible is an important skill that can also be used against the smalljump pressure of other characters.
Videos
Oswald Guide from U-Rasia, part 1
Oswald Guide from U-Rasia, part 2
Ace Setups for particular Teams
12-hour long file with Korean top players, lots of Leader Oswald
- Sacred Treasures Team: Kyo | Iori | Shingo
- Hero Team: Ash | Oswald | Shen
- Fatal Fury Team: Terry | Kim | Duck King
- Agent Team: Vanessa | Mary | Ramon
- Art of Fighting Team: Ryo Sakazaki | Yuri Sakazaki | King
- Rival Team: Elisabeth | Duo Lon | Benimaru
- Team K': K' |Kula | Maxima
- Garou Team: Jenet | Gato | Griffon
- Ikari Warriors Team: Ralf | Clark | Whip
- Anti Kyokugenryu Team: Malin | Kasumi | Eiji
- Psycho Soldier Team: Athena Asamiya | Sie Kensou | Momoko
- Time Unlock: Adelheid | Gai | Hayate | Jazu | Silber
