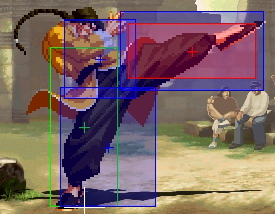
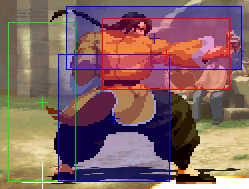
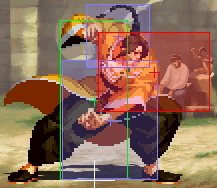
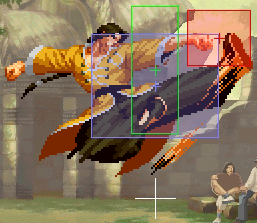
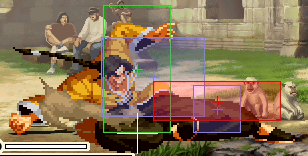
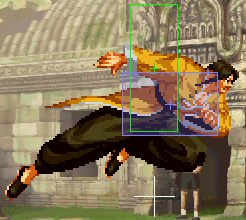
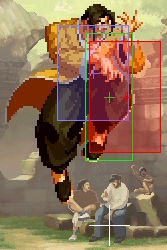
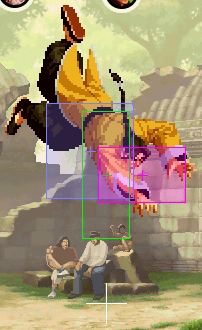
Gato(KOFXI): Unterschied zwischen den Versionen
(→Kensou) |
Keine Bearbeitungszusammenfassung |
||
| Zeile 3: | Zeile 3: | ||
| jcharname = 牙刀 | | jcharname = 牙刀 | ||
| portrait = [[Image:KOFXI gato full.png]] | | portrait = [[Image:KOFXI gato full.png]] | ||
|tier_rank = | |tier_rank = S+ | ||
|ratio_rank = 7 | |ratio_rank = 7 Points | ||
|health = 112 | |health = 112 | ||
|stun_gauge = 100 | |stun_gauge = 100 | ||
| Zeile 10: | Zeile 10: | ||
}} | }} | ||
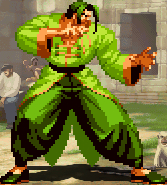
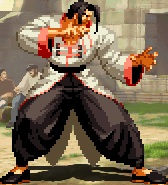
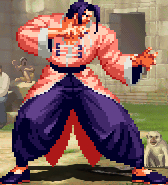
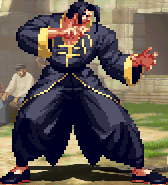
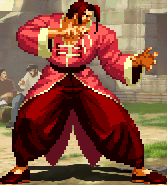
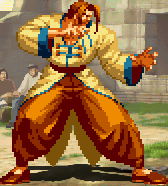
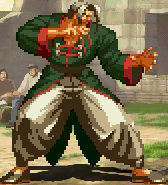
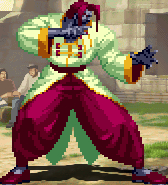
== | == Colors == | ||
{| cellpadding="0" style="text-align: center;" | {| cellpadding="0" style="text-align: center;" | ||
|[[Datei:KOFXI gato S.jpg]] | |[[Datei:KOFXI gato S.jpg]] | ||
| Zeile 63: | Zeile 63: | ||
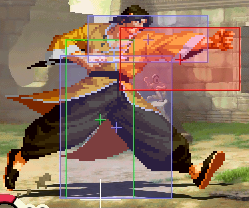
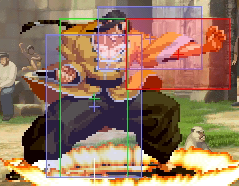
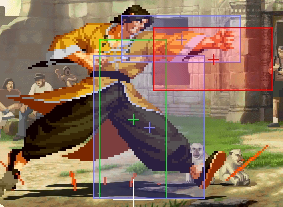
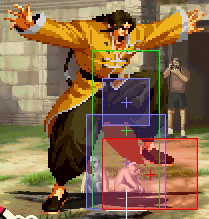
==Frame Data== | ==Frame Data== | ||
'' | ''Note: thanks to Rock for the Short List Data!'' | ||
{| class="wikitable sortable mw-collapsible mw-collapsed" cellspacing="1" style="text-align: center; color:black;border: 1px solid #B5B5B5" | {| class="wikitable sortable mw-collapsible mw-collapsed" cellspacing="1" style="text-align: center; color:black;border: 1px solid #B5B5B5" | ||
|+Short List | |+Short List | ||
|- | |- | ||
! Move !! S!! A!! Hit!! Blk!! | ! Move !! S!! A!! Hit!! Blk!! Note | ||
|- | |- | ||
| 5A(c) || 3 || 2|| +5|| +4|| | | 5A(c) || 3 || 2|| +5|| +4|| | ||
| Zeile 103: | Zeile 103: | ||
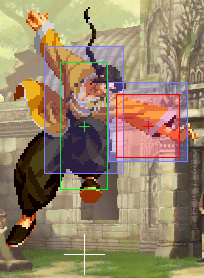
{| class="wikitable sortable mw-collapsible mw-collapsed" cellspacing="1" style="text-align: center; color:black;border: 1px solid #B5B5B5" | {| class="wikitable sortable mw-collapsible mw-collapsed" cellspacing="1" style="text-align: center; color:black;border: 1px solid #B5B5B5" | ||
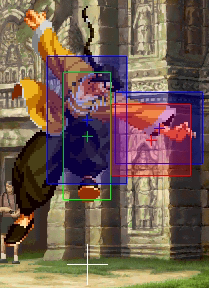
|+ | |+Standing Attacks | ||
! Move !! Hitbox!! Startup!! Active!! Hit!! Guard!! | ! Move !! Hitbox!! Startup!! Active!! Hit!! Guard!! Note | ||
|- | |- | ||
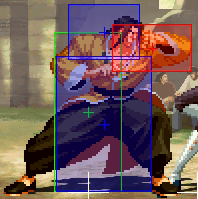
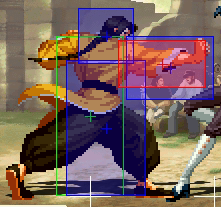
| 5A(c) || [[bild:kofxi_gato_5A(c)_1.png]] || 3 || 2 || +5 || +4 || | | 5A(c) || [[bild:kofxi_gato_5A(c)_1.png]] || 3 || 2 || +5 || +4 || | ||
|- | |- | ||
| 5A(f)|| [[bild:kofxi_gato_5A(f).png]] || 4 || 2 || +6 || +5 || | | 5A(f)|| [[bild:kofxi_gato_5A(f).png]] || 4 || 2 || +6 || +5 ||cannot be crouched | ||
|- | |- | ||
| 5B(c)|| [[bild:kofxi_gato_5B(c).png]] || 6 || 2 || +5 || +4 || | | 5B(c)|| [[bild:kofxi_gato_5B(c).png]] || 6 || 2 || +5 || +4 || | ||
| Zeile 128: | Zeile 128: | ||
| 6A(cancel)|| [[bild:kofxi_gato_6A.png]] || 24 || 4 || +10 || +9 || | | 6A(cancel)|| [[bild:kofxi_gato_6A.png]] || 24 || 4 || +10 || +9 || | ||
|- | |- | ||
| 6B|| [[bild:kofxi_gato_6B.png]] || 9 || 5 || -3 || +2 || | | 6B|| [[bild:kofxi_gato_6B.png]] || 9 || 5 || -3 || +2 || only hits standing, tall opponents | ||
|- | |- | ||
| 6B(cancel)|| [[bild:kofxi_gato_6B.png]] || 9 || 5 || -3 || +2 || | | 6B(cancel)|| [[bild:kofxi_gato_6B.png]] || 9 || 5 || -3 || +2 || | ||
| Zeile 135: | Zeile 135: | ||
{| class="wikitable sortable mw-collapsible mw-collapsed" cellspacing="1" style="text-align: center; color:black;border: 1px solid #B5B5B5" | {| class="wikitable sortable mw-collapsible mw-collapsed" cellspacing="1" style="text-align: center; color:black;border: 1px solid #B5B5B5" | ||
|+ | |+Crouching attacks | ||
! Move !! Hitbox!! Startup!! Active!! Hit!! Guard!! | ! Move !! Hitbox!! Startup!! Active!! Hit!! Guard!! Note | ||
|- | |- | ||
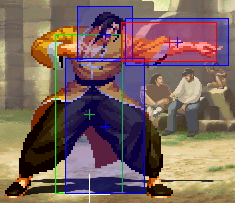
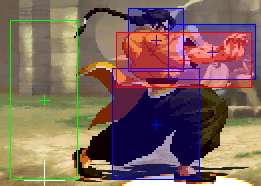
| 2A|| [[bild:kofxi_gato_2A.png]] || 4 || 3 || +6 || +5 || | | 2A|| [[bild:kofxi_gato_2A.png]] || 4 || 3 || +6 || +5 || | ||
| Zeile 149: | Zeile 149: | ||
{| class="wikitable sortable mw-collapsible mw-collapsed" cellspacing="1" style="text-align: center; color:black;border: 1px solid #B5B5B5" | {| class="wikitable sortable mw-collapsible mw-collapsed" cellspacing="1" style="text-align: center; color:black;border: 1px solid #B5B5B5" | ||
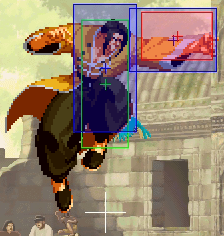
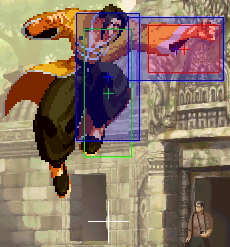
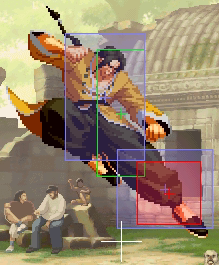
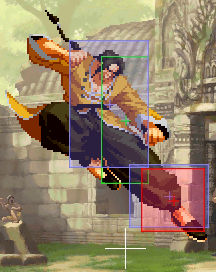
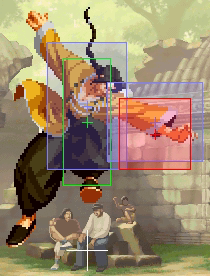
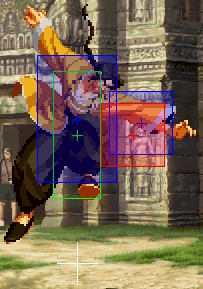
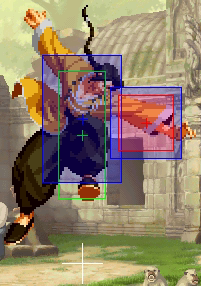
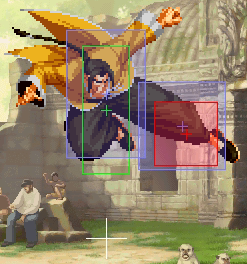
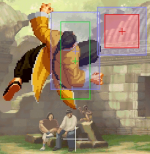
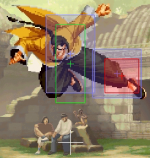
|+ | |+Jump Attacks | ||
! Move !! Hitbox!! Startup!! Active!! | ! Move !! Hitbox!! Startup!! Active!! Note | ||
|- | |- | ||
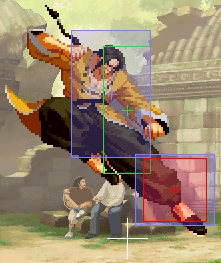
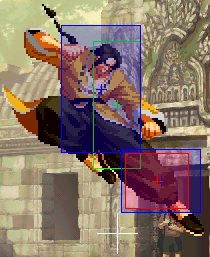
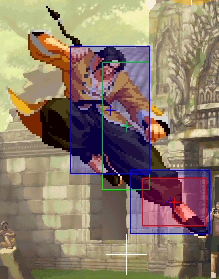
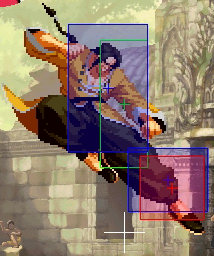
| smalljump back A|| [[bild:kofxi_gato_smalljump_back_A.png]]|| 5 || 5 || | | smalljump back A|| [[bild:kofxi_gato_smalljump_back_A.png]]|| 5 || 5 || | ||
| Zeile 206: | Zeile 206: | ||
{| class="wikitable sortable mw-collapsible mw-collapsed" cellspacing="1" style="text-align: center; color:black;border: 1px solid #B5B5B5" | {| class="wikitable sortable mw-collapsible mw-collapsed" cellspacing="1" style="text-align: center; color:black;border: 1px solid #B5B5B5" | ||
|+Specials & Supers | |+Specials & Supers | ||
! Move !! Hitbox!! Startup!! Active!! Vorteil!! | ! Move !! Hitbox!! Startup!! Active!! Vorteil!! Note | ||
|- | |- | ||
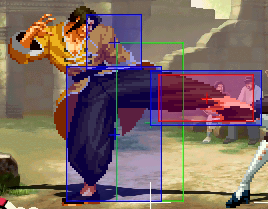
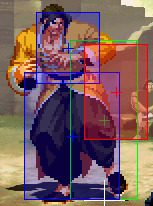
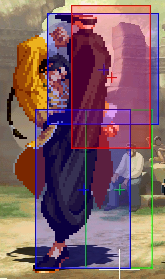
| 236A|| [[bild:kofxi_gato_236A.png]] || 12 || 6 || +2 || | | 236A|| [[bild:kofxi_gato_236A.png]] || 12 || 6 || +2 || | ||
| Zeile 214: | Zeile 214: | ||
| 236C || [[bild:kofxi_gato_236C.png]] || 19 || 8 || +0|| | | 236C || [[bild:kofxi_gato_236C.png]] || 19 || 8 || +0|| | ||
|- | |- | ||
| 236C-66C|| [[bild:kofxi_gato_236C-66C.png]] || 3 || 12 || +0||-10 | | 236C-66C|| [[bild:kofxi_gato_236C-66C.png]] || 3 || 12 || +0||-10 or +0? | ||
|- | |- | ||
| 214A/B|| [[bild:kofxi_gato_214A.png]] || 6 || 2 || -14 || | | 214A/B|| [[bild:kofxi_gato_214A.png]] || 6 || 2 || -14 || | ||
|- | |- | ||
| 214C/D|| [[bild:kofxi_gato_214C.png]] || 6 || 2 || minus || | | 214C/D|| [[bild:kofxi_gato_214C.png]] || 6 || 2 || minus || flies higher than 214A/B | ||
|- | |- | ||
| 214K-A|| [[bild:kofxi_gato_214KA.png]] || 15? || 12 || || | | 214K-A|| [[bild:kofxi_gato_214KA.png]] || 15? || 12 || || | ||
| Zeile 224: | Zeile 224: | ||
| 214K-B|| [[bild:kofxi_gato_214KB.png]] || 5? || 3 || || | | 214K-B|| [[bild:kofxi_gato_214KB.png]] || 5? || 3 || || | ||
|- | |- | ||
| 214K-C|| [[bild:kofxi_gato_214KC.png]] || 4? || 22* || || *= | | 214K-C|| [[bild:kofxi_gato_214KC.png]] || 4? || 22* || || *=active until landing. | ||
|- | |- | ||
| 214K-D|| [[bild:kofxi_gato_214KD.png]] || 7* || 10 || || *=7F | | 214K-D|| [[bild:kofxi_gato_214KD.png]] || 7* || 10 || || *=7F from landing. | ||
|- | |- | ||
| 214P-A|| [[bild:kofxi_gato_214PA.png]] || 15* ||4+18* || || 15F Startup | | 214P-A|| [[bild:kofxi_gato_214PA.png]] || 15* ||4+18* || || 15F Startup CH-State, 4F take-off+18F flight in CH-State. | ||
|- | |- | ||
| 214P-B|| [[bild:kofxi_gato_214PB.png]] || 4 || 22 || ||Counter. 8F? Landing Recovery. | | 214P-B|| [[bild:kofxi_gato_214PB.png]] || 4 || 22 || ||Counter. 8F? Landing Recovery. | ||
|- | |- | ||
| 214P-C|| [[bild:kofxi_gato_214PC.png]] || 7 || 10 || || | | 214P-C|| [[bild:kofxi_gato_214PC.png]] || 7 || 10 || ||Throw. | ||
|- | |- | ||
| 214P-D|| [[bild:kofxi_gato_214PD.png]] || || 6* || ||*=6F | | 214P-D|| [[bild:kofxi_gato_214PD.png]] || || 6* || ||*=6F invul from landing. No Counterhit-State. | ||
|- | |- | ||
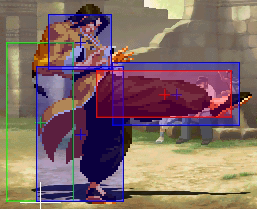
| 236236A|| [[bild:kofxi_gato_236236A.png]] || 4 || 4 || -4 || | | 236236A|| [[bild:kofxi_gato_236236A.png]] || 4 || 4 || -4 || 4F invul(the whole startup). | ||
|- | |- | ||
| 236236C|| [[bild:kofxi_gato_236236C.png]] || 10 || 5 || -5 || | | 236236C|| [[bild:kofxi_gato_236236C.png]] || 10 || 5 || -5 ||No invul. | ||
|- | |- | ||
| 236236B || [[bild:kofxi_gato_236236B_1.png]][[bild:kofxi_gato_236236B_2.png]] || 2 || 3+18 || minus || | | 236236B || [[bild:kofxi_gato_236236B_1.png]][[bild:kofxi_gato_236236B_2.png]] || 2 || 3+18 || minus || 2F invul (the entire startup). Juggle anywhere. | ||
|- | |- | ||
| 236236D || [[bild:kofxi_gato_236236D_1.png]][[bild:kofxi_gato_236236D_2.png]] || 15 || 4+30 || minus || | | 236236D || [[bild:kofxi_gato_236236D_1.png]][[bild:kofxi_gato_236236D_2.png]] || 15 || 4+30 || minus || 19F invul. Juggle anywhere. | ||
|- | |- | ||
| 623Ex1 || [[bild:kofxi_gato_623E_1.png]][[bild:kofxi_gato_623E_1_2.png]] || 7 || 4+4 || -2 || 6F | | 623Ex1 || [[bild:kofxi_gato_623E_1.png]][[bild:kofxi_gato_623E_1_2.png]] || 7 || 4+4 || -2 || 6F invul (the entire startup). | ||
|- | |- | ||
| 623Ex2 || [[bild:kofxi_gato_623E_2.png]] || 13 || 3 || +2 || | | 623Ex2 || [[bild:kofxi_gato_623E_2.png]] || 13 || 3 || +2 ||High guard damage. 3F CH-State on legs after the active-Frames. | ||
|- | |- | ||
| 623Ex3 || [[bild:kofxi_gato_623E_3.png]] || ~16 || 3 || N/A || | | 623Ex3 || [[bild:kofxi_gato_623E_3.png]] || ~16 || 3 || N/A ||No invul. Guard Crush. | ||
|- | |- | ||
| 623E(DC) || [[bild:kofxi_gato_623E(DC).png]] || || || || | | 623E(DC) || [[bild:kofxi_gato_623E(DC).png]] || || || || Dream Cancel-Version of 623E has a slightly different hitbox. | ||
|} | |} | ||
| Zeile 256: | Zeile 256: | ||
'''214B/D Followups''' | '''214B/D Followups''' | ||
{| class="wikitable sortable" | {| class="wikitable sortable" | ||
! Move !! Startup!! Block!! Hit!! | ! Move !! Startup!! Block!! Hit!! Note | ||
|- | |- | ||
| 214B>A|| N/A || +8 || N/A || Point Blank, A = fastest timing | | 214B>A|| N/A || +8 || N/A || Point Blank, A = fastest timing | ||
| Zeile 269: | Zeile 269: | ||
=== DOWN Okizeme === | === DOWN Okizeme === | ||
* | *Close to corner smalljump back (recrossup) j.B,2B, link 236236A, Shift Out Oswald, backdash, 3A,214B,236A,236B,236E: Delays if necessary are unknown | ||
== | == Universal Strategy Vs Gato == | ||
'''Gato Pressure'''<br> | '''Gato Pressure'''<br> | ||
Gato's infamous pressure consists of a combination of quick 2Bs, 2As, 5As and j.B, which all give massive frame advantage and hit very fast. Rolling out is not a valid strategy since all of his attacks recover quick enough to punish you. This leaves either mashing into j.B, which is dangerous, or reversals, or guard cancels. Ideally you want to escape to a distance that resets neutral. You cannot take your time once in neutral however, since Gato can build absurd amounts of meter by whiffing special moves, so you will have to take the initiative sooner or later. | |||
'''236236A&/C'''<br> | '''236236A&/C'''<br> | ||
Gato's 236236A is notoriously strong: it is fast (4F), deals a lot of damage, allows combos on trade and is hard to punish (-4). The C version is almost never used, since the A-version is so much better and faster. The A-version has invulnerability during the startup, but not during its active time. Since a trade is so favorable, it can still be used as a reversal.<br> | |||
236236A | 236236A is only '''-4 on block''' & pushes the opponent away a good distance, which makes it hard or even impossible to punish on block for some characters. Instead of blocking 236236A, it is best to input your punish already during the super freeze, i you are quick enough. If you are standing next to Gato during the super freeze, you can simply throw him with 6/4+C/D. Rolling through unfortunately does not give enough time to punish in almost all cases. Other than throwing, most characters have a Special or Super they can use to beat 236236A during the super freeze, eg. command grabs or moves with full or upper body invul, eg Eiji 236B, Vanessa 214P / 236K / [4],6C. Counters also work (Oswald's 4212D) or Guard Points (Maxima 236236C). | ||
'''Reversal 236236B'''<br> | |||
Gato's 236236B is extremely fast and can be used as an anti-air wakeup. Gatos will usually only use this against very bold jump-in attempts on wakeup, since 236236A is generally better as a reversal and leads to more damage, and is also more safe. The best way to avoid getting hit by reversal 236263B is not to jump onto Gato too recklessly. | |||
'''LDM (623Ex3)'''<br> | '''LDM (623Ex3)'''<br> | ||
Gato's LDM has '''7F Startup''' and invulnerability and has no super freeze. Safe jumping this super is useless, since you never want it to connect on guard. You can however option select during your safe jump against it, eg. by buffering an action that evades or beats 623E in case your jump-in whiffs (due to 623E invulnerability). Getting hit in air by 623E does not lead to anything for Gato, so jump attacks with early timing can be used against it without much danger, but this opens you up to 236236B & 236236A reversals.<br> | |||
The third hit of 623E causes a guaranteed guard crush due to the high guard damage of the 2nd hit. If you blocked 3 light or 1 heavy attack before 623E, the 2nd hit will already cause a guard crush and the 3rd hit will hit for a lot of damage. If you are quick enough, you can react to the 623E series on the first or second hit (first hit is more of a guess) by immediately doing a'''Guard Cancel Roll''' or attack to evade it. | |||
== Matchups == | ==Matchups== | ||
=== Kensou === | === Vs Kensou === | ||
According to Sawakoro, the matchup is relatively even, since Gato has massive problems getting in on Kensou's zoning playstyle. | |||
:Gato | :Gato can use smalljump j.C as an instant overhead against Kensou | ||
{{KOFXI_Navi}} | {{KOFXI_Navi}} | ||
Version vom 22. Mai 2020, 11:04 Uhr
| Gato 牙刀 | |

| |
| Tiers & Ranking | |
| Tier: | S+ |
| Ratio Cost: | 7 Points |
| Properties | |
| Damage Modifier: | 112 |
| Stun Modifier: | 100 |
| Crouch height (Tier): | C |
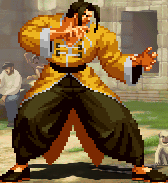
Colors
|

|
|
|
| ⃞ | X | △ | ⃝ |
| A | B | C | D |
|
|
|
|
| R1 +⃞ | R1 + X | R1 + △ | R1 + ⃝ |
| E+A | E+B | E+C | E+D |

|
|
|

|
| L1 +⃞ | L1 + X | L1 + △ | L1 + ⃝ |
| Start+A | Start+B | Start+C | Start+D |
Frame Data
Note: thanks to Rock for the Short List Data!
| Move | S | A | Hit | Blk | Note |
|---|---|---|---|---|---|
| 5A(c) | 3 | 2 | +5 | +4 | |
| 5A(f) | 4 | 2 | +6 | +5 | |
| 5B(c) | 6 | 2 | +5 | +4 | |
| 5B(f) | 6 | 3 | +2 | +1 | |
| 5C(c) | 5 | 4 | +7 | +6 | |
| 5C(f) | 11 | 6 | +0 | -1 | |
| 5D(c)(1) | 5 | 2 | +4 | +3 | |
| 5D(c)(2) | 8 | 4 | +7 | +6 | |
| 5D(f) | 11 | 4 | +6 | +5 | |
| 5E | 16 | 6 | KD | -3 | |
| 2A | 4 | 3 | +5 | +4 | |
| 2B | 5 | 2 | +6 | +5 | |
| 2C | 7 | 4 | +3 | +2 | |
| 2D | 9 | 4 | KD | +4 | |
| 6A | 24 | 5 | +10 | +9 | |
| 6B | 9 | 4 | -3 | +2 |
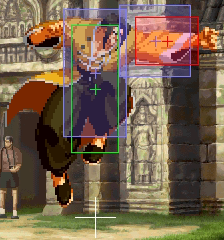
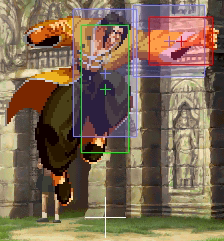
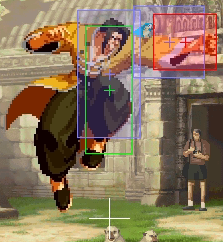
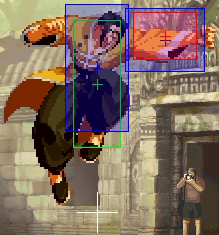
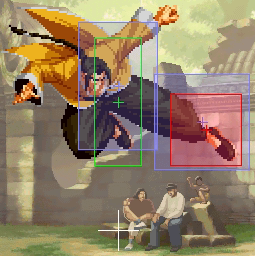
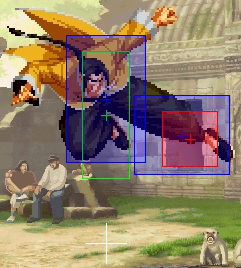
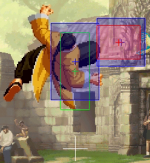
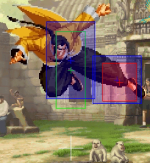
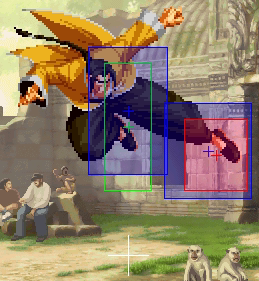
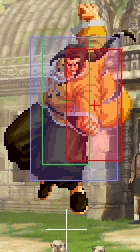
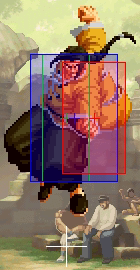
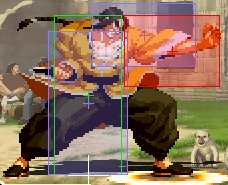
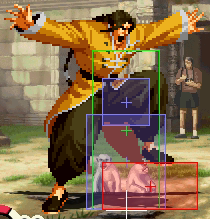
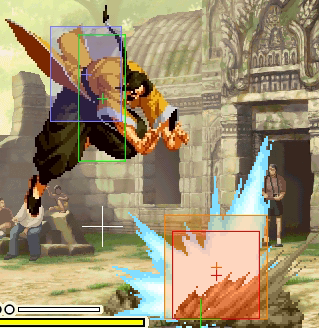
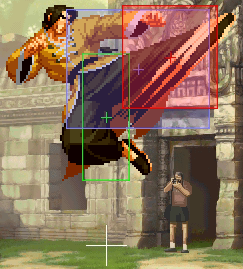
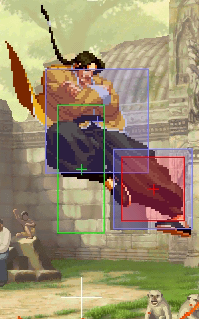
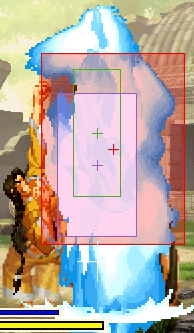
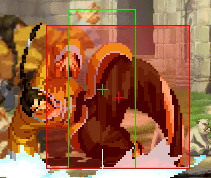
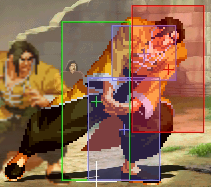
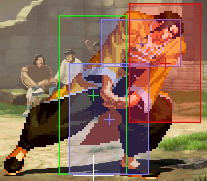
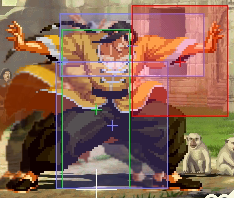
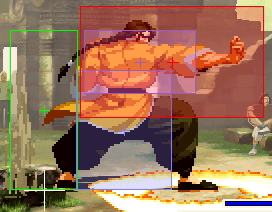
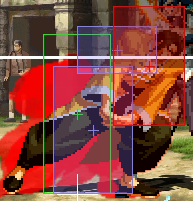
| Move | Hitbox | Startup | Active | Hit | Guard | Note |
|---|---|---|---|---|---|---|
| 2A | 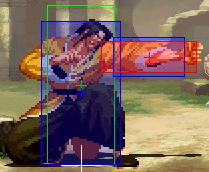 |
4 | 3 | +6 | +5 | |
| 2B | 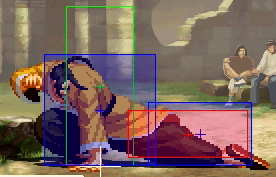 |
5 | 2 | +6 | +5 | |
| 2C | 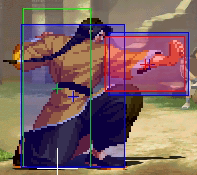 |
7 | 4 | +3 | +2 | |
| 2D | 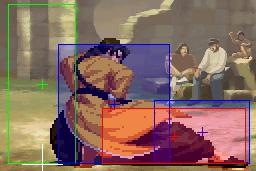 |
9 | 4 | KD | +4 |
214B/D Followups
| Move | Startup | Block | Hit | Note |
|---|---|---|---|---|
| 214B>A | N/A | +8 | N/A | Point Blank, A = fastest timing |
| 214B>B | N/A | +2 | N/A | Point Blank, A = fastest timing |
| 214B>D | N/A | +0 | N/A |
Combos
DOWN Okizeme
- Close to corner smalljump back (recrossup) j.B,2B, link 236236A, Shift Out Oswald, backdash, 3A,214B,236A,236B,236E: Delays if necessary are unknown
Universal Strategy Vs Gato
Gato Pressure
Gato's infamous pressure consists of a combination of quick 2Bs, 2As, 5As and j.B, which all give massive frame advantage and hit very fast. Rolling out is not a valid strategy since all of his attacks recover quick enough to punish you. This leaves either mashing into j.B, which is dangerous, or reversals, or guard cancels. Ideally you want to escape to a distance that resets neutral. You cannot take your time once in neutral however, since Gato can build absurd amounts of meter by whiffing special moves, so you will have to take the initiative sooner or later.
236236A&/C
Gato's 236236A is notoriously strong: it is fast (4F), deals a lot of damage, allows combos on trade and is hard to punish (-4). The C version is almost never used, since the A-version is so much better and faster. The A-version has invulnerability during the startup, but not during its active time. Since a trade is so favorable, it can still be used as a reversal.
236236A is only -4 on block & pushes the opponent away a good distance, which makes it hard or even impossible to punish on block for some characters. Instead of blocking 236236A, it is best to input your punish already during the super freeze, i you are quick enough. If you are standing next to Gato during the super freeze, you can simply throw him with 6/4+C/D. Rolling through unfortunately does not give enough time to punish in almost all cases. Other than throwing, most characters have a Special or Super they can use to beat 236236A during the super freeze, eg. command grabs or moves with full or upper body invul, eg Eiji 236B, Vanessa 214P / 236K / [4],6C. Counters also work (Oswald's 4212D) or Guard Points (Maxima 236236C).
Reversal 236236B
Gato's 236236B is extremely fast and can be used as an anti-air wakeup. Gatos will usually only use this against very bold jump-in attempts on wakeup, since 236236A is generally better as a reversal and leads to more damage, and is also more safe. The best way to avoid getting hit by reversal 236263B is not to jump onto Gato too recklessly.
LDM (623Ex3)
Gato's LDM has 7F Startup and invulnerability and has no super freeze. Safe jumping this super is useless, since you never want it to connect on guard. You can however option select during your safe jump against it, eg. by buffering an action that evades or beats 623E in case your jump-in whiffs (due to 623E invulnerability). Getting hit in air by 623E does not lead to anything for Gato, so jump attacks with early timing can be used against it without much danger, but this opens you up to 236236B & 236236A reversals.
The third hit of 623E causes a guaranteed guard crush due to the high guard damage of the 2nd hit. If you blocked 3 light or 1 heavy attack before 623E, the 2nd hit will already cause a guard crush and the 3rd hit will hit for a lot of damage. If you are quick enough, you can react to the 623E series on the first or second hit (first hit is more of a guess) by immediately doing aGuard Cancel Roll or attack to evade it.
Matchups
Vs Kensou
According to Sawakoro, the matchup is relatively even, since Gato has massive problems getting in on Kensou's zoning playstyle.
- Gato can use smalljump j.C as an instant overhead against Kensou
- Sacred Treasures Team: Kyo | Iori | Shingo
- Hero Team: Ash | Oswald | Shen
- Fatal Fury Team: Terry | Kim | Duck King
- Agent Team: Vanessa | Mary | Ramon
- Art of Fighting Team: Ryo Sakazaki | Yuri Sakazaki | King
- Rival Team: Elisabeth | Duo Lon | Benimaru
- Team K': K' |Kula | Maxima
- Garou Team: Jenet | Gato | Griffon
- Ikari Warriors Team: Ralf | Clark | Whip
- Anti Kyokugenryu Team: Malin | Kasumi | Eiji
- Psycho Soldier Team: Athena Asamiya | Sie Kensou | Momoko
- Time Unlock: Adelheid | Gai | Hayate | Jazu | Silber
