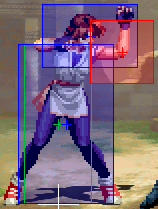
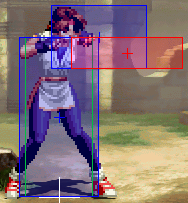
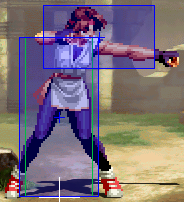
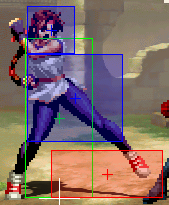
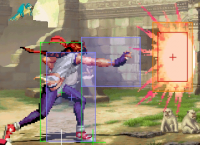
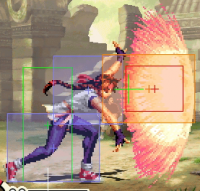
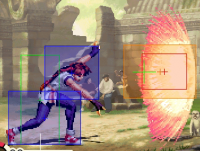
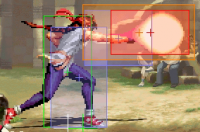
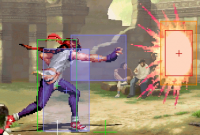
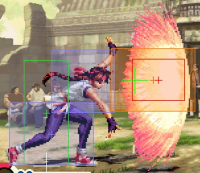
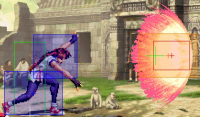
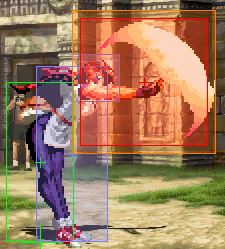
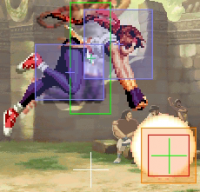
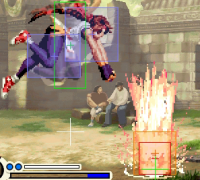
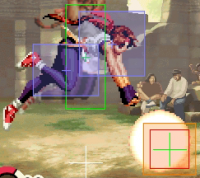
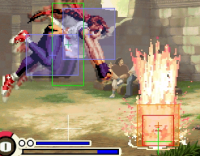
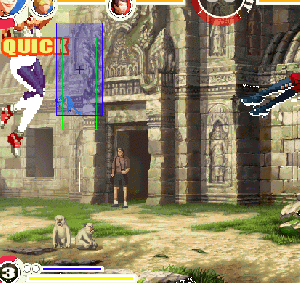
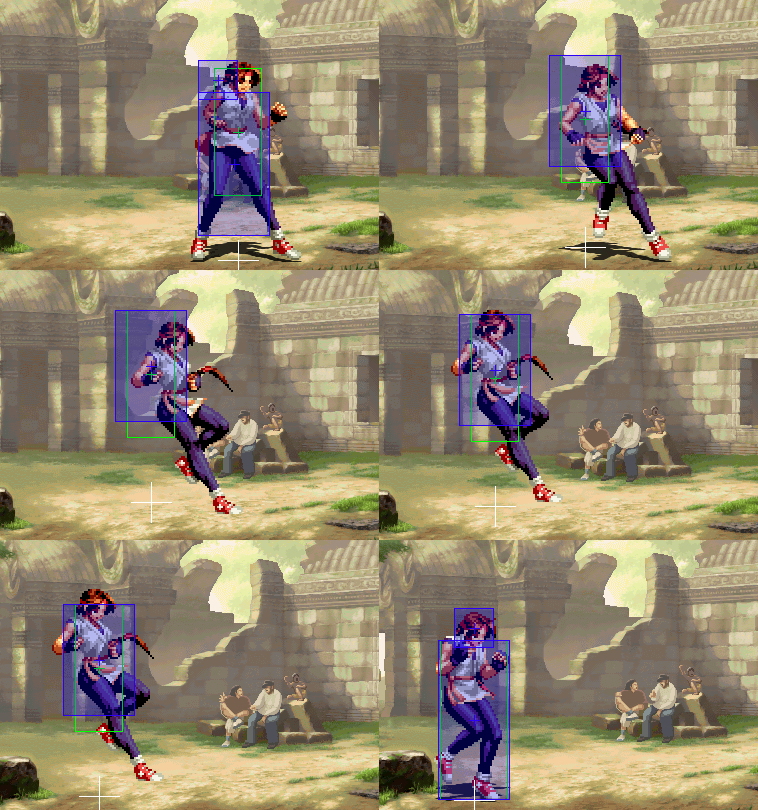
Yuri Sakazaki(KOFXI): Unterschied zwischen den Versionen
Zur Navigation springen
Zur Suche springen
| (17 dazwischenliegende Versionen desselben Benutzers werden nicht angezeigt) | |||
| Zeile 26: | Zeile 26: | ||
}} | }} | ||
== Quick Guide (WIP)== | == Quick Guide (WIP)== | ||
:Yuri is | :Yuri is a character with particularly good normals, but overall low shift synergy. | ||
:She is best played in point or 2nd position, to either build meter or get some use out of her 2B>2A>3B>2363214K combo that leads to nothing without the super. | :She is best played in point or 2nd position, to either build meter or get some use out of her 2B>2A>3B>2363214K combo that otherwise leads to nothing without the super. | ||
'''Neutral'''<br> | '''Neutral'''<br> | ||
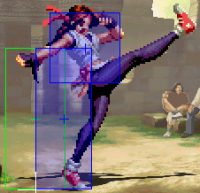
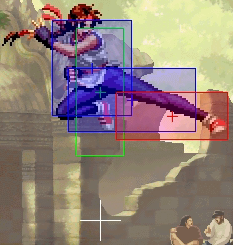
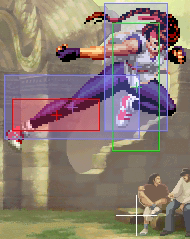
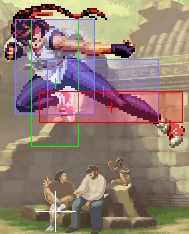
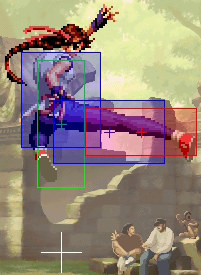
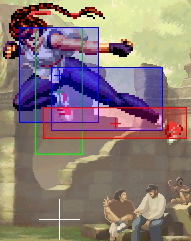
:On range, either use charge 236P or approach with her good air normals (j.D & j.E). | :On range, either use charge 236P or approach with her good air normals (j.D & j.E). | ||
:To stop your opponent from approaching, use Yuri's jump up | :To stop your opponent from approaching, use Yuri's jump up j.D & j.C - they are among the best air normals in the game. | ||
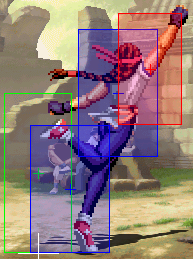
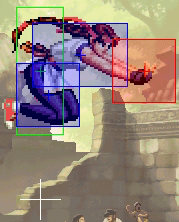
:To gain distance, use backdash cancelled into j.4B. | :To gain distance, use backdash cancelled into j.4B. | ||
'''Offense'''<br> | '''Offense'''<br> | ||
:2A gives good frame advantage and can be used for pressure | :2A gives good frame advantage and can be used for pressure. | ||
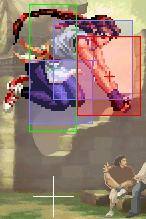
: | :smalljump / jump D is slow but strong. The jumping version can cross up. | ||
:jump / smalljump C and smalljump (crossup) 4B can also be used to reset pressure and open up the opponent. | |||
:Whenever you use small / normal jump C or D, make sure to hold 1 to get an option select air throw. | :Whenever you use small / normal jump C or D, make sure to hold 1 to get an option select air throw. | ||
:You can also use walk up 2C>3B/3D hit confirm. If your opponent blocks, you can cancel into (charge) 236P. | :You can also use walk up 2C>3B/3D hit confirm. If your opponent blocks, you can cancel into (charge) 236P. | ||
| Zeile 42: | Zeile 43: | ||
'''Defense'''<br> | '''Defense'''<br> | ||
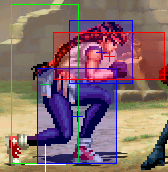
2C has only 4F startup and is a good mash normal against smalljumps or just in general. | :2C has only 4F startup and is a good mash normal against smalljumps or just in general. | ||
:623A has invul during startup and is generally fine as a reversal. | :623A has invul during startup and is generally fine as a reversal. | ||
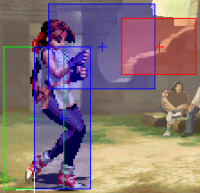
:5B(f) is a good poke that can be used to stop approaches, or end blockstrings with. | :5B(f) is a good poke that can be used to stop approaches, or end blockstrings with. | ||
| Zeile 84: | Zeile 85: | ||
| 2C|| 4 || 3+3|| <span style="color: red;">-6</span>|| <span style="color: red;">-7</span>|| | | 2C|| 4 || 3+3|| <span style="color: red;">-6</span>|| <span style="color: red;">-7</span>|| | ||
|- | |- | ||
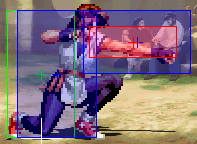
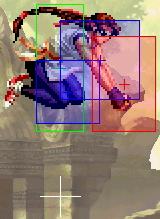
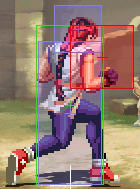
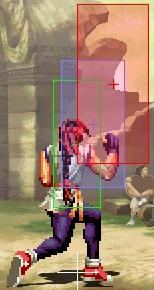
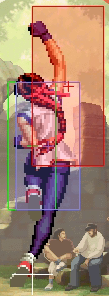
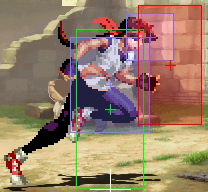
| 2D|| 11 ||5 || KD|| <span style="color: red;">-7</span>||Low Profile F11-23. | | 2D|| 11 ||5 || KD|| <span style="color: red;">-7</span>||Low Profile F11-23. Special Cancel. | ||
|- | |- | ||
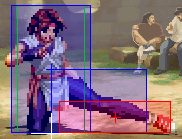
| 3B|| 9 ||5 || <span style="color: blue;">+1</span>|| <span style="color: blue;">+0</span>||Special Cancel. Low Profile F1-26. | | 3B|| 9 ||5 || <span style="color: blue;">+1</span>|| <span style="color: blue;">+0</span>||Special Cancel. Low Profile F1-26. | ||
| Zeile 118: | Zeile 119: | ||
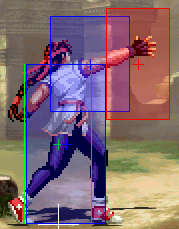
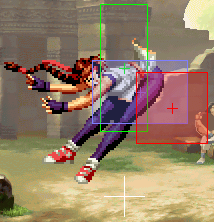
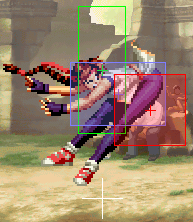
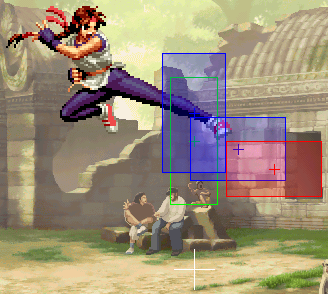
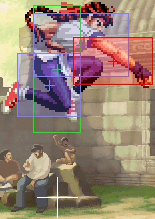
| j.E|| 15 || 4|| || || | | j.E|| 15 || 4|| || || | ||
|- | |- | ||
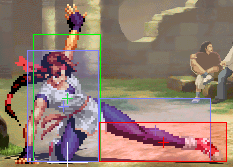
| 236A|| 23 || 4+6|| KD|| <span style="color: blue;">+5</span>|| | | 236A|| 23 || 4+6|| KD|| <span style="color: blue;">+5</span>||48F total duration. | ||
|- | |- | ||
| 236[A]|| 57 || ~|| KD|| <span style="color: blue;">+3</span>|| | | 236[A]|| 57 || ~|| KD|| <span style="color: blue;">+3</span>||84F total duration. | ||
|- | |- | ||
| 236C|| 24 || 4+6|| KD|| <span style="color: blue;">+0</span>|| | | 236C|| 24 || 4+6|| KD|| <span style="color: blue;">+0</span>||54F total duration. | ||
|- | |- | ||
| 236[C]|| 60 || ~|| KD|| <span style="color: blue;">+3</span>|| | | 236[C]|| 60 || ~|| KD|| <span style="color: blue;">+3</span>||87F total duration. | ||
|- | |- | ||
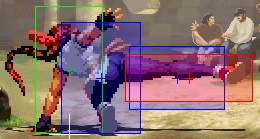
| 214A|| 15 || 10|| KD|| <span style="color: blue;">+2</span>|| | | 214A|| 15 || 10|| KD|| <span style="color: blue;">+2</span>||Reflects projectiles. 43F total duration. | ||
|- | |- | ||
| 214C|| 44 || 10|| KD|| <span style="color: blue;">+4</span>|| | | 214C|| 44 || 10|| KD|| <span style="color: blue;">+4</span>||Reflects projectiles. 70F total duration. | ||
|- | |- | ||
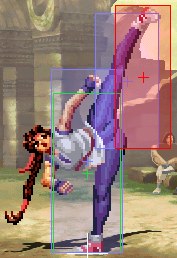
| 623A|| 5 || 5+9|| KD|| <span style="color: red;">-28</span>||F1-4 invul. F5-9 low profile. Airborne F10. | | 623A|| 5 || 5+9|| KD|| <span style="color: red;">-28</span>||F1-4 invul. F5-9 low profile. Airborne F10. | ||
| Zeile 308: | Zeile 309: | ||
| style="background-color:#F9F9F9;" |KD | | style="background-color:#F9F9F9;" |KD | ||
| style="background-color:#F9F9F9;" |-7 | | style="background-color:#F9F9F9;" |-7 | ||
| style="background-color:#F9F9F9;" |Low Profile F11-23. | | style="background-color:#F9F9F9;" |Low Profile F11-23. Special Cancel. | ||
|- | |- | ||
| style="background-color:#F9F9F9;" |'''3B''' | | style="background-color:#F9F9F9;" |'''3B''' | ||
| Zeile 446: | Zeile 447: | ||
| style="background-color:#F9F9F9;" |KD | | style="background-color:#F9F9F9;" |KD | ||
| style="background-color:#F9F9F9;" |+5 | | style="background-color:#F9F9F9;" |+5 | ||
| style="background-color:#F9F9F9;" | | | style="background-color:#F9F9F9;" |48F total duration. | ||
|- | |- | ||
| style="background-color:#F9F9F9;" |'''236[A]''' | | style="background-color:#F9F9F9;" |'''236[A]''' | ||
| Zeile 454: | Zeile 455: | ||
| style="background-color:#F9F9F9;" |KD | | style="background-color:#F9F9F9;" |KD | ||
| style="background-color:#F9F9F9;" |+3 | | style="background-color:#F9F9F9;" |+3 | ||
| style="background-color:#F9F9F9;" |*=Old data says 53F startup. | | style="background-color:#F9F9F9;" |84F total duration. *=Old data says 53F startup. | ||
|- | |- | ||
| style="background-color:#F9F9F9;" |'''236C''' | | style="background-color:#F9F9F9;" |'''236C''' | ||
| Zeile 462: | Zeile 463: | ||
| style="background-color:#F9F9F9;" |KD | | style="background-color:#F9F9F9;" |KD | ||
| style="background-color:#F9F9F9;" |+0 | | style="background-color:#F9F9F9;" |+0 | ||
| style="background-color:#F9F9F9;" | | | style="background-color:#F9F9F9;" |54F total duration. | ||
|- | |- | ||
| style="background-color:#F9F9F9;" |'''236[C]''' | | style="background-color:#F9F9F9;" |'''236[C]''' | ||
| Zeile 470: | Zeile 471: | ||
| style="background-color:#F9F9F9;" |KD | | style="background-color:#F9F9F9;" |KD | ||
| style="background-color:#F9F9F9;" |+3 | | style="background-color:#F9F9F9;" |+3 | ||
| style="background-color:#F9F9F9;" |Fireball active until it leaves the stage. | | style="background-color:#F9F9F9;" |Fireball active until it leaves the stage. 87F total duration. | ||
|- | |- | ||
| style="background-color:#F9F9F9;" |'''214A''' | | style="background-color:#F9F9F9;" |'''214A''' | ||
| Zeile 478: | Zeile 479: | ||
| style="background-color:#F9F9F9;" |KD | | style="background-color:#F9F9F9;" |KD | ||
| style="background-color:#F9F9F9;" |+2 | | style="background-color:#F9F9F9;" |+2 | ||
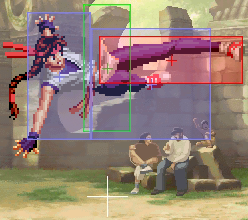
| style="background-color:#F9F9F9;" |Same Hitbox as 214C. | | style="background-color:#F9F9F9;" |Reflects projectiles. Same Hitbox as 214C. 43F total duration. | ||
|- | |- | ||
| style="background-color:#F9F9F9;" |'''214C''' | | style="background-color:#F9F9F9;" |'''214C''' | ||
| Zeile 486: | Zeile 487: | ||
| style="background-color:#F9F9F9;" |KD | | style="background-color:#F9F9F9;" |KD | ||
| style="background-color:#F9F9F9;" |+4 | | style="background-color:#F9F9F9;" |+4 | ||
| style="background-color:#F9F9F9;" |Same Hitbox as 214A. | | style="background-color:#F9F9F9;" |Reflects projectiles. Same Hitbox as 214A. 70F total duration. | ||
|- | |- | ||
| style="background-color:#F9F9F9;" |'''623A''' | | style="background-color:#F9F9F9;" |'''623A''' | ||
| Zeile 573: | Zeile 574: | ||
*Yuri has 3F more invulnerability on her front roll: 1-26 invul, 6F recovery. | *Yuri has 3F more invulnerability on her front roll: 1-26 invul, 6F recovery. | ||
*Yuri's back roll goes further than normal (187px instead of 160px) | *Yuri's back roll goes further than normal (187px instead of 160px) | ||
*Yuri's 2363214K is potentially unsafe on hit when done very close to the corner, see [https://x.com/dagun7676/status/1832092015724822892 here] | |||
*Bug: doing Yuri's 623C on the first frame of landing after a quick shift puts her below the ground. Performing any action that puts her above ground resets the bug. [https://twitter.com/SenseiEnrique98/status/1359603734075031555 Source: Sensei Enrique]<br> | *Bug: doing Yuri's 623C on the first frame of landing after a quick shift puts her below the ground. Performing any action that puts her above ground resets the bug. [https://twitter.com/SenseiEnrique98/status/1359603734075031555 Source: Sensei Enrique]<br> | ||
[[bild:kofxi_yuri_623C_bug.gif|300px]] | [[bild:kofxi_yuri_623C_bug.gif|300px]] | ||
| Zeile 581: | Zeile 583: | ||
*2B>2A>3B>2363214K: Bread n Butter Combo | *2B>2A>3B>2363214K: Bread n Butter Combo | ||
*2C>3D>623C | *5D/2C>3D> max delay 623C, then... | ||
**623C | |||
**236236K | |||
*Corner Combo in 3D | *Corner Combo in 3D>214C, then... | ||
**delay 214A, link j. | **delay 214A, link j.236D | ||
**delay 623C(2 hits)>623C | **delay 623C(2 hits)>623C | ||
**delay 236236K | **delay 623C link 26236K | ||
== Team Combos == | |||
===Yuri & Oswald=== | |||
* Yuri midscreen combo into 2C>3D QS oswald > land > 5A(whiff), 3A>214A>236B>236E (ACE) | |||
* Yuri corner combo into 2C>3D QS oswald j.A whiff > land > backdash > 3A>236B>236A>236B>236E (ACE) | |||
* Yuri midscreen combo into 2C>3D, max delay 623C, link max delay 236236K, QS 2nd hit oswald > land > turn around 3A > max delay 214A,236B,236E (ACE): see [https://twitter.com/ATG213/status/1758791723092758843 here]. | |||
===Yuri & Vanessa=== | |||
*Yuri corner 2C>3D>214C, delay 623C(2)>623C QS Vanessa j.B,\/,236236E, 214B-6C... etc, see [https://twitter.com/ATG213/status/1758793292647379233 here] | |||
==Videos== | ==Videos== | ||
Aktuelle Version vom 19. April 2025, 12:13 Uhr
| Yuri Sakazaki ユリ・サカザキ | |

| |
| Tiers & Ranking | |
| Tier: | B to B+ |
| Ratio Cost: | 5 Points |
| Properties | |
| Damage Modifier: | 1.05 |
| Stun Modifier: | 1.03 |
| Crouch height (Tier): | F |
Colors
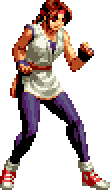
|

|

|
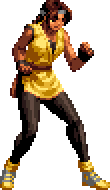
|
| A | B | C | D |
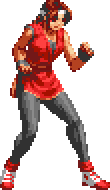
|

|
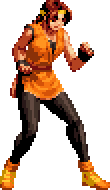
|
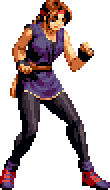
|
| R1 + |
R1 + |
R1 + |
R1 + |
| E+A | E+B | E+C | E+D |
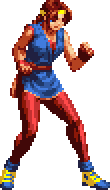
|

|

|
|
| L1 + |
L1 + |
L1 + |
L1 + |
| Start+A | Start+B | Start+C | Start+D |
Quick Guide (WIP)
- Yuri is a character with particularly good normals, but overall low shift synergy.
- She is best played in point or 2nd position, to either build meter or get some use out of her 2B>2A>3B>2363214K combo that otherwise leads to nothing without the super.
Neutral
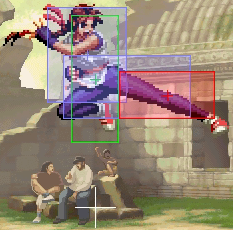
- On range, either use charge 236P or approach with her good air normals (j.D & j.E).
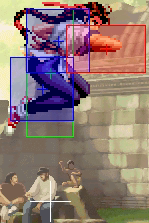
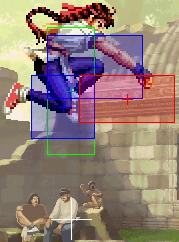
- To stop your opponent from approaching, use Yuri's jump up j.D & j.C - they are among the best air normals in the game.
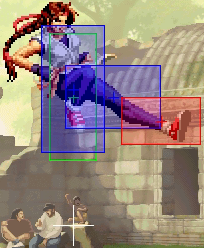
- To gain distance, use backdash cancelled into j.4B.
Offense
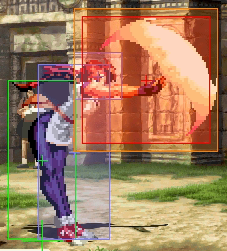
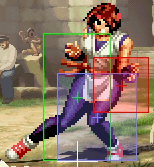
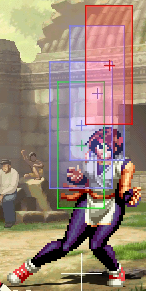
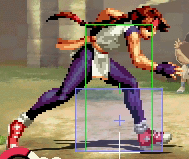
- 2A gives good frame advantage and can be used for pressure.
- smalljump / jump D is slow but strong. The jumping version can cross up.
- jump / smalljump C and smalljump (crossup) 4B can also be used to reset pressure and open up the opponent.
- Whenever you use small / normal jump C or D, make sure to hold 1 to get an option select air throw.
- You can also use walk up 2C>3B/3D hit confirm. If your opponent blocks, you can cancel into (charge) 236P.
- Make sure to use her 63214K command grab occasionally, it is relatively fast if you are close.
Defense
- 2C has only 4F startup and is a good mash normal against smalljumps or just in general.
- 623A has invul during startup and is generally fine as a reversal.
- 5B(f) is a good poke that can be used to stop approaches, or end blockstrings with.
Frame Data
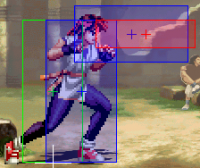
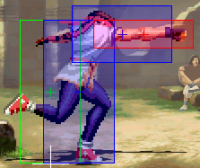
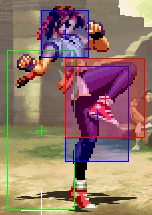
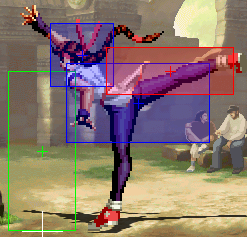
Special Attributes & Bugs
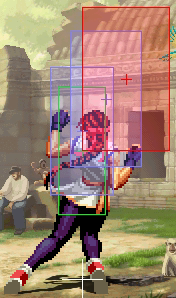
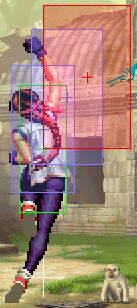
- Yuri has 3F more invulnerability on her front roll: 1-26 invul, 6F recovery.
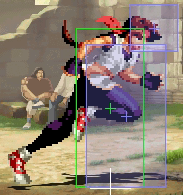
- Yuri's back roll goes further than normal (187px instead of 160px)
- Yuri's 2363214K is potentially unsafe on hit when done very close to the corner, see here
- Bug: doing Yuri's 623C on the first frame of landing after a quick shift puts her below the ground. Performing any action that puts her above ground resets the bug. Source: Sensei Enrique
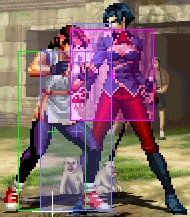
- Yuri's backdash is invul on the feet from F1.
Combos
- 2B>2A>3B>2363214K: Bread n Butter Combo
- 5D/2C>3D> max delay 623C, then...
- 623C
- 236236K
- Corner Combo in 3D>214C, then...
- delay 214A, link j.236D
- delay 623C(2 hits)>623C
- delay 623C link 26236K
Team Combos
Yuri & Oswald
- Yuri midscreen combo into 2C>3D QS oswald > land > 5A(whiff), 3A>214A>236B>236E (ACE)
- Yuri corner combo into 2C>3D QS oswald j.A whiff > land > backdash > 3A>236B>236A>236B>236E (ACE)
- Yuri midscreen combo into 2C>3D, max delay 623C, link max delay 236236K, QS 2nd hit oswald > land > turn around 3A > max delay 214A,236B,236E (ACE): see here.
Yuri & Vanessa
- Yuri corner 2C>3D>214C, delay 623C(2)>623C QS Vanessa j.B,\/,236236E, 214B-6C... etc, see here
Videos
- Sacred Treasures Team: Kyo | Iori | Shingo
- Hero Team: Ash | Oswald | Shen
- Fatal Fury Team: Terry | Kim | Duck King
- Agent Team: Vanessa | Mary | Ramon
- Art of Fighting Team: Ryo Sakazaki | Yuri Sakazaki | King
- Rival Team: Elisabeth | Duo Lon | Benimaru
- Team K': K' |Kula | Maxima
- Garou Team: Jenet | Gato | Griffon
- Ikari Warriors Team: Ralf | Clark | Whip
- Anti Kyokugenryu Team: Malin | Kasumi | Eiji
- Psycho Soldier Team: Athena Asamiya | Sie Kensou | Momoko
- Time Unlock: Adelheid | Gai | Hayate | Jazu | Silber
