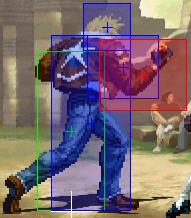
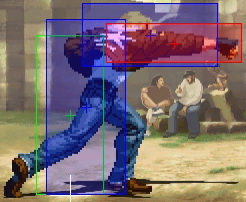
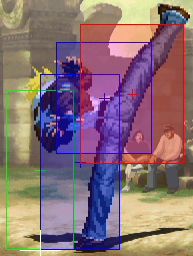
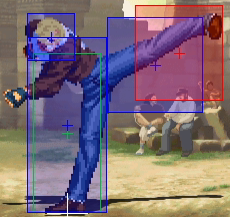
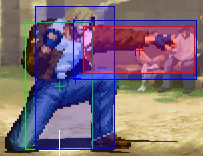
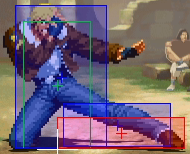
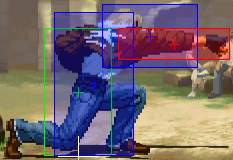
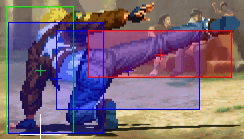
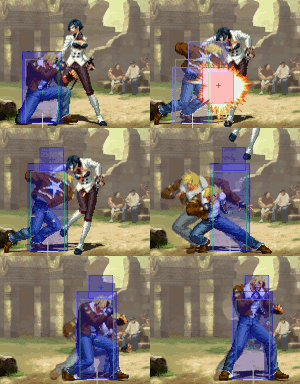
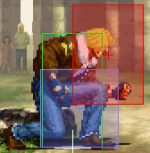
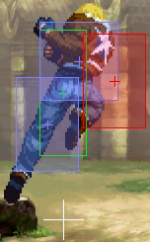
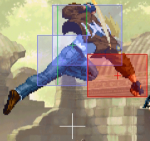
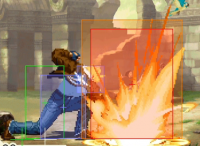
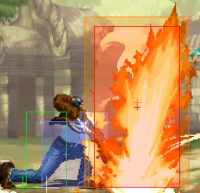
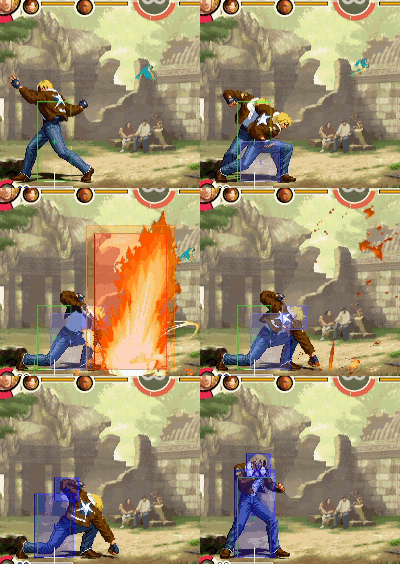
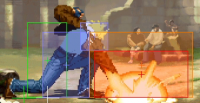
Terry Bogard(KOFXI): Unterschied zwischen den Versionen
Zur Navigation springen
Zur Suche springen
| (48 dazwischenliegende Versionen desselben Benutzers werden nicht angezeigt) | |||
| Zeile 3: | Zeile 3: | ||
| jcharname = テリー・ボガード | | jcharname = テリー・ボガード | ||
| portrait = [[Image:KOFXI terry full.png]] | | portrait = [[Image:KOFXI terry full.png]] | ||
|tier_rank = ~ | |tier_rank = ~A | ||
|ratio_rank = 4 Points | |ratio_rank = 4 Points | ||
|health = 0.97 | |health = 0.97 | ||
| Zeile 9: | Zeile 9: | ||
|crouch_tier = C | |crouch_tier = C | ||
}} | }} | ||
== Quick Guide == | |||
:Terry is a strong, well-rounded character that can be played both offensively and defensively. | |||
:His damage output and juggle potential is average, but he has higher health, good normals and various ways to cause hard knockdown, including from light hits, enabling strong okizeme loops. | |||
:His defense is very good, with only his reversals having pronounced weaknesses. | |||
:He is best played in second position since he needs super stock for 236236B, or as a point. He can occasionally be seen as a Leader since his LDM deals good damage, though it is not trivial to land. | |||
'''Neutral'''<br> | |||
:On range, use Terry's very fast and annoying projectiles to make your opponent jump or roll, then punish on reaction with the lightning-fast, 3F startup 236236B. | |||
:Terry best approaches with smalljump j.E (from far away), smalljump j.C (from closer) or normal j.D. j.E has the longest range, j.C the best hitbox and j.D can cross up. | |||
'''Offense'''<br> | |||
:Once in close range, use blockstrings such as 2B>2D, 2B>2C, 2B>2A/5A, then cancel into 41236B>66B or 236A or simply nothing to keep them guessing. | |||
:5A(c) is great in pressure and combos. It is very fast, with only 4F startup, and cannot be crouched. It is the go-to normal after a smalljump C or D, since 5C is too slow at 7F startup. | |||
:Mix in smalljump C to reset your pressure. | |||
:Smalljump B and D can cross up against crouching opponents, which can be used after a dash or a small walk forward during blockstrings or after a knockdown. | |||
:214B can be used once in a while as an overhead option. If blocked it is mostly safe at -3, but depending on your spacing, you might lose your turn. | |||
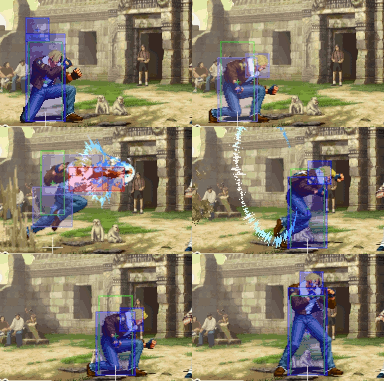
:If you end your combo with 41236K>66K>66K midscreen, you get a hard knockdown into a j.D crossup / fake crossup 50/50 that can potentially be repeated. | |||
:Terry's throw makes opponents wake up facing the other way. This can be used to cross them up in the corner with j.D and should be exploited as much as possible. To turn this into a 50/50, simply delay the attack and it will not crossup. [https://youtu.be/5iEQF0CXvyU?t=2319 Continue with 5D(c)] to make hit confirming a little easier (5D has 2 hits). You can loop this if you combo into the 41236K-series to cause another hard knockdown. | |||
'''Defense'''<br> | |||
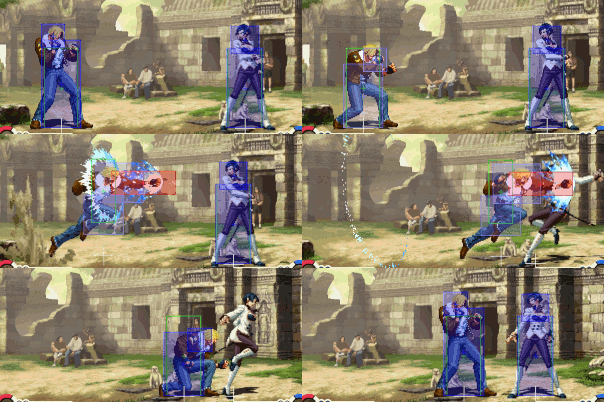
:In neutral, 236236B is the mainstay of Terry's defense. While dealing low damage, it is so fast and reliable that it can even beat half-screen smalljumps easily on reaction. | |||
:Also use 236236B to punish otherwise hard-to-punish moves such as Kula 214B. | |||
:If you have the super stock, be ready to combo into another 236236B should the first one trade, which happens a lot. | |||
:To break out of pressure, use 5A (against smalljumps) or 5B(f). | |||
:623D can be used against obvious jump-ins due to its upper feet invulnerability, but don't expect it to be great as a reversal. | |||
:Terry's 2141236E LDM generally works as a reversal and an anti-air, but occasionally your opponent will fall out of the attack, only getting damaged slightly. | |||
== Colors == | == Colors == | ||
| Zeile 32: | Zeile 59: | ||
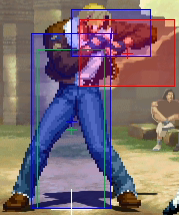
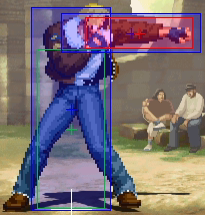
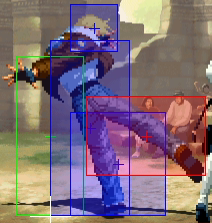
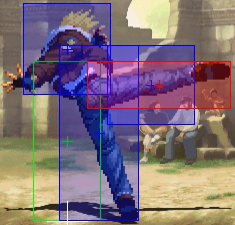
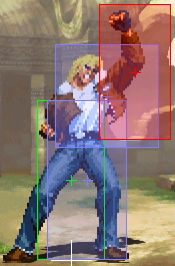
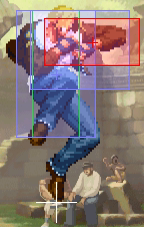
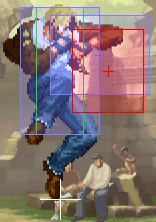
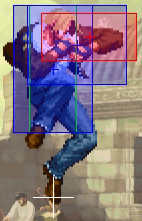
!Move!!S!!A!!Hit!!Grd!!Note | !Move!!S!!A!!Hit!!Grd!!Note | ||
|- | |- | ||
|5A(c)|| 4|| 3|| +4|| +3 || | |5A(c)|| 4|| 3|| <span style="color: blue;">+4</span>|| <span style="color: blue;">+3</span> || | ||
|- | |- | ||
|5A(f)|| 5|| 4|| +5|| +4 || | |5A(f)|| 5|| 4|| <span style="color: blue;">+5</span>|| <span style="color: blue;">+4</span> || | ||
|- | |- | ||
|5B(c)|| 6 || 5 || +2|| +1|| | |5B(c)|| 6 || 5 || <span style="color: blue;">+2</span>|| <span style="color: blue;">+1</span>|| | ||
|- | |- | ||
|5B(f)|| 7 || 2 || -5|| -6|| | |5B(f)|| 7 || 2 || <span style="color: red;">-5</span>|| <span style="color: red;">-6</span>|| | ||
|- | |- | ||
|5C(c)|| 7 || 2 || +7|| +6|| | |5C(c)|| 7 || 2 || <span style="color: blue;">+7</span>|| <span style="color: blue;">+6</span>|| | ||
|- | |- | ||
|5C(f)|| 10 || 4 || -2|| -3|| | |5C(f)|| 10 || 4 || <span style="color: red;">-2</span>|| <span style="color: red;">-3</span>|| | ||
|- | |- | ||
|5D(c)|| 7 || 9 || +1|| +0||2 | |5D(c)|| 7 || 9 || <span style="color: blue;">+1</span>|| <span style="color: blue;">+0</span>||2 hits. Both have special cancel | ||
|- | |- | ||
|5D(f)|| 15 || 3 || -2|| -3|| | |5D(f)|| 15 || 3 || <span style="color: red;">-2</span>|| <span style="color: red;">-3</span>|| | ||
|- | |- | ||
|5E|| 14 || 4 || KD|| -8||Invul on feet from F3-23 | |5E|| 14 || 4 || KD|| <span style="color: red;">-8</span>||Invul on feet from F3-23 | ||
|- | |- | ||
|GC|| 7 || 5 || KD|| - | |GC|| 7 || 5 || KD|| <span style="color: red;">-12</span>|| | ||
|- | |- | ||
|5C>5E|| 5 || 4 || +7|| +6||Chain | |5C>5E|| 5 || 4 || <span style="color: blue;">+7</span>||<span style="color: blue;">+6</span>||Chain combo | ||
|- | |- | ||
|Saving Shift|| ? || n* || /|| /||Active until landing. 9F/10F recovery (hit/whiff). | |Saving Shift|| ? || n* || /|| /||Active until landing. 9F/10F recovery (hit/whiff). | ||
|- | |- | ||
|2A|| 5 || 4 || +2|| +1|| | |2A|| 5 || 4 || <span style="color: blue;">+2</span>|| <span style="color: blue;">+1</span>|| | ||
|- | |- | ||
|2B|| 5 || 3 || +5|| +4|| | |2B|| 5 || 3 || <span style="color: blue;">+5</span>|| <span style="color: blue;">+4</span>|| | ||
|- | |- | ||
|2C|| 8 || 4 || -2|| -3|| | |2C|| 8 || 4 || <span style="color: red;">-2</span>|| <span style="color: red;">-3</span>|| | ||
|- | |- | ||
|2D|| 9 || 2 || KD|| -9||Special cancel | |2D|| 9 || 2 || KD|| <span style="color: red;">-9</span>||Special cancel | ||
|- | |- | ||
|3C|| 7 || 3 || +1|| +0||Special cancel | |3C|| 7 || 3 || <span style="color: blue;">+1</span>|| <span style="color: blue;">+0</span>||Special cancel | ||
|- | |- | ||
|small u.A|| 5 || 7|| || ||Same Hitbox as Jump Up A | |small u.A|| 5 || 7|| || ||Same Hitbox as Jump Up A | ||
| Zeile 100: | Zeile 127: | ||
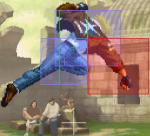
|j.E|| 13 || 7|| || || | |j.E|| 13 || 7|| || || | ||
|- | |- | ||
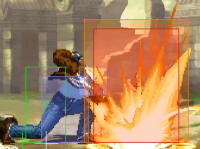
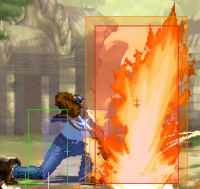
| 236A|| 20 || 1+X|| +3*|| +2*||F16-40 small Hurtbox. F1-28 Counterhit-State. *=Point Blank. | | 236A|| 20 || 1+X|| <span style="color: blue;">+3</span>*|| <span style="color: blue;">+2</span>*||48F total duration. F16-40 small Hurtbox. F1-28 Counterhit-State. *=Point Blank. | ||
|- | |- | ||
| 236C|| 12 || 1+X|| -3*|| -4*||F11-38 small Hurtbox. F1-22 Counterhit-State. *=Point Blank. | | 236C|| 12 || 1+X|| <span style="color: red;">-3</span>*|| <span style="color: red;">-4</span>*||46F total duration. F11-38 small Hurtbox. F1-22 Counterhit-State. *=Point Blank. | ||
|- | |- | ||
| 214A|| 15 || 11|| KD|| -12*||F15-25 invul on legs. At the end while standing up 4F Counterhit-State. *=Point Blank. | | 214A|| 15 || 11|| KD|| <span style="color: red;">-12</span>*||F15-25 invul on legs. At the end while standing up 4F Counterhit-State. *=Point Blank. | ||
|- | |- | ||
| 214C|| 21 || 22|| KD|| -22*|| F4-9 invul. F21-42 invul on the legs & airborne. At the end while standing up 4F Counterhit-State. *=Point Blank. | | 214C|| 21 || 22|| KD|| <span style="color: red;">-22</span>*|| F4-9 invul. F21-42 invul on the legs & airborne. At the end while standing up 4F Counterhit-State. *=Point Blank. | ||
|- | |- | ||
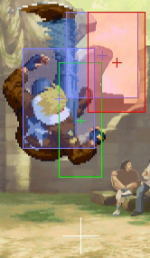
| 623B|| 4/23* ||3+1+8 || KD|| -4|| *23F Startup | | 623B|| 4/23* ||3+1+8 || KD|| <span style="color: red;">-4</span>|| *23F Startup if first hit whiffs. | ||
|- | |- | ||
| 623B>AB|| N/A ||26 || KD|| /|| | | 623B>AB|| N/A ||26 || KD|| /||No Counterhit-State. | ||
|- | |- | ||
| 623D||7/31*|| 3+1+11|| KD|| -9/-7*|| *31F | | 623D||7/31*|| 3+1+11|| KD|| <span style="color: red;">-9</span>/<span style="color: red;">-7</span>*|| *31F if first Hit whiffs. Upper body invul F1-9. *= stand/crouch guard. | ||
|- | |- | ||
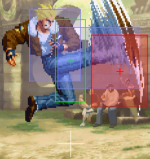
| 214B || 21 ||2+4 || KD|| -3||Overhead. F7-11 small Hurtbox. Airborne from F12. | | 214B || 21 ||2+4 || KD|| <span style="color: red;">-3</span>||Overhead. F7-11 small Hurtbox. Airborne from F12. | ||
|- | |- | ||
| 214D ||11*/19|| 5+3+7|| -2/+0*|| -3||Overhead. *=11F Startup, but hitbox is behind Terry. F6-8 small Hurtbox. Airborne from F9.*=stand/crouch guard. | | 214D ||11*/19|| 5+3+7|| <span style="color: red;">-2</span>/<span style="color: blue;">+0</span>*|| <span style="color: red;">-3</span>||Overhead. *=11F Startup, but hitbox is behind Terry. F6-8 small Hurtbox. Airborne from F9.*=stand/crouch guard. | ||
|- | |- | ||
| 41236B || 7 || 6|| -10|| -11||Rekka Starter. Same Hitbox as D-Version. | | 41236B || 7 || 6|| <span style="color: red;">-10</span>|| <span style="color: red;">-11</span>||Rekka Starter. Same Hitbox as D-Version. | ||
|- | |- | ||
| 41236D || 21 || 6|| +2|| +1||Rekka Starter. Same Hitbox as B-Version. Allows for juggles on Air-Hit. | | 41236D || 21 || 6|| <span style="color: blue;">+2</span>|| <span style="color: blue;">+1</span>||Rekka Starter. Same Hitbox as B-Version. Allows for juggles on Air-Hit. | ||
|- | |- | ||
| 41236K>66K ||9/14 || 6|| +1|| +0||9 = B-Version, 14 = D-Version. | | 41236K>66K ||9/14 || 6|| <span style="color: blue;">+1</span>|| <span style="color: blue;">+0</span>||SC. 9 = B-Version, 14 = D-Version. | ||
|- | |- | ||
| 41236K>66K>66K ||6 || 12|| KD|| -8|| | | 41236K>66K>66K ||6 || 12|| KD|| <span style="color: red;">-8</span>|| Small Hurtbox. Wall bounce on counter hit. | ||
|- | |- | ||
| 21416A || 16 || 3+12|| KD|| -13|| F1-3 invul. F11+12 upper feet invul. F13-52 small Hurtbox. F4-52 Counterhit-State. | | 21416A || 16 || 3+12|| KD|| <span style="color: red;">-13</span>|| F1-3 invul. F11+12 upper feet invul. F13-52 small Hurtbox. F4-52 Counterhit-State. | ||
|- | |- | ||
| 21416C || 21 ||1+2+12 || KD|| -15|| F1-3 invul. F16+17 upper feet invul. F4-59 Counterhit-State. | | 21416C || 21 ||1+2+12 || KD|| <span style="color: red;">-15</span>|| F1-3 invul. F16+17 upper feet invul. F4-59 Counterhit-State. | ||
|- | |- | ||
| 236236B || 3 ||11 || KD|| -11|| F1+2 invul. Invul on feet & counterhit-state for whole active time. | | 236236B || 3 ||11 || KD|| <span style="color: red;">-11</span>|| F1+2 invul. Invul on feet & counterhit-state for whole active time. | ||
|- | |- | ||
| 236236D || 6 ||15 || KD|| -19|| F1-5 invul. Invul on feet & counterhit-state for whole active time. | | 236236D || 6 ||15 || KD|| <span style="color: red;">-19</span>|| F1-5 invul. Invul on feet & counterhit-state for whole active time. | ||
|- | |- | ||
| 2141236E || 7/46* ||45|| KD|| -24||*46F Startup just for the laser. F1-73 invul. F74-97 small Hurtbox. Negates projectiles F7-67. | | 2141236E || 7/46* ||45|| KD|| <span style="color: red;">-24</span>||*46F Startup just for the laser. F1-73 invul. F74-97 small Hurtbox. Negates projectiles F7-67. | ||
|- | |- | ||
|} | |} | ||
| Zeile 154: | Zeile 181: | ||
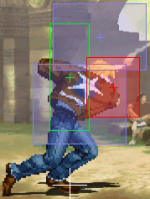
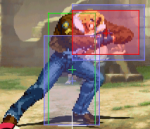
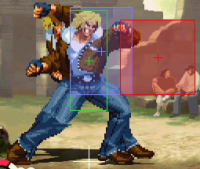
| 5C(f)|| [[bild:kofxi_terry_5C(f).png]] || 10 || 4 || -2|| -3|| | | 5C(f)|| [[bild:kofxi_terry_5C(f).png]] || 10 || 4 || -2|| -3|| | ||
|- | |- | ||
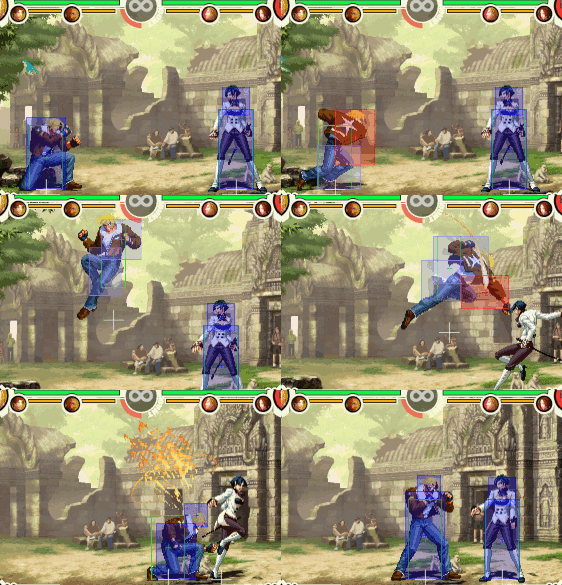
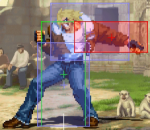
| 5D(c)|| [[bild:kofxi_terry_5D(c).png]] || 7 || 9 || +1|| +0||2 Hits. Both hits have special cancel | | 5D(c)|| [[bild:kofxi_terry_5D(c).png]] || 7 || 9 || +1|| +0||2 Hits. Both hits have special cancel. | ||
|- | |- | ||
| 5D(f)|| [[bild:kofxi_terry_5D(f).png]] || 15 || 3 || -2|| -3|| | | 5D(f)|| [[bild:kofxi_terry_5D(f).png]] || 15 || 3 || -2|| -3|| | ||
| Zeile 160: | Zeile 187: | ||
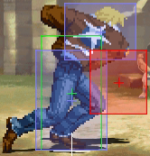
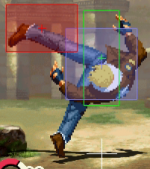
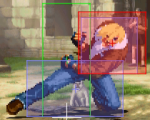
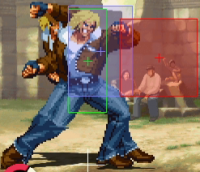
| 5E|| [[bild:kofxi_terry_5E.png]] || 14 || 4 || KD|| -8||Invul on feet from F3-23. F24-27 invul on the toes (not touching the ground yet, small gap below hurtbox). | | 5E|| [[bild:kofxi_terry_5E.png]] || 14 || 4 || KD|| -8||Invul on feet from F3-23. F24-27 invul on the toes (not touching the ground yet, small gap below hurtbox). | ||
|- | |- | ||
| GC|| [[bild:kofxi_terry_GC.png]] || 7 || 5 || KD|| - | | GC|| [[bild:kofxi_terry_GC.png]] || 7 || 5 || KD|| <span style="color: red;">-12</span>|| | ||
|- | |- | ||
| 5C>5E|| [[bild:kofxi_terry_5C5E.png]] || 5 || 4 || +7|| +6||Chain Combo. No cancel, but massive frame advantage & Quick Shift possible. | | 5C>5E|| [[bild:kofxi_terry_5C5E.png]] || 5 || 4 || +7|| +6||Chain Combo. No cancel, but massive frame advantage & Quick Shift possible. | ||
| Zeile 230: | Zeile 257: | ||
! Move !! Hitbox!! Startup!! Active!! Hit!! Guard!! Note | ! Move !! Hitbox!! Startup!! Active!! Hit!! Guard!! Note | ||
|- | |- | ||
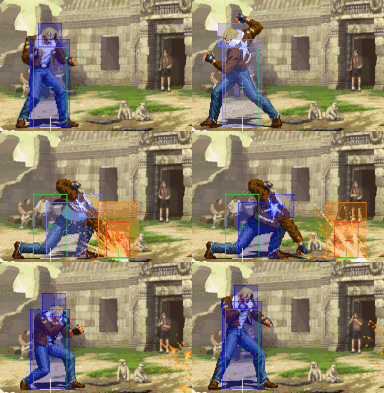
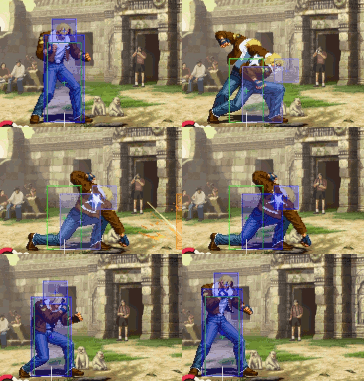
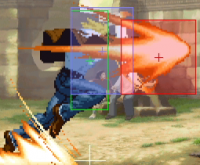
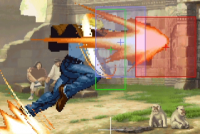
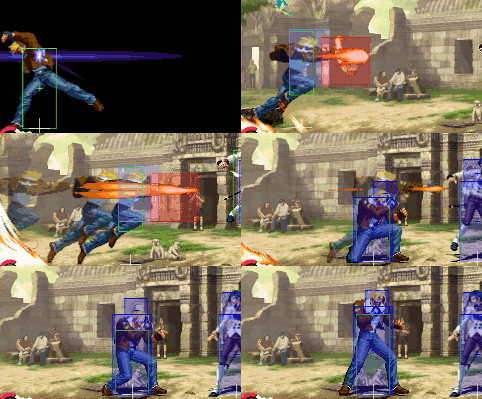
| 236A|| [[bild:kofxi_terry_236A_2.png|200px]][[bild:kofxi_terry_236A_gif50.gif]] || 20 || 1+X* || +3*|| +2*|| F16-40 small Hurtbox. *First Active Frame has its own hitbox near Terry (144*80px). F1-28 Counterhit-State. *=Point Blank. | | 236A|| [[bild:kofxi_terry_236A_2.png|200px]][[bild:kofxi_terry_236A_gif50.gif]] || 20 || 1+X* || +3*|| +2*||48F total duration. F16-40 small Hurtbox. *First Active Frame has its own hitbox near Terry (144*80px). F1-28 Counterhit-State. *=Point Blank. | ||
|- | |- | ||
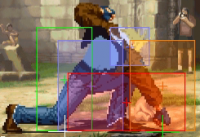
| 236C|| [[bild:kofxi_terry_236C_2.png|200px]][[bild:kofxi_terry_236C_gif50.gif]] || 12 || 1+X*|| -3*|| -4*||F11-38 small Hurtbox. *First Active Frame has its own hitbox near Terry (144*72px). F1-22 Counterhit-State. *=Point Blank. | | 236C|| [[bild:kofxi_terry_236C_2.png|200px]][[bild:kofxi_terry_236C_gif50.gif]] || 12 || 1+X*|| -3*|| -4*||46F total duration. F11-38 small Hurtbox. *First Active Frame has its own hitbox near Terry (144*72px). F1-22 Counterhit-State. *=Point Blank. | ||
|- | |- | ||
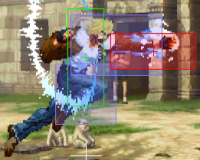
| 214A|| [[bild:kofxi_terry_214A.png|200px]]|[[bild:kofxi_terry_214A_gif50.gif]] || 15 || 11|| KD|| -12*|| F15-25 invul on legs (the whole active time). At the end while standing up 4F Counterhit-State. *=Point Blank. | | 214A|| [[bild:kofxi_terry_214A.png|200px]]|[[bild:kofxi_terry_214A_gif50.gif]] || 15 || 11|| KD|| -12*|| F15-25 invul on legs (the whole active time). At the end while standing up 4F Counterhit-State. *=Point Blank. | ||
| Zeile 240: | Zeile 267: | ||
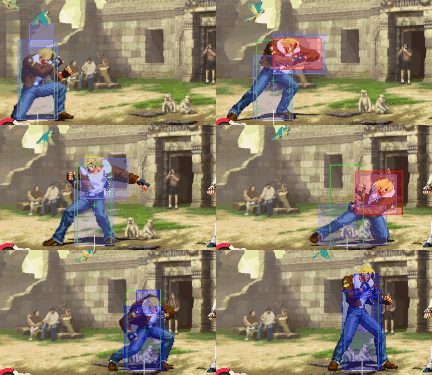
| 623B|| [[bild:kofxi_terry_623B_1.png|150px]][[bild:kofxi_terry_623B_2.png|150px]][[bild:kofxi_terry_623B_3.png|150px]][[bild:kofxi_terry_623B_gif50.gif]] || 4/23* ||3+1+8 || KD|| -4|| *23F Startup, if first hit whiffs. | | 623B|| [[bild:kofxi_terry_623B_1.png|150px]][[bild:kofxi_terry_623B_2.png|150px]][[bild:kofxi_terry_623B_3.png|150px]][[bild:kofxi_terry_623B_gif50.gif]] || 4/23* ||3+1+8 || KD|| -4|| *23F Startup, if first hit whiffs. | ||
|- | |- | ||
| 623B>AB|| [[bild:kofxi_terry_623B,AB_gif50.gif]] || N/A ||26 || KD|| /|| | | 623B>AB|| [[bild:kofxi_terry_623B,AB_gif50.gif]] || N/A ||26 || KD|| /||No Counterhit-State. | ||
|- | |- | ||
| 623D|| [[bild:kofxi_terry_623D_1.png|150px]][[bild:kofxi_terry_623D_2.png|150px]][[bild:kofxi_terry_623D_3.png|150px]][[bild:kofxi_terry_623D_gif50.gif]] || 7/31* || 3+1+11|| KD|| -9/-7*|| *31F, if first Hit whiffs. Upper body invul F1-9. *= stand/crouch guard. | | 623D|| [[bild:kofxi_terry_623D_1.png|150px]][[bild:kofxi_terry_623D_2.png|150px]][[bild:kofxi_terry_623D_3.png|150px]][[bild:kofxi_terry_623D_gif50.gif]] || 7/31* || 3+1+11|| KD|| -9/-7*|| *31F, if first Hit whiffs. Upper body invul F1-9. *= stand/crouch guard. | ||
| Zeile 252: | Zeile 279: | ||
| 41236D || [[bild:kofxi_terry_41236B.png|150px]] || 21 || 6|| +2|| +1||Rekka Starter. Same hitbox as B-version, but slower & allows for juggles on Air-Hit. | | 41236D || [[bild:kofxi_terry_41236B.png|150px]] || 21 || 6|| +2|| +1||Rekka Starter. Same hitbox as B-version, but slower & allows for juggles on Air-Hit. | ||
|- | |- | ||
| 41236K>66K || [[bild:kofxi_terry_41236B66B.png|150px]] || 9/14 || 6|| +1|| +0||9 = B-Version, 14 = D-Version. | | 41236K>66K || [[bild:kofxi_terry_41236B66B.png|150px]] || 9/14 || 6|| +1|| +0||SC. 9 = B-Version, 14 = D-Version. | ||
|- | |- | ||
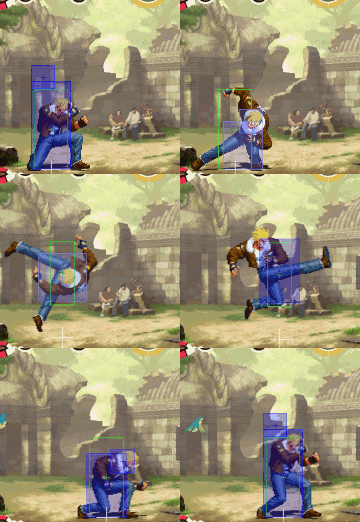
| 41236K>66K>66K || [[bild:kofxi_terry_41236B66B66B.png|150px]][[bild:kofxi_terry_41236B66B66B_gif50.gif]] || 6 || 12|| KD|| -8|| | | 41236K>66K>66K || [[bild:kofxi_terry_41236B66B66B.png|150px]][[bild:kofxi_terry_41236B66B66B_gif50.gif]] || 6 || 12|| KD|| -8|| Small Hurtbox. Wall bounce on counter hit. | ||
|- | |- | ||
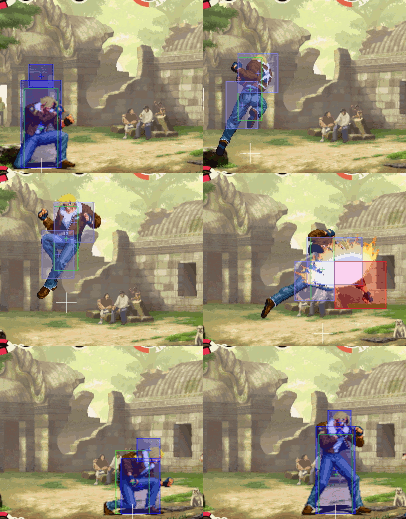
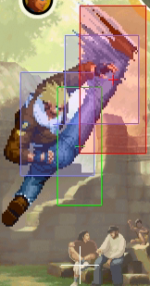
| 21416A || [[bild:kofxi_terry_21416A_1.png|200px]][[bild:kofxi_terry_21416A_2.png|200px]][[bild:kofxi_terry_21416A_gif.gif]] || 16 || 3+12|| KD|| -13|| F1-3 invul. F11+12 only vulnerable on the legs. F13-52 small Hurtbox. F4-52 Counterhit-State. | | 21416A || [[bild:kofxi_terry_21416A_1.png|200px]][[bild:kofxi_terry_21416A_2.png|200px]][[bild:kofxi_terry_21416A_gif.gif]] || 16 || 3+12|| KD|| -13|| F1-3 invul. F11+12 only vulnerable on the legs. F13-52 small Hurtbox. F4-52 Counterhit-State. | ||
| Zeile 266: | Zeile 293: | ||
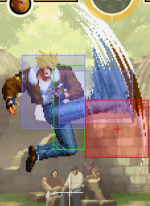
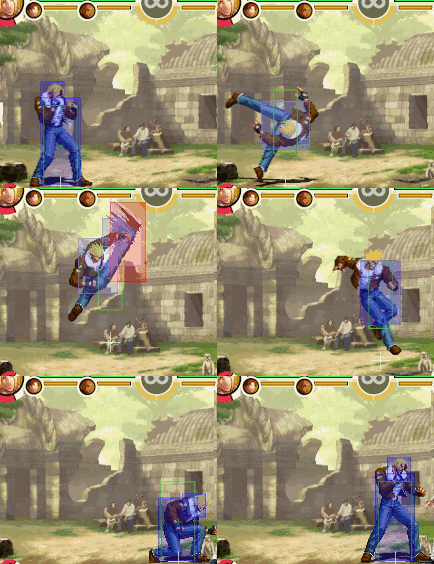
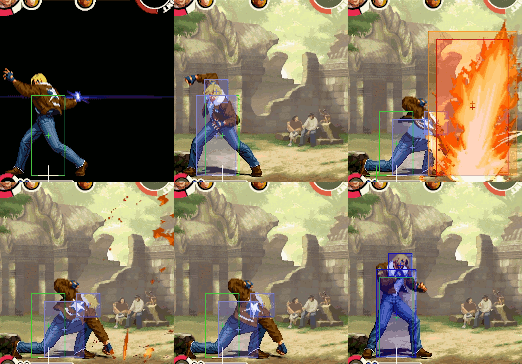
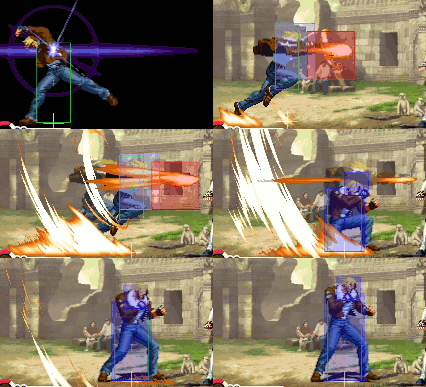
| 2141236E || [[bild:kofxi_terry_2141236E_1.png|200px]][[bild:kofxi_terry_2141236E_2-7.png|200px]][[bild:kofxi_terry_2141236E_8.png|200px]][[bild:kofxi_terry_2141236E_9.png]][[bild:kofxi_terry_2141236E_gif.gif]] || 7/46* ||3+3+3+3+3+2+2+26 || KD|| -24||*46F Startup just for the laser. F1-73 invul. F74-97 small Hurtbox. Negates projectiles F7-67. | | 2141236E || [[bild:kofxi_terry_2141236E_1.png|200px]][[bild:kofxi_terry_2141236E_2-7.png|200px]][[bild:kofxi_terry_2141236E_8.png|200px]][[bild:kofxi_terry_2141236E_9.png]][[bild:kofxi_terry_2141236E_gif.gif]] || 7/46* ||3+3+3+3+3+2+2+26 || KD|| -24||*46F Startup just for the laser. F1-73 invul. F74-97 small Hurtbox. Negates projectiles F7-67. | ||
|} | |} | ||
== Combos == | |||
=== Basic Combos === | |||
These combos are used frequently and are very useful. | |||
*(j.C/D,)2B>2A/5A(c)>41236B>66B, then... | |||
**>66B: useful combo from lights into hard knockdown. 5A(c) is easier to cancel into 41236B, but 2A has more range. | |||
**QS: ''[1 Skill Stock]'' a useful quick shift setup from light hits. | |||
**SC 21416A or 2141236E: ''[1-2 Super, 1 Skill Stock]'' super cancel for good damage, can be saving-shifted however. | |||
**''nothing:'' end the combo right there if your opponent blocked, you will be at +0. | |||
*j.C/D,5C>3C, then... | |||
**41236B>66B> ender from above: starter with better damage & stun. | |||
**21416A: ''[1 Super Stock]'' high-damage combo into super. | |||
*5C>5E link 236236B: ''[1 Super Stock]'' easy combo into super. If the opponent guards, stopping after 5E will leave Terry at an advantage. | |||
===623B>AB Combos=== | |||
These combos need to be started from fairly close, so they are harder to land than the above combos. | |||
*J.C/D,5A(c)/5C>623B>AB(break), then... | |||
**41236D>44D(whiff)>44D: hard knockdown. 44 instead of 66 is needed since you cross your opponent. | |||
**21416A: ''[1 Super Stock]'' simple ender for good damage. | |||
**41236D, 23636A: ''[1 Super Stock]'' harder, but slightly more damage and builds some extra meter. The weird motion is needed since you cross your opponent. | |||
**2141236E: ''[2 Super Stocks]'' easy LDM setup that cannot be saving-shifted. | |||
**41236D, 23[6](walk forward),236E: ''[2 Super Stocks]'' harder, but slightly more damage and builds some extra meter. The weird motion is needed since you cross your opponent. | |||
*Corner j.C/D,5A(c)/5C>623B>AB(break), mini-delay 41236D link 41236D, then... | |||
**623D: combo into hard knockdown | |||
**236236K: ''[1 Super Stock]'' hardly worth the damage. | |||
**2141236E: ''[2 Super Stocks]'' good damage. | |||
**QS: 41236D has a lot of juggle time, so QS combos after are possible. | |||
===Situational Combos=== | |||
*2B>5A(c)>2141236E: ''[2 Super Stocks]'' only works up close, needs a fast hit confirm and can be saving shifted. Input the 5A(c) as 214A to make the combo easier. | |||
*j.D crossup,5A/C>3C>2141236E: ''[2 Super Stocks]'' variation to the above combo with an easier hit confirm, only after a crossup. | |||
*Saving Shift to Terry (counter hit) > 236236B: ''[1 Super Stock]'' costly but adds some extra damage. | |||
=== Team Combos=== | |||
'''Universal''' | |||
*QS to Terry > j.B/j.D,\/,5C>3C>41236B>66B>66B: simple combo into hard knockdown. j.B is used if there is not enough space for j.D. | |||
'''Terry & K''' | |||
*Terry 623K anti-air QS K', land, 236236P DC LDM: [https://youtu.be/zDPOwIBr1yk?t=1046 Source] | |||
===5E CH > Rekka Combos=== | |||
*Collection of 5E CH > rekka > shift combos from NKT, see [https://www.youtube.com/watch?v=DiY9xsw4Lh0 here] | |||
*5E(counter hit)>rekka, link 623K, see [https://youtu.be/2vbxqQ9R6O8?t=8219 here] | |||
== Matchups == | |||
===Vs Ralf=== | |||
'''Unblock (623P) punishes:''' | |||
''(Source: [https://twitter.com/dagun7676/status/1397871520320409602 Dagun])'' | |||
*Instant j.A/B/C | |||
*Far B > 236236K | |||
*2C > 214A/236C/623B(1st hit whiffs)/236236K/21416P | |||
===Vs Maxima=== | |||
:Punish Vapor Cannon with 236236B | |||
== Videos == | |||
[https://youtu.be/V1GtSJ_kyjE?t=1212 Kyuntakuya vs a very strong Terry player, several matches] | |||
{{KOFXI_Navi}} | {{KOFXI_Navi}} | ||
Aktuelle Version vom 19. April 2025, 12:10 Uhr
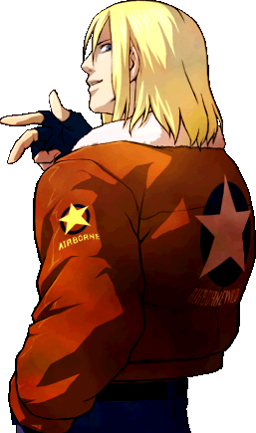
| Terry Bogard テリー・ボガード | |
| |
| Tiers & Ranking | |
| Tier: | ~A |
| Ratio Cost: | 4 Points |
| Properties | |
| Damage Modifier: | 0.97 |
| Stun Modifier: | 1.0 |
| Crouch height (Tier): | C |
Quick Guide
- Terry is a strong, well-rounded character that can be played both offensively and defensively.
- His damage output and juggle potential is average, but he has higher health, good normals and various ways to cause hard knockdown, including from light hits, enabling strong okizeme loops.
- His defense is very good, with only his reversals having pronounced weaknesses.
- He is best played in second position since he needs super stock for 236236B, or as a point. He can occasionally be seen as a Leader since his LDM deals good damage, though it is not trivial to land.
Neutral
- On range, use Terry's very fast and annoying projectiles to make your opponent jump or roll, then punish on reaction with the lightning-fast, 3F startup 236236B.
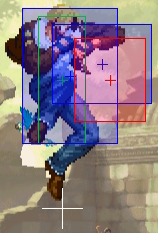
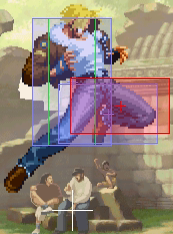
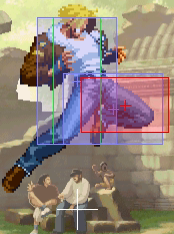
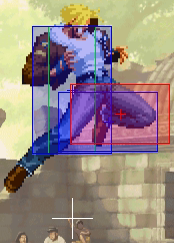
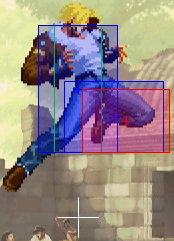
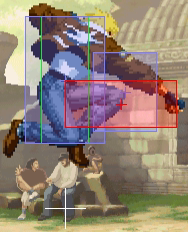
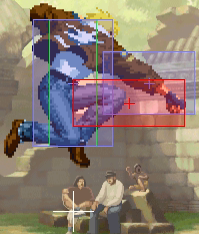
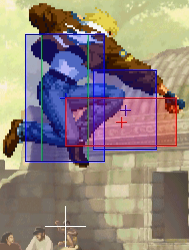
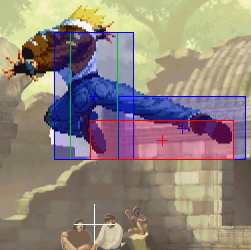
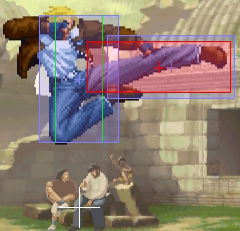
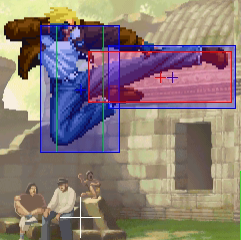
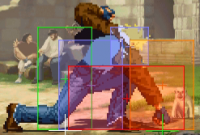
- Terry best approaches with smalljump j.E (from far away), smalljump j.C (from closer) or normal j.D. j.E has the longest range, j.C the best hitbox and j.D can cross up.
Offense
- Once in close range, use blockstrings such as 2B>2D, 2B>2C, 2B>2A/5A, then cancel into 41236B>66B or 236A or simply nothing to keep them guessing.
- 5A(c) is great in pressure and combos. It is very fast, with only 4F startup, and cannot be crouched. It is the go-to normal after a smalljump C or D, since 5C is too slow at 7F startup.
- Mix in smalljump C to reset your pressure.
- Smalljump B and D can cross up against crouching opponents, which can be used after a dash or a small walk forward during blockstrings or after a knockdown.
- 214B can be used once in a while as an overhead option. If blocked it is mostly safe at -3, but depending on your spacing, you might lose your turn.
- If you end your combo with 41236K>66K>66K midscreen, you get a hard knockdown into a j.D crossup / fake crossup 50/50 that can potentially be repeated.
- Terry's throw makes opponents wake up facing the other way. This can be used to cross them up in the corner with j.D and should be exploited as much as possible. To turn this into a 50/50, simply delay the attack and it will not crossup. Continue with 5D(c) to make hit confirming a little easier (5D has 2 hits). You can loop this if you combo into the 41236K-series to cause another hard knockdown.
Defense
- In neutral, 236236B is the mainstay of Terry's defense. While dealing low damage, it is so fast and reliable that it can even beat half-screen smalljumps easily on reaction.
- Also use 236236B to punish otherwise hard-to-punish moves such as Kula 214B.
- If you have the super stock, be ready to combo into another 236236B should the first one trade, which happens a lot.
- To break out of pressure, use 5A (against smalljumps) or 5B(f).
- 623D can be used against obvious jump-ins due to its upper feet invulnerability, but don't expect it to be great as a reversal.
- Terry's 2141236E LDM generally works as a reversal and an anti-air, but occasionally your opponent will fall out of the attack, only getting damaged slightly.
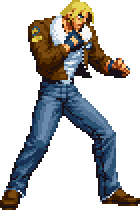
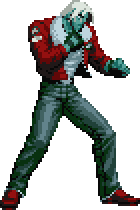
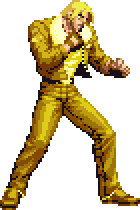
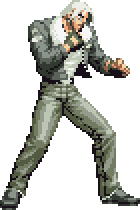
Colors
|
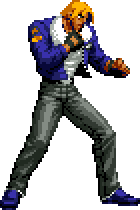
|
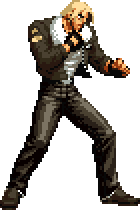
|
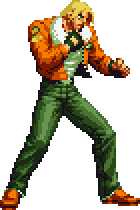
|
| A | B | C | D |
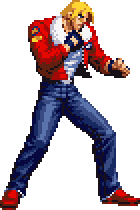
|
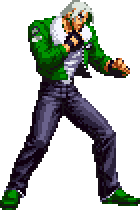
|
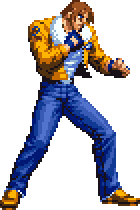
|
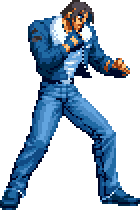
|
| R1 + |
R1 + |
R1 + |
R1 + |
| E+A | E+B | E+C | E+D |
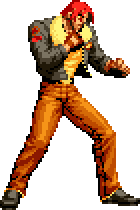
|
|
|
|
| L1 + |
L1 + |
L1 + |
L1 + |
| Start+A | Start+B | Start+C | Start+D |
Frame Data
Combos
Basic Combos
These combos are used frequently and are very useful.
- (j.C/D,)2B>2A/5A(c)>41236B>66B, then...
- >66B: useful combo from lights into hard knockdown. 5A(c) is easier to cancel into 41236B, but 2A has more range.
- QS: [1 Skill Stock] a useful quick shift setup from light hits.
- SC 21416A or 2141236E: [1-2 Super, 1 Skill Stock] super cancel for good damage, can be saving-shifted however.
- nothing: end the combo right there if your opponent blocked, you will be at +0.
- j.C/D,5C>3C, then...
- 41236B>66B> ender from above: starter with better damage & stun.
- 21416A: [1 Super Stock] high-damage combo into super.
- 5C>5E link 236236B: [1 Super Stock] easy combo into super. If the opponent guards, stopping after 5E will leave Terry at an advantage.
623B>AB Combos
These combos need to be started from fairly close, so they are harder to land than the above combos.
- J.C/D,5A(c)/5C>623B>AB(break), then...
- 41236D>44D(whiff)>44D: hard knockdown. 44 instead of 66 is needed since you cross your opponent.
- 21416A: [1 Super Stock] simple ender for good damage.
- 41236D, 23636A: [1 Super Stock] harder, but slightly more damage and builds some extra meter. The weird motion is needed since you cross your opponent.
- 2141236E: [2 Super Stocks] easy LDM setup that cannot be saving-shifted.
- 41236D, 23[6](walk forward),236E: [2 Super Stocks] harder, but slightly more damage and builds some extra meter. The weird motion is needed since you cross your opponent.
- Corner j.C/D,5A(c)/5C>623B>AB(break), mini-delay 41236D link 41236D, then...
- 623D: combo into hard knockdown
- 236236K: [1 Super Stock] hardly worth the damage.
- 2141236E: [2 Super Stocks] good damage.
- QS: 41236D has a lot of juggle time, so QS combos after are possible.
Situational Combos
- 2B>5A(c)>2141236E: [2 Super Stocks] only works up close, needs a fast hit confirm and can be saving shifted. Input the 5A(c) as 214A to make the combo easier.
- j.D crossup,5A/C>3C>2141236E: [2 Super Stocks] variation to the above combo with an easier hit confirm, only after a crossup.
- Saving Shift to Terry (counter hit) > 236236B: [1 Super Stock] costly but adds some extra damage.
Team Combos
Universal
- QS to Terry > j.B/j.D,\/,5C>3C>41236B>66B>66B: simple combo into hard knockdown. j.B is used if there is not enough space for j.D.
Terry & K
- Terry 623K anti-air QS K', land, 236236P DC LDM: Source
5E CH > Rekka Combos
- Collection of 5E CH > rekka > shift combos from NKT, see here
- 5E(counter hit)>rekka, link 623K, see here
Matchups
Vs Ralf
Unblock (623P) punishes: (Source: Dagun)
- Instant j.A/B/C
- Far B > 236236K
- 2C > 214A/236C/623B(1st hit whiffs)/236236K/21416P
Vs Maxima
- Punish Vapor Cannon with 236236B
Videos
Kyuntakuya vs a very strong Terry player, several matches
- Sacred Treasures Team: Kyo | Iori | Shingo
- Hero Team: Ash | Oswald | Shen
- Fatal Fury Team: Terry | Kim | Duck King
- Agent Team: Vanessa | Mary | Ramon
- Art of Fighting Team: Ryo Sakazaki | Yuri Sakazaki | King
- Rival Team: Elisabeth | Duo Lon | Benimaru
- Team K': K' |Kula | Maxima
- Garou Team: Jenet | Gato | Griffon
- Ikari Warriors Team: Ralf | Clark | Whip
- Anti Kyokugenryu Team: Malin | Kasumi | Eiji
- Psycho Soldier Team: Athena Asamiya | Sie Kensou | Momoko
- Time Unlock: Adelheid | Gai | Hayate | Jazu | Silber
